
If you're familiar with Umbraco forms, then you probably love it as much as I do; the power and flexibility of the package are chief amongst the reasons that it’s been around for so long, and these days it’s even better after getting some love from Warren Buckley.
If you're not familiar with Umbraco Forms, then don’t be shy! You can test it out on any version of Umbraco v7 by downloading it via the Forms tab, or indeed visit the package page here for a list of features. On top of this, you may or may not know, Umbraco has made Forms fairly extensible too, and while I explored this I learned some valuable lessons, tips, and tricks along the way which I thought I would share!
Extending Umbraco Forms; Custom Control
Very recently I had an update to do for an existing website, which was a new job application form. Simple enough, but the snag was that elsewhere on the site the client already had functionality to allow users to upload large files, up to 20Mb; on this form, they wanted to restrict the file upload size to 5Mb.
To ensure this wouldn’t affect the other parts of the site, I decided I’d have to create a custom control within Umbraco forms. As with anything else, it’s easy when you know how. I didn’t know how, and now I do, so hopefully this will make it easy for you.
I’ll assume that you have an existing Umbraco project with Forms installed, and I’ll skip any of that setup stuff.
Please note that this isn’t the website I did the updates for; as I’m sure you’ll guess from my fancy HTML and CSS, this is purely for demo purposes.
The field type
public class CustomFileUpload : FileUpload
{
    private int _maxFileSize = 5242880;

    public CustomFileUpload()
    {
        Id = new Guid("d8d89001-57ce-4b52-9005-c0c84f6651cb");
        Name = "Custom file upload";
        Description = "Renders an upload field with a max size limit.";
        Icon = "icon-cloud-upload ";
        DataType = FieldDataType.String;
        FieldTypeViewName = "FieldType.CustomFileUpload.cshtml";
    }

    public override IEnumerable<string> ValidateField(Form form, Field field, IEnumerable<object> postedValues, HttpContextBase context)
    {
        IList<HttpPostedFileBase> files = context.Request.Files.GetMultiple(field.Id.ToString());

        foreach (HttpPostedFileBase file in files)
        {
            // ContentLength is in bytes
            if (file.ContentLength > _maxFileSize)
            {
                // Reset the uploaded files
                return new[]
                {
                            "File cannot exceed 5Mb"
                };
            }
        }

        return Enumerable.Empty<string>();
    }
}
In the constructor, we set the id to be a GUID so this doesn’t clash with existing controls. The name, description, and icon, are what will appear in forms when you add a new form element. The FieldTypeViewName field is where you define the view for your control on the front end, which I’ll come to.
This class inherits from ‘FileUpload’ so that the saving of the uploaded file is handled for us, otherwise you could inherit from ‘FieldType’ class and write that code yourself; but why reinvent the wheel when a wheel is what you need.
(For the purposes of keeping this demo simple, I’ve hard-coded the maxFileSize, but you may wish to store this either in an Umbraco property or web.config in case it ever changes.)
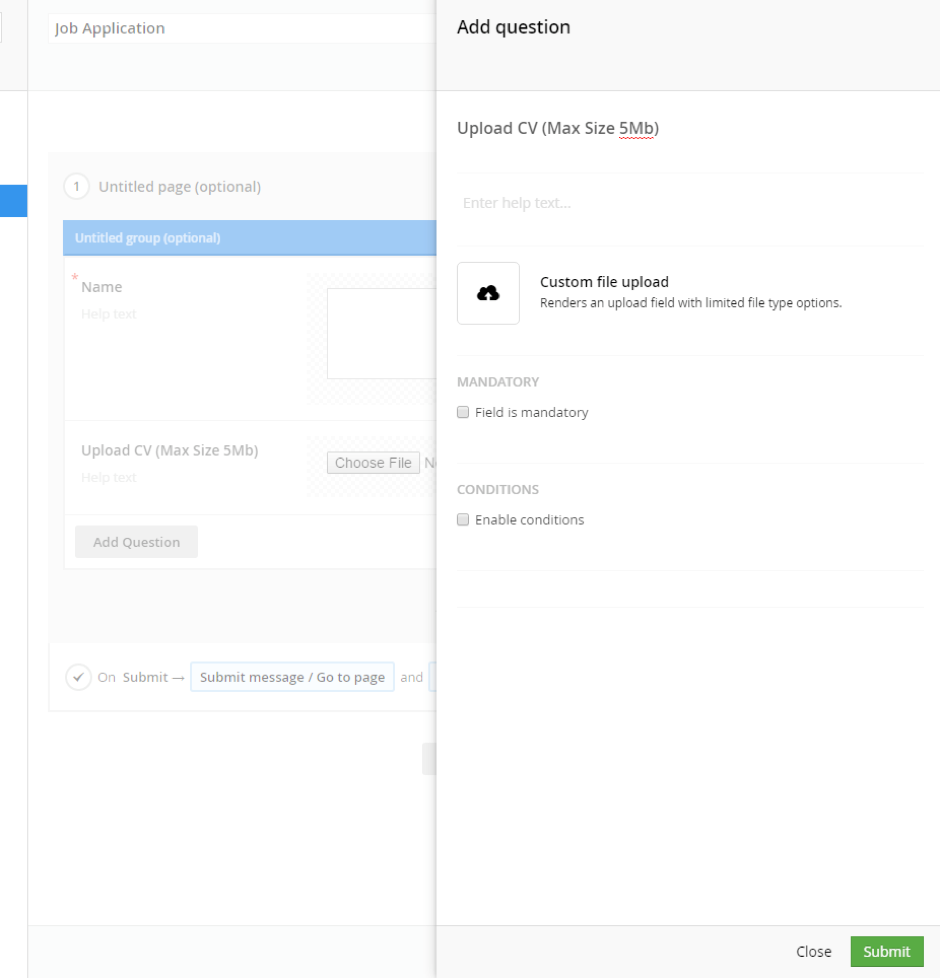
From the above diagram, you can see how the name, description, and icon fields relate to the control when you’re adding it to your form.
The View (Front end)
Within the ~/Views/Partials/Forms/FieldTypes folder, you can copy an existing file and rename it to be the same as your FieldTypeViewName field above, in this example ‘FieldType.CustomFileUpload.cshtml’
@using Umbraco.Web
@model Umbraco.Forms.Mvc.Models.FieldViewModel
<input type="file" name="@Model.Name" id="@Model.Id" multiple
@if (Model.Mandatory) { <text> data-val="true" data-val-required="@Model.RequiredErrorMessage" </text>  } />
@if (!string.IsNullOrEmpty(Model.Value))
{
  <input type="hidden" name="@{@Model.Name}_file" value="@Model.Value" />
}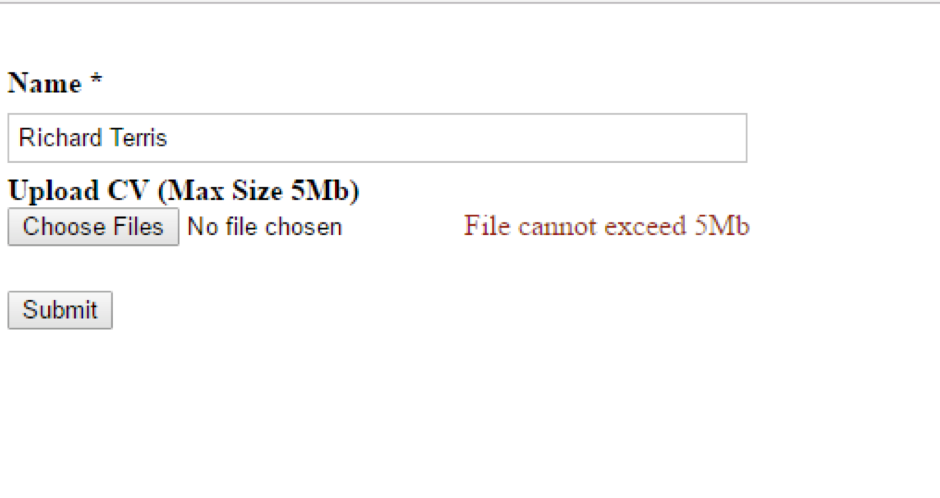
The above diagram shows the form on the front end after it has been submitted with a file which exceeds the maximum upload size.
The View (Back office)
Within the ~/App_Plugins/UmbracoForms/Backoffice/Common/FieldTypes folder, you can copy an existing file and rename it to the same as your custom class name, all in lower case. In this example my file is called ‘customfileupload.html’.
<input tabindex="-1" type="file"/>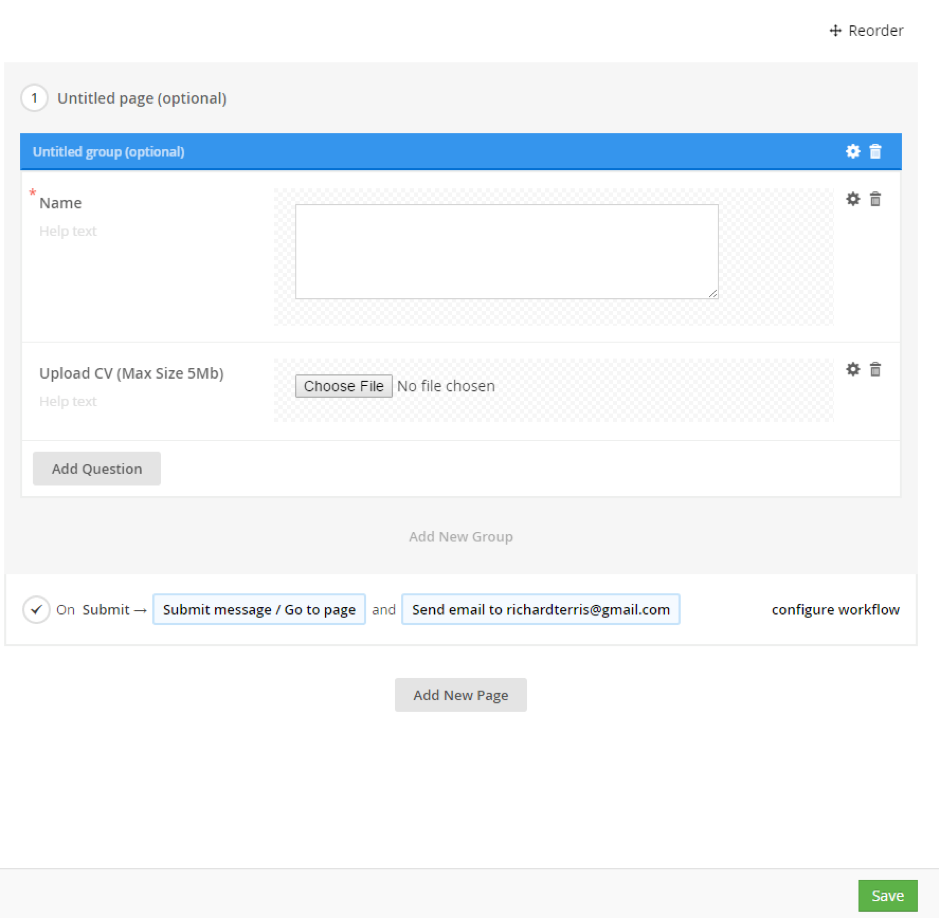
The above diagram shows the control as it appears on the form in the back office. The actual control is the back office view you created, rendered on the form. In this partial view, you could have additional messages, or any other custom text and markup.
One thing to note with regards to this max file size, since we have a 20Mb limit in web.config for the other parts of the site, IIS checks files first, so if on this application form the user tried to upload a file more than 20Mb, this would be caught by IIS first. If the file passes this check, it’s at this point the custom control takes over.
Extending Umbraco Forms; Custom Workflow
Another recent scenario I had was to create users in a CRM via a sign up form on a website, using the CRM’s API. This situation led me to create a custom workflow which would call the API, and if successful, store the returned ID for the newly created user in a cookie. The cookie name, owner email (which is required in the API request), and the cookie expiration time are all set by the site admin within Umbraco.
The workflow code
public class CustomWorkflow : WorkflowType
{
    [Umbraco.Forms.Core.Attributes.Setting("Cookie Name")]
    public string CookieName { get; set; }

    [Umbraco.Forms.Core.Attributes.Setting("Owner Email", description = "Owner email address is required by API in order to create contacts.")]
    public string OwnerEmail { get; set; }

    [Umbraco.Forms.Core.Attributes.Setting("Cookie Expiry - In days")]
    public string CookieExpiryInDays { get; set; }

    public CustomWorkflow()
    {
        Id = new Guid("7b8e492e-0bf1-471f-a696-d8d8927e7d54");
        Name = "Set cookie workflow";
        Description = "Sets a cookie with API response Id, at workflow stage";
    }

    public override WorkflowExecutionStatus Execute(Record record, RecordEventArgs e)
    {
        if (!string.IsNullOrEmpty(OwnerEmail))
        {
            var contactId = Guid.NewGuid().ToString();

            if (!string.IsNullOrEmpty(contactId))
            {
                //If successful, take response ID and set in cookie
                try
                {
                    var workflowCookie = new HttpCookie(CookieName);
                    workflowCookie.Value = contactId;
                    workflowCookie.Expires = DateTime.Now.AddDays(double.Parse(CookieExpiryInDays));
                    HttpContext.Current.Response.Cookies.Add(workflowCookie);

                    return WorkflowExecutionStatus.Completed;
                }
                catch (Exception ex)
                {
                    LogHelper.Error<CustomWorkflow>("SetCookieWorkFlow - Failed", ex);
                    return WorkflowExecutionStatus.Failed;
                }
            }
        }
        return WorkflowExecutionStatus.Failed;
    }

    public override List<Exception> ValidateSettings()
    {
        List<Exception> exceptionList = new List<Exception>();
        if (string.IsNullOrEmpty(CookieName))
            exceptionList.Add(new Exception("’CookieName’ setting has not been set"));

        if (string.IsNullOrEmpty(CookieExpiryInDays))
            exceptionList.Add(new Exception("’CookieExpiryInDays’ setting has not been set’"));

        double expiryDays;
        if (!double.TryParse(CookieExpiryInDays, out expiryDays))
            exceptionList.Add(new Exception("’CookieExpiryInDays’ is not a valid day count’"));

        if (string.IsNullOrEmpty(OwnerEmail))
            exceptionList.Add(new Exception("'Owner Email has not been set'"));

        return exceptionList;
    }
}
I haven’t provided the code which calls the API because it wouldn’t be useful. The point of this is that you can do any number of things within the workflow that might be specific to your needs. In this example, instead of making the API call, I’m creating a new GUID and adding that to the cookie – so that you can follow this article end to end.
The important thing is to override the Execute and ValidateSettings methods, which Visual Studio will prompt you to do when you inherit from WorkFlowType because it’s an abstract class.
In my execute method, I am retrieving the values from the posted form, calling the 3rd party API, and if that is successful, storing the returned ID in the cookie.
The ValidateSettings method allows us to check that the necessary values are being provided within Umbraco. These are values which are required, in this case, so that the API request can be made. This is validation for the back office.
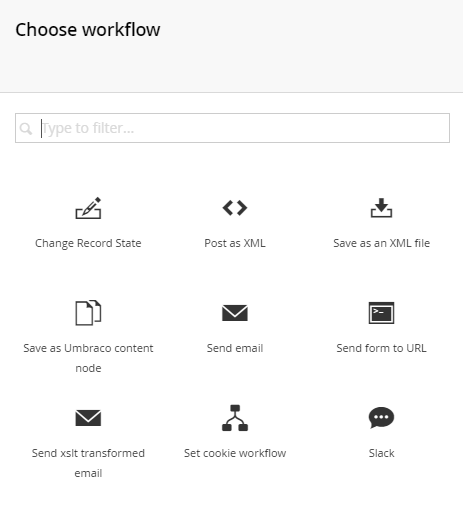
When you have compiled this, and navigate to the form in the back office, you will see the workflow in the list of workflows which you can choose from:
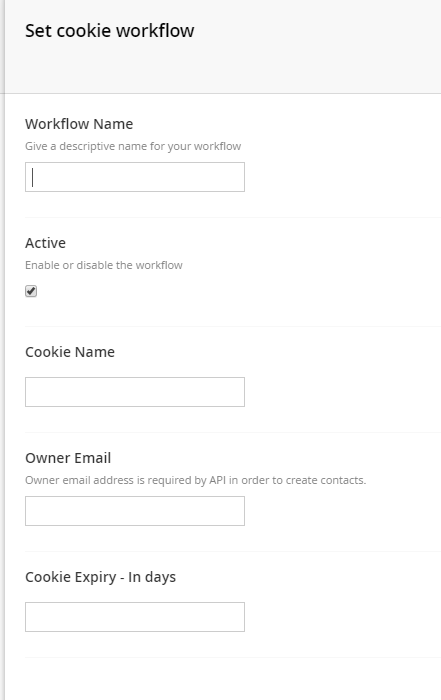
And you will be able to supply the necessary fields:
If you try to save the workflow without supplying the required values, you will receive validation errors, for example:

Using the form in the first example, if you add this workflow and submit the form, you will be able to see a cookie with the name you gave it and the GUID value.
In Closing
There you have it, two ways in which you can easily extend Umbraco Forms. Forms is a really great package, particularly if your end user is likely to want to edit forms or create new ones regularly, and now that you are able to extend it there are myriad ways in which you can use this such as custom fields or custom workflows which work with 3rd party APIs or CRMs. Whatever you choose to do, having this trick in your weaponry can prove to be a very useful one.
Feel free to contact me if there are any questions about this, and I hope some of you find it useful.