
I have been in the Umbraco community for over a decade and wear a large number of hats on the projects I work on from project manager, UX designer, backoffice UX engineer, UI designer, frontend developer, Umbraco integration, and content designer and writer to name a few. Though I do development, if anyone asks me, I generally say I'm not a developer. Is that imposter syndrome speaking? Probably, but I feel more comfortable in the world of design.
Historically I haven't set up many Umbraco sites — lots of sandboxes for myself, yes, and I even setup this site that you're on now, but not for clients that will end up in production. I step into projects that already exist — that have been setup and are being managed by and Umbraco dev or agency. I don't have to worry about the implementation or how the frontend compiles. It just does. Like magic.
But the last couple of years, I have been doing increasingly more frontend and on projects where I am owning the whole frontend process and build. Like, here's a brand new, fresh Cloud site, now go. Wha?! I have to figure out the magic myself. I took inspiration from other sites I had worked on, but I never felt like I was nailing it. Then in September of 2022, my pal Jason Elkin wrote up an article on using Vite for frontend builds for Umbraco sites (v9+). What is this Vite you write about? Never heard of it. But self, I said, if this is the next gen of frontend builds, I'm in.
But self, I said, if this is the next gen of frontend builds, I'm in.
I will say, my first attempt with getting it up and running on a v10 Cloud site (on Windows) was a head bashing nightmare that took me waaaay too long, but with the help of those who asked questions in the comments and a lot of trial and error, I finally got it going and absolutely love it. Game. Changer. At least for me.
But then v13 came out and the Startup.cs file is no longer in play — a file that was used in the original configuration article how-to for v9+. Enter deer-in-the-headlights-what-do-I-do-now panic. I have 6 sites in my upcoming project queue that are being scheduled for v13 and I'm now back to, how do I set up the frontend project?
Instead of trying to pin Jason down to try to get him to write a follow-up article (also because I need to know now!), I cornered him at the pre-Spark Hackathon (that thankfully we were both attending) for an in-person tutorial on getting it up and running on one of my client sites. My level of stress decreased a thousand-fold when he agreed to walk me through it.
So now, my friends, with Jason's permission, I will attempt to impart my new-found knowledge to you, in hopes that I can lower someone else's stress level, as well for future me as I'm likely to forget all this between site setups. So we are starting at the beginning because I am VERY literal when it comes to these things. I like ALL the steps, not just some, so this will be long. If you don't need all the steps, feel free to skip ahead/around to what you need.
First Things First
I am a Mac user and have finally figured out how to run v10+ sites on my Mac instead of VMware that I have historically used (and still do for legacy sites) to run Windows. I feel like there might be a few idiosyncracies between Mac and Windows, but hopefully not too many. In any case, this journey will be told from a Mac perspective with Mac terminology.
v13 uses .NET 8, so if you haven't already installed that, you're gonna need to. Something I learned chatting with Bjarke from HQ last year was that you can have multiple versions of .NET installed on your Mac and you don't have to worry about switching between them depending on your project version. It just knows. Magic.
So do as I say, not as I do. You'll thank me later, I promise.
You're also going to need Node.js version 18+ installed, though I recommend v20.12.0, which is the current LTS. Your package manager will warn you if you need to upgrade. I have historically gotten in node pickles with the vast range of versioned projects I work on, so I highly recommend using NVM (Node Version Manager) to manage different versions of node AND make a note of which version of node you use with each project. Have I done that yet on my Mac? No, no I haven't. I've only set it up on the Windows side. 🤦♀️ So do as I say, not as I do. You'll thank me later, I promise. Here's a how-to guide for Macs and here's one for Windows.
Project Structure
Because I'm a visual person, this is what we're aiming for as our project structure
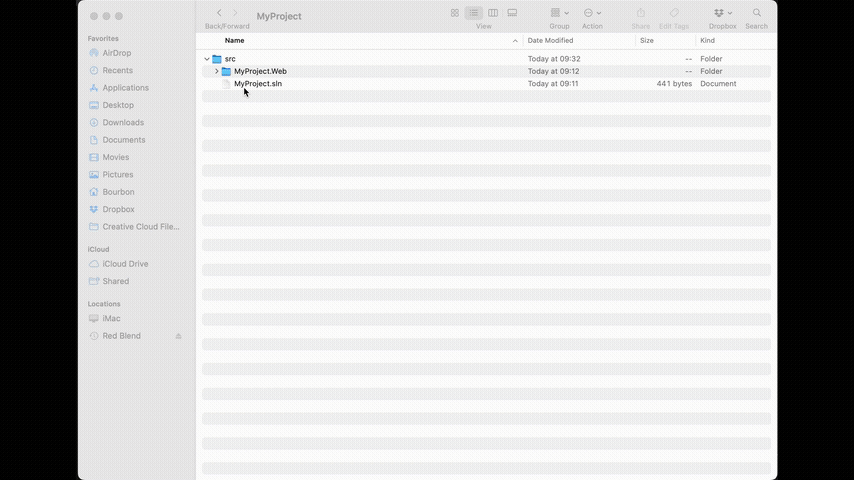
MyProject                    ← my repository root
|__ src/
    |—— MyProject.Frontend   ← my Frontend Project
    |—— MyProject.Web        ← my Umbraco Project
Once the project structure is set up, I like to have two terminal windows open. One for MyProject.Frontend and one for MyProject.Web so I don't continually have to cd into the different folders. You'll see what I mean.
1. Install Umbraco
Umbraco Cloud
The project I was installing Vite on with Jason is a Cloud project that I had already cloned down to my Mac and had renamed the default "UmbracoProject" to "MyProject.Web". If you don't know how to do that, you will not find documentation for it online. At least I didn't, which I found hugely frustrating. I knew that I had read it somewhere a year or so ago, but couldn't remember where. I finally found it in the Readme.md file (of course! 🤦♀️) in my Umbraco Cloud project. So check there for instructions on all the places you need to change "UmbracoProject" to your custom name (if using) so it'll still run when you push everything back up to Cloud.
Note: If you're a Mac user like me and can't find the .umbraco file, in a Finder window, hit command + shift + period to reveal hidden files. 💡
Not Umbraco Cloud
If you're not using Umbraco Cloud for your project, I highly recommend installing via command line — something I truly never thought I'd say — for simplicity. In fact, Paul Seal, legend that he is, created a website that pretty much does it all for you, including any packages you might want to install out of the gate. Easy peasy.
- Choose any packages you want to include, head over to the options tab to customize the solution, project name, database type and unattended install info.
- Create a folder for your project on your computer.
- Right click on the folder and choose New Terminal at Folder
- Paste in the install script and Bam. You have an Umbraco site.
- Before I run the dotnet run command, I generally open the project folder in VS Code, right-click on MyProject.Web and choose Open in Integrated Terminal. I don't know why I switch, but I do.
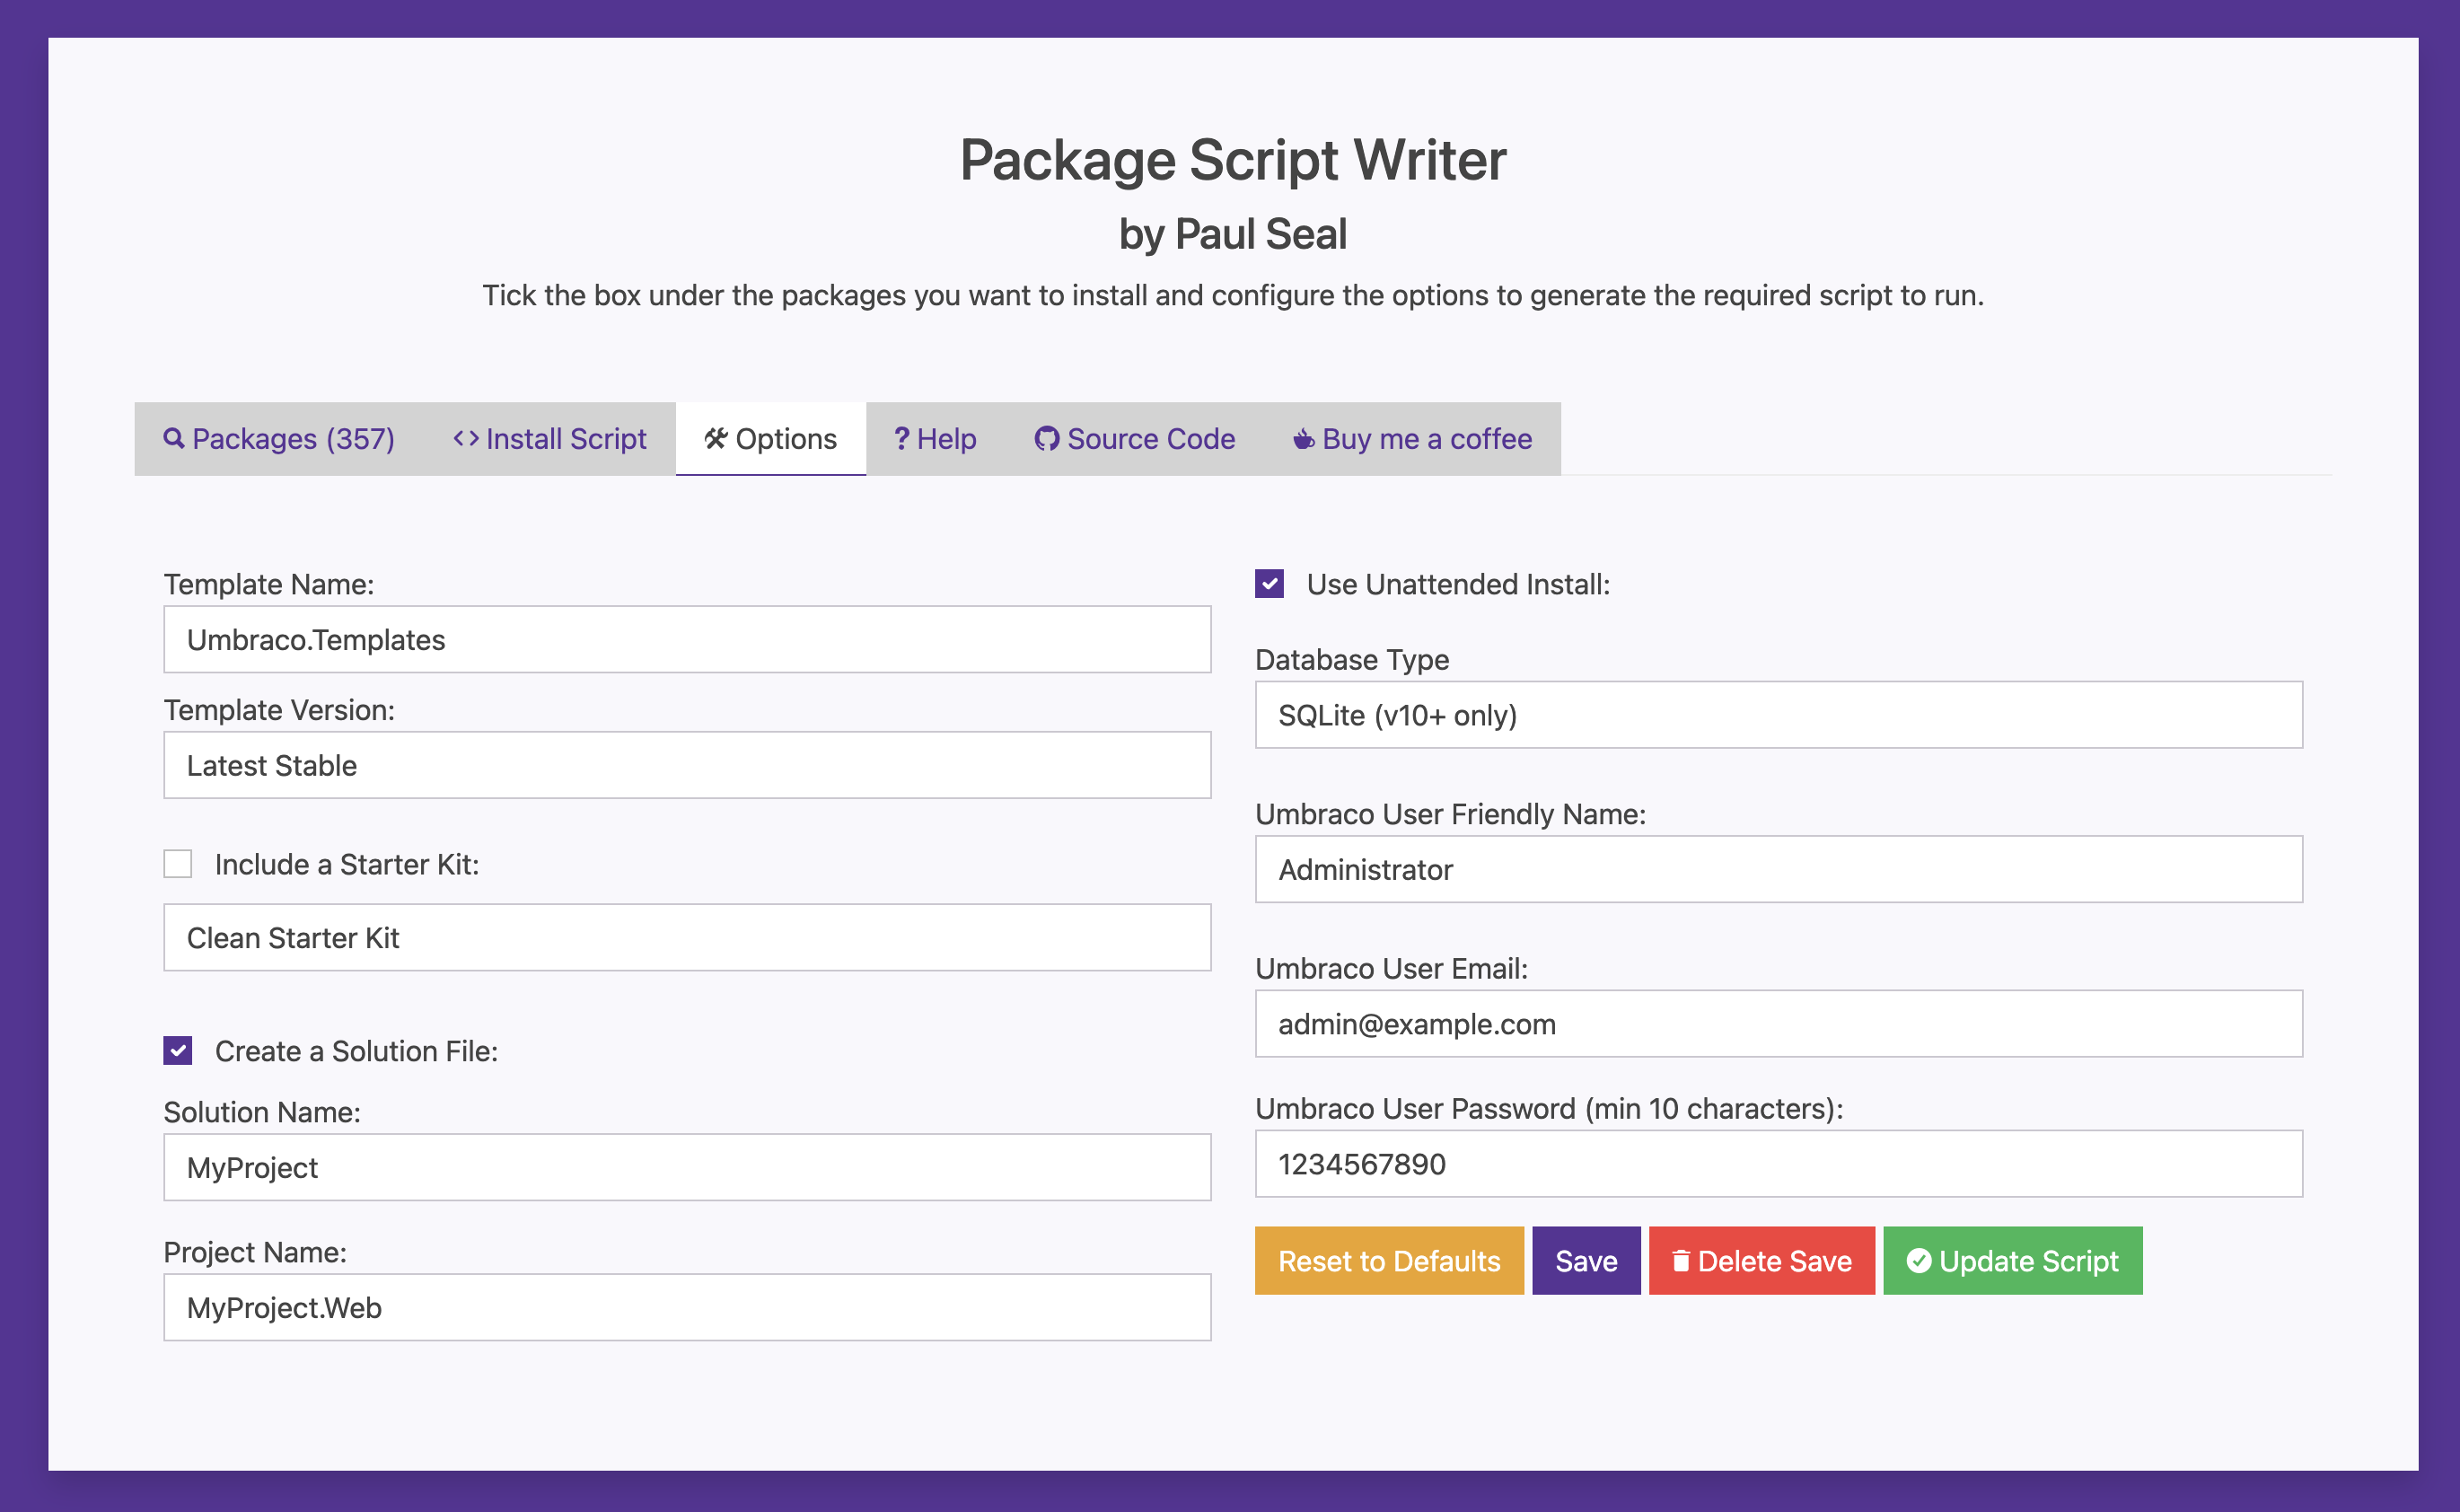
Package Script Writter from Paul Seal
Note: Depending on the database type you choose, there might be additional steps. I'm using SQLite for this sandbox to keep things easy. Setting up Docker is a whole other rabbit hole to go down if you want to use an SQL database on a Mac.
I generally grab the localhost Url from the terminal and paste that into a browser to verify that I do indeed have a site that runs.
2. Create the Vite project
Some of this process is the same as outlined in Jason's article. I will repeat it here for continuity, but I highly recommend taking a look at his original article if you haven't read it before as he gives more of the "why" and the background of things and I am not going to.
In another Terminal window pointed at MyProject > src create your Vite project and follow the prompts in the terminal.
npm create vite@latestI've gone with "vanilla" and "JavaScript", but you can choose what you want, and it will scaffold your Frontend project for you.
Yes, I call my iMac Bourbon. All my devices over the years have been named after cocktails or spirits. Something I started with my first external drive 15 or so years ago. I called her Cosmo — my favorite cocktail at that time.
At the end there, I also installed Sass, as I use it on all my projects. Might as well do it now while I'm installing npm in general.
3. Add a certs script for SSL
According to Jason's article, Vite "requires you to generate your own trusted SSL certificate" and he's created one for us that works with Vite. He recommends putting it in its own build folder: MyProject.Frontend > build > certs.ts
MyProject                    ← my repository root
|__ src/
    |—— MyProject.Frontend   ← my Frontend Project
        |—— build            ← build folder
    |—— MyProject.Web        ← my Umbraco Project
Now, you might remember I did set my Vite project up with JavaScript not TypeScript, but the updated certs file Jason gave me is a TypeScript file. He told me it didn't really matter. Vite would figure it out. And so it did.
// ./build/certs.ts

import * as fs from 'fs';
import * as child_process from 'child_process';
import * as path from 'path';

// this module takes the ASP.NET Core IIS certificate and uses it for Vite's dev server.
// this allows us to use HTTPS in development without having to generate a new certificate.

export function getAspDotNetCertificate() {
    // where the certificate and key is going to live
    const baseFolder =
        process.env.APPDATA !== undefined && process.env.APPDATA !== ''
            ? `${process.env.APPDATA}/ASP.NET/https`
            : `${process.env.HOME}/.aspnet/https`;

    // get the cert name from the NPM package name.
    const certificateName = process.env.npm_package_name;

    if (!certificateName) {
        console.error('Invalid certificate name. Run this script in the context of an npm/yarn script or pass --name=<> explicitly.')
        process.exit(-1);
    }

    const certFilePath = path.join(baseFolder, `${certificateName}.pem`);
    const keyFilePath = path.join(baseFolder, `${certificateName}.key`);

    // check if the cert and key already exist
    if (!fs.existsSync(certFilePath) || !fs.existsSync(keyFilePath)) {
        // export a new copy of the cert and key from .NET
        const fetchCert = child_process.spawnSync('dotnet', [
            'dev-certs',
            'https',
            '--export-path',
            certFilePath,
            '--format',
            'Pem',
            '--no-password',
        ], { stdio: 'inherit', });

        const exitCode = fetchCert.status ?? 0;
        if (exitCode !== 0) {
            process.exit(exitCode)
        }
    }

    // read the cert and key as UTF8 strings
    const certificate = fs.readFileSync(certFilePath, 'utf8');
    const privateKey = fs.readFileSync(keyFilePath, 'utf8');

    // export the cert and key so we can use in them our dev server configuration
    return {
        certificate,
        privateKey
    }
}
4. Add vite.config.js
Now we're going to add a vite.config.js file to the root of our Frontend project. This will tell Vite where the entry point is for the site and handle the SSL for the development server.
As Jason explains:
"The entry point is a key concept to understand. This is where Vite first enters your code and discovers the dependencies that it needs to build your app. Vite’s default is to build a SPA app with index.html as its entry point, but our Umbraco site won’t use an index.html (we’ll be using razor views) so we’ll need to change this."
// vite.config.js:

import { defineConfig } from 'vite'
import { resolve } from 'path'
import { getAspDotNetCertificate } from './build/certs';

export default defineConfig(async ({ mode }) => {
    console.log(`Configuring Vite for ${mode} mode.`);

    const config = {

    css: {
        devSourcemap: true,
    },
    build: {
        outDir: '../MyProject.Web/wwwroot/app',
        emptyOutDir: true,
        rollupOptions: {
        input: {
            main: resolve(__dirname, 'main.js'),
        },
        },
    },
    };

    if (mode === 'development') {
    // only get the certificate if we're in development mode
    const cert = getAspDotNetCertificate();

    config.server = {
        strictPort: true,
        hmr: {
        clientPort: 5173,
        },
        https: {
        cert: cert.certificate,
        key: cert.privateKey,
        },
    };
    }

    return config;
});
At this point, if you want to see if your assets are being added to the right place in the wwwroot folder of your Umbraco Project, you can now run npm run build in your MyProject.Frontend terminal. You should see them compile over to wwwroot > app > assets. Magic.
5. Install Vite.AspNetCore package
Back to your other terminal for MyProject.Web. Let's install the Vite.AspNetCore package.
dotnet add package Vite.AspNetCoreAt the time of writing, this installs version 1.12.0. This magic package is going to automagically start our Vite server when we start the Umbraco Project instead of having to start it separately as we had to do before, as well as give us access to tag helpers, service access to the Vite manifest and some middleware action. Love efficiency improvements! You can read more about all it does in their repo on Github.
6. Update Program.cs
We need to tell our project that we're using the Vite.AspNetCore package, as well as where our Frontend project is and what to do if it's the development environment. To do that, we're going to add the following bits of code to our Program.cs file.
using Vite.AspNetCore.Extensions;


// ---- Service Configuration ----
// Add Vite services.
builder.Services.AddViteServices(options =>
{
    options.PackageDirectory = "../MyProject.Frontend";
    options.Server.AutoRun = true;
    options.Server.Https = true;
});

// ---- App Configuration ----
// Use the Vite Development Server in development environment.
if (app.Environment.IsDevelopment())
{
    app.UseViteDevelopmentServer(true);
}
Does it matter where you put all these things in your Program.cs file? I have absolutely no idea. So here's what my full Program.cs file looks like so you know where Jason coached me to put them:
// Program.cs

using Vite.AspNetCore.Extensions;
WebApplicationBuilder builder = WebApplication.CreateBuilder(args);

builder.Services.AddViteServices(options =>
{
    options.PackageDirectory = "../MyProject.Frontend";
    options.Server.AutoRun = true;
    options.Server.Https = true;
});

builder.CreateUmbracoBuilder()
    .AddBackOffice()
    .AddWebsite()
    .AddDeliveryApi()
    .AddComposers()
    .Build();

WebApplication app = builder.Build();

await app.BootUmbracoAsync();


app.UseUmbraco()
    .WithMiddleware(u =>
    {
        u.UseBackOffice();
        u.UseWebsite();
    })
    .WithEndpoints(u =>
    {
        u.UseInstallerEndpoints();
        u.UseBackOfficeEndpoints();
        u.UseWebsiteEndpoints();
    });

if (app.Environment.IsDevelopment())
{
    app.UseViteDevelopmentServer(true);
}

await app.RunAsync();
24 April 2024 Update: Vite.AspNetCore version 2.0.0 is now out, which, of course, means changes to our Program.cs file. Fortunately, they are minor and as follows:
- using Vite.AspNetCore.Extension; => Vite.AspNetCore;
- options.PackageDirectory => options.Server.PackageDirectory
7. Update appsettings.Development.json
Next we'll go to our appsettings.Development.json file to add Vite's specific routes for serving files in development mode to Umbraco's ReservePaths. Find the "Umbraco" > "CMS" section and add the "Global" bit:
"Umbraco": {
    "CMS": {
    ...
        "Global": {
            "ReservedPaths": "~/app_plugins/,~/install/,~/mini-profiler-resources/,~/umbraco/,~/@vite/,~/@id/,"
        },
    ...
    }
}
8. Start Umbraco project
Now we have all our pieces in place and can fire up our Umbraco Project to wire everything in place. In our MyProject.Web terminal:
dotnet runYou'll notice that your Vite server has also started. Whoop! Grab that localhost URL from the terminal and login to your project with the credentials you created when you installed the project and add your main layout view. I like to call mine _Layout.cshtml with an underscore so it bubbles to the top of the list. But you do you on this one.
If you haven't already deleted in the index.html file in your MyProject.Frontend, you can use the code in there for your initial scaffolding if you don't have a default template you start your projects with.
9. Wiring it up
How it actually works:
"In development mode, Vite streams assets from its dev server. In production mode it outputs static files. We need our views to handle both scenarios.
"We can handle this with the really useful “environment” tag helper which is included with ASP.NET Core. This helper includes or excludes its contents based on the current environment."
In Jason's example, he put everything in the <head>, but I like to split out my production js to load just before the closing <body> tag.
<!-- _Layout.cshtml -->

<head>
<!-- ... Meta tags etc. -->

    <environment include="Development">
        <script type="module" defer src="~/@@vite/client"></script> <!-- load Vite -->
        <script type="module" defer src="~/main.js"></script> <!-- define the entry point -->
    </environment>

    <environment exclude="Development">
        <link rel="stylesheet" asp-href-include="~/app/assets/main.*.css"> <!-- load styles -->
    </environment>

</head>

<body>

    <environment exclude="Development">
        <script type="module" defer asp-src-include="~/app/assets/main.*.js"></script> <!-- load Vite build output -->
    </environment>
</body>
Update: Per Jason in the comments below, you CAN keep everything in the head because of the deferred load! Good to know!
And a closing explanation from Jason:
"The first tag helper is specifically for the Development environment. We have two script tags here: the first loads Vite itself, the second tells vite which entry point to use (the entry point we configured earlier is actually only used for production builds). You’ll notice we don’t need to do anything with CSS in development, Vite will handle it.
"The second tag helper loads the static assets for production and you might notice a couple of new or unusual things here:
"Firstly, I’m using the Script tag helper, with the asp-src-include attribute, and a * in the path. This feature of the tag helper resolves files on disk and allows wildcards in the filename (to account for the file hash that gets appended to the filename for cache busting).
"Secondly, I also added a script tag for a script that’s not there. Once I start importing third-party code from node-modules into my frontend codebase Vite will split it out into this file. The Script tag helper won’t actually render anything to the page unless it finds the file, so it’s safe to leave it there.
"It’s worth pointing out at this point that this is a rather basic setup. In a real world app I might have multiple entry points and include different entry points in different views depending on what functionality I need."
To double check it worked as it is supposed to, I added a doctype and a node to Umbraco, pasted in @RenderBody() and <div class="app"></div> in the _Layout.cshtml file and hit the front of my site and got the default Vite landing page. Nailed it!
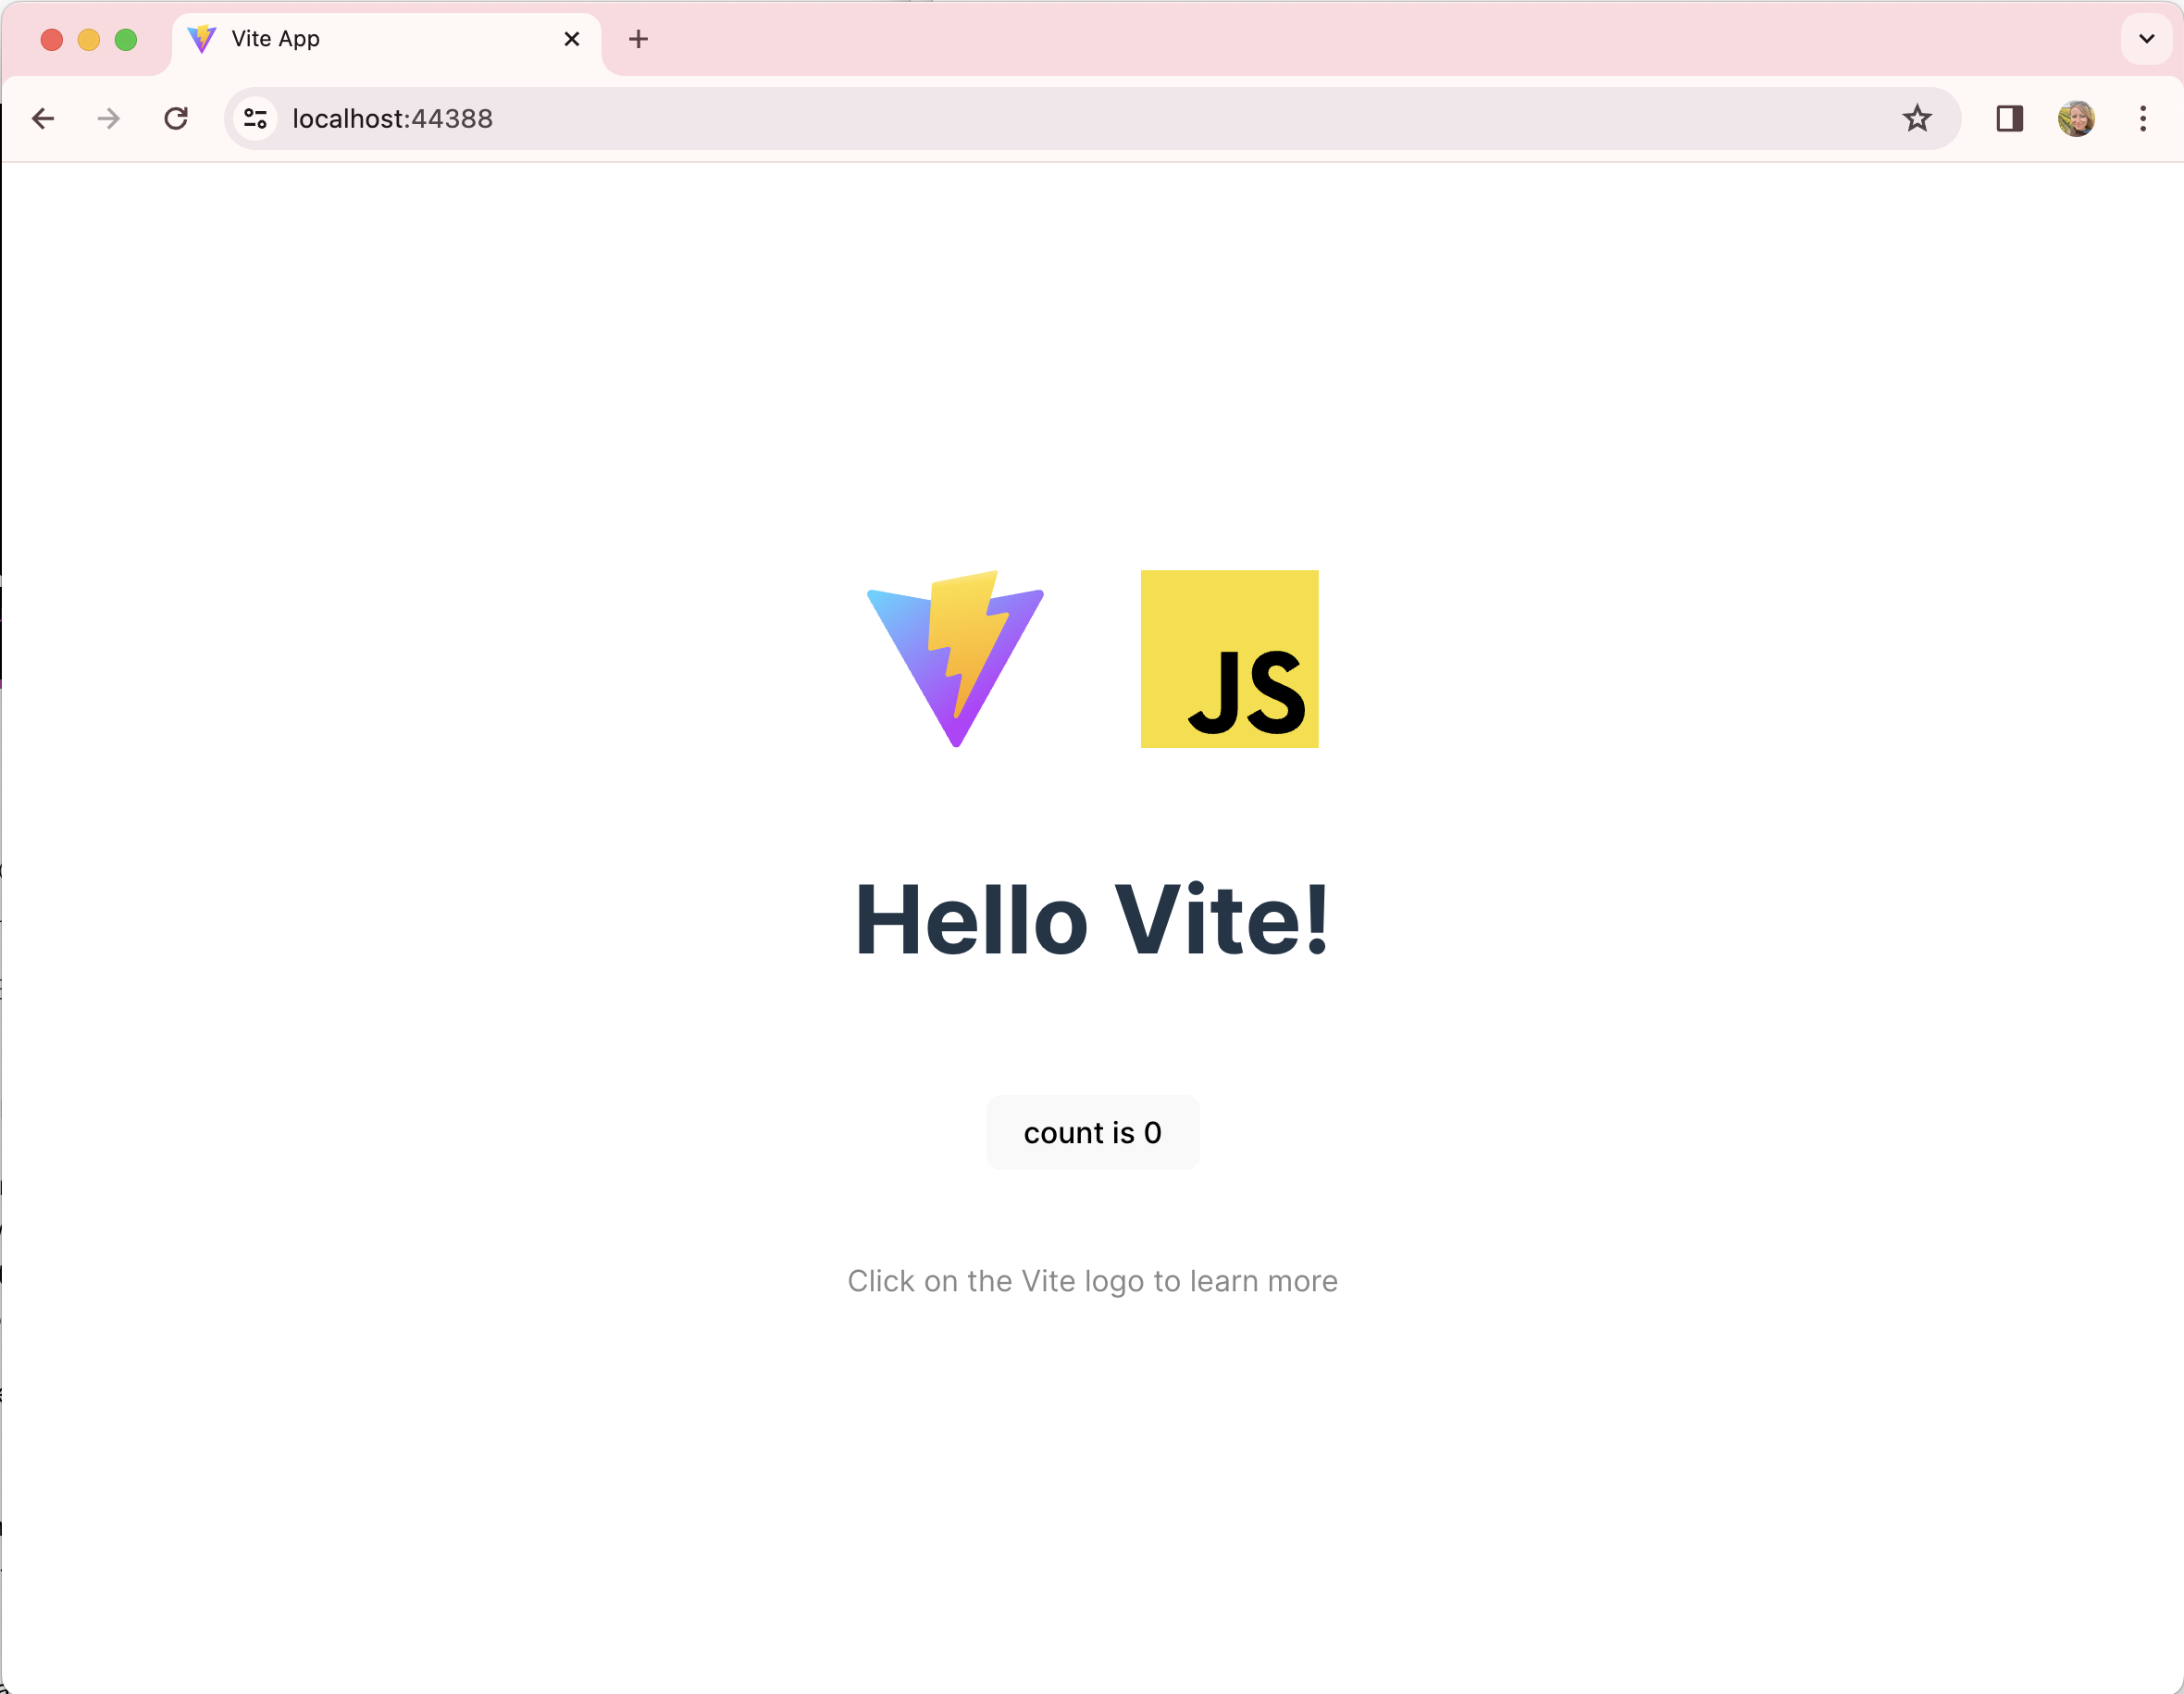
The Vite landing page showing us we wired everything up correctly!
10. Taking it further
We have Umbraco installed and running; we've got our Vite server set up and running; and when we run npm run build on our frontend project, our assets are compiling over to our wwwroot folder. Success. But also, now what?
If you haven't already looked at the main.js file, let's do that now. This file is where you import all your assets so Vite knows where to find them. Your stylesheet is linked there, you can import any manor of js files. You don't need anything in the file, but I will typically comment everything out so I have an example of the syntax to reference.
I like to use Sass, so I will always install that in my projects and create a corresponding folder for all my Sass files and add a main.scss file that I use to import all my other sass modules to.
MyProject                    ← my repository root
|__ src/
    |—— MyProject.Frontend   ← my Frontend Project
        |—— build
        |—— node_modules
        |—— public          ← for static assets
        |—— sass
            |—— main.scss
        |—— main.js
        |—— vite.config.js
        ...
    |—— MyProject.Web        ← my Umbraco Project
In your main.js file update the stylesheet to
import './main.scss'Vite takes care of everything from there. When you're ready for production, run the npm run build command and Vite will compile all your Sass into a main-*.css file in your wwwroot > app > assets folder, which we've already wired in in Step 9.
That is just the tip of the iceberg. Jason walked me through so many things Vite could do that my brain couldn't keep hold of all the things, but check out their documentation for more tips and tricks especially when it comes to dependency pre-bundling and static asset handling.
11. Clean it all up
As a last step, I clean out everything I don't need and sometimes move some files around.
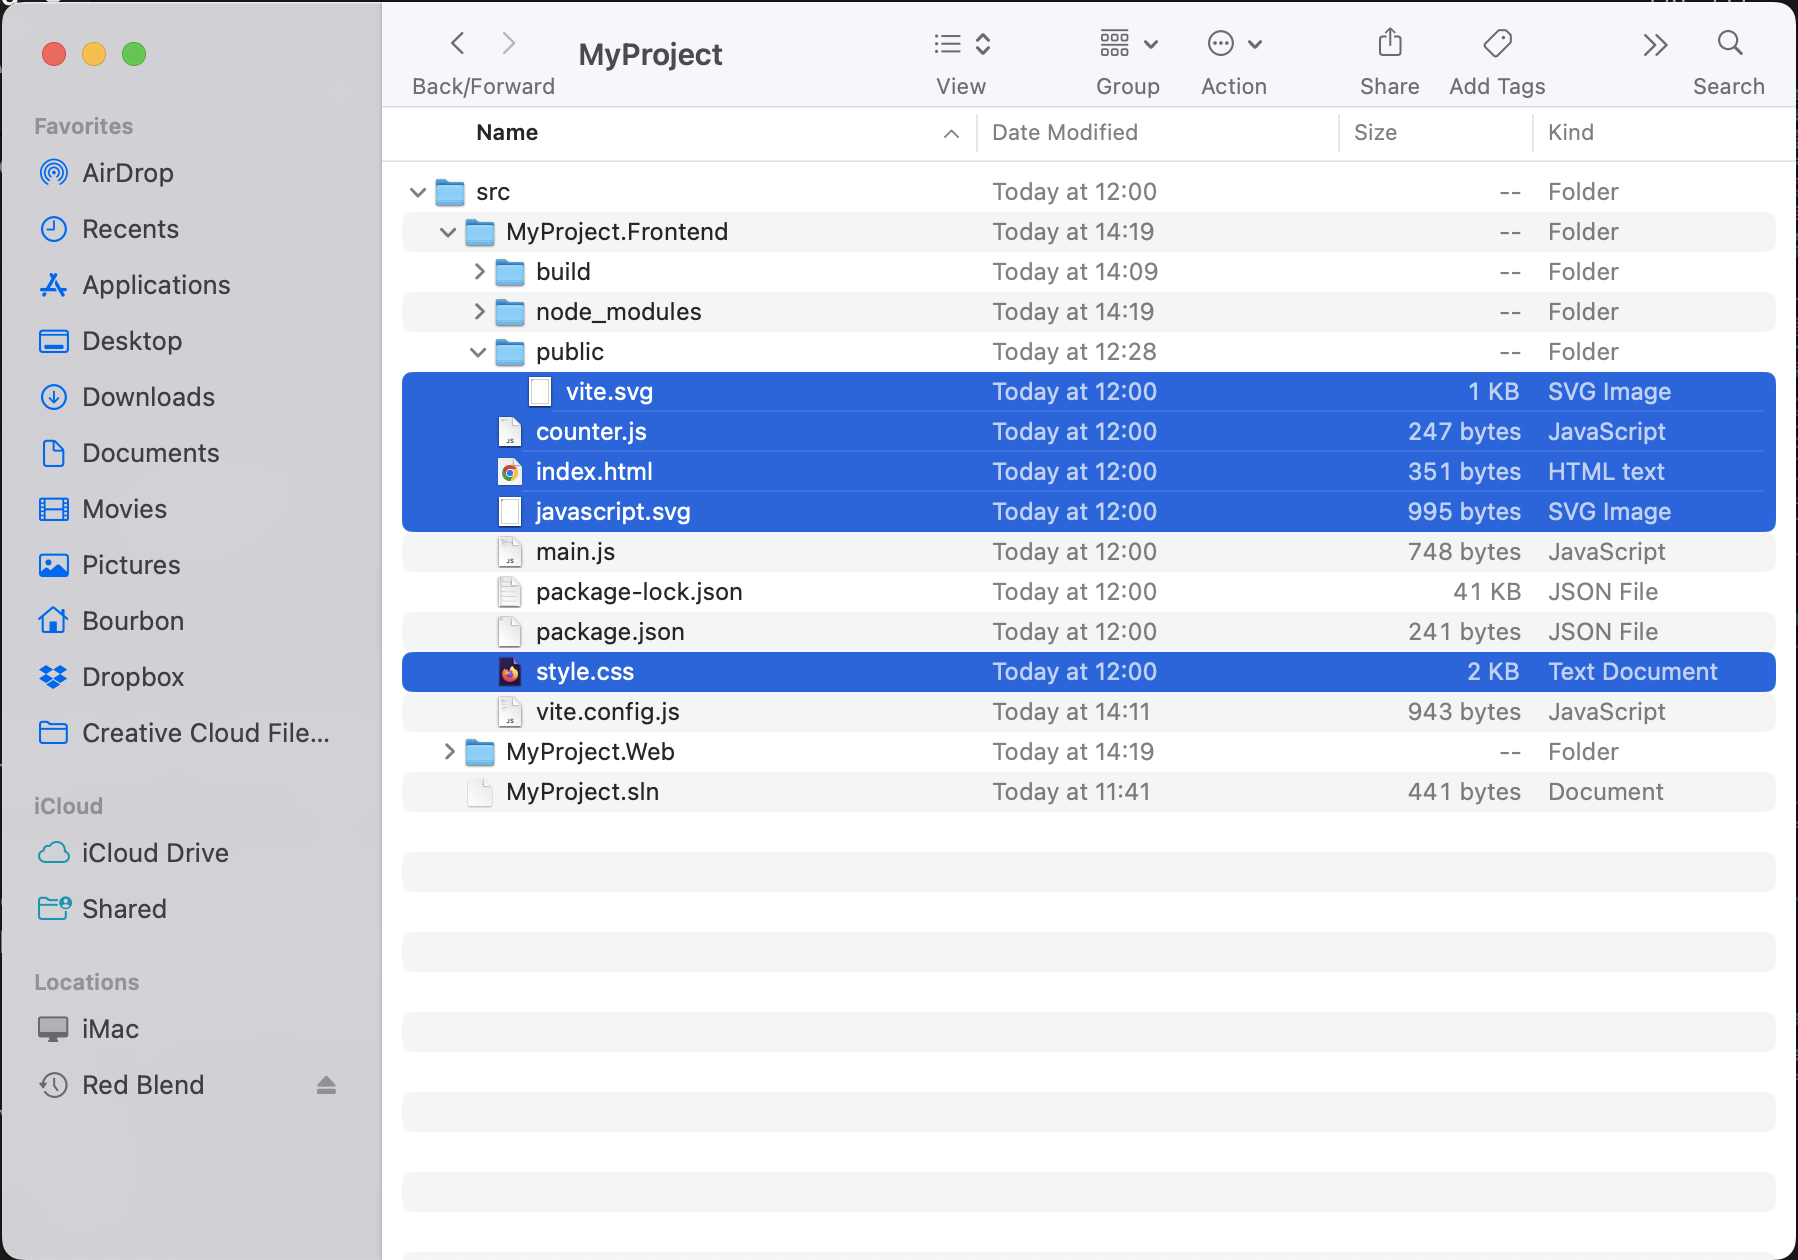
These highlighted files are not needed in your MyProject.Frontend folder
You're also welcome to move the main.js file into a js or scripts folder if you wish. Just make sure to update your path in the vite.config.js file.
And there you have it! Thank you again to Jason for walking me through this and being willing to share your code snippets with the community. #h5yr