
There are many different ways to extend the Umbraco backoffice, the goal of this article is to give a nice overview of the differences and hopefully spark some ideas in ways you can improve the user experience.
Note: The examples and resources linked to in this post will be for Umbraco 8, but almost everything should be the same except for the C# namespaces for Umbraco 9.
Built-in extension points
Umbraco's backoffice has several UI parts that it uses itself which has extension points so we can create them very quickly ourselves. If you install a package they will often contain one or more of these extensions within that package.
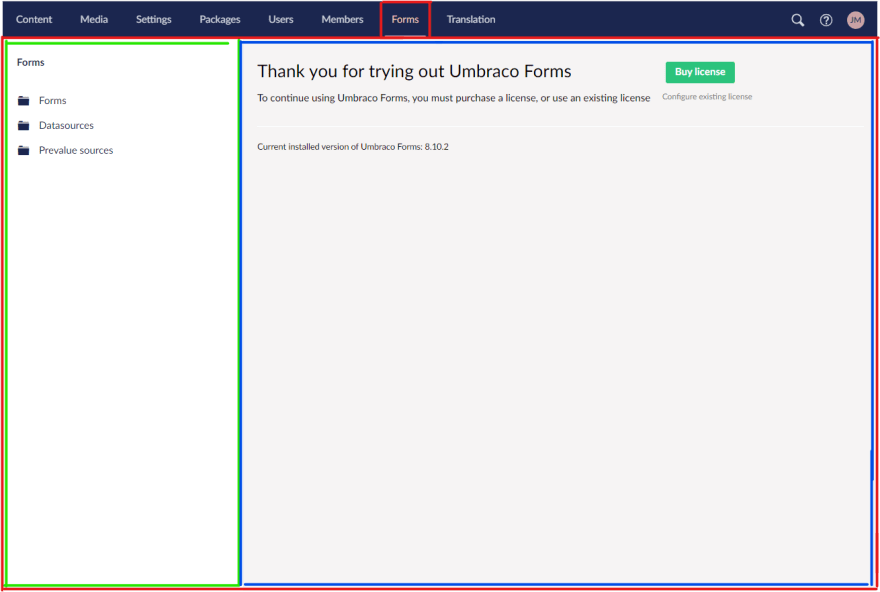
If you for example install Umbraco Forms, you will find that it adds a new Section (highlighted with red) - and within that section there is a Tree (highlighted in green) and a Dashboard (highlighted in blue).
Let's get to the overview of the different types:
Sections
Adding a section means adding something to the top menu, and then having an entire view that you can use however you want. In the Umbraco Forms example used above they've chosen to keep an Umbraco look to make the package look like it's a regular part of Umbraco, but you can put anything you want within your section, and don't have to stick with Umbraco's way of doing things if you don't want to.
Registering a section
A Section can be created either through a package.manifest file or C# code - read more on adding a section in Umbracos documentation.
For sections there isn't a lot of pros and cons to how you want to register it, if done via a package.manifest you have the opportunity to register css and js files you may also need - whereas doing it through C# code you have options to also remove existing sections and reorder them.
Note: When adding a section make sure you also include a lang file so the title gets output correctly - read more here.
Where did my section go?
Final thing to be aware of when it comes to sections is that it will by default not be an allowed section for any user groups - meaning it is not visible in the menu bar until you go in and add the section to the relevant user groups.
There is a way to do that automatically through a migration though, and luckily the Umbraco Package team has an example of how to do it both in v9 and v8 in their UI Examples package.
Dashboards
A dashboard is part of a section, it goes next to the tree and consists of a blank view that can be used for anything. Umbraco has several built-in dashboards. It is possible to extend with your own, and add them to either an existing section or a custom one.
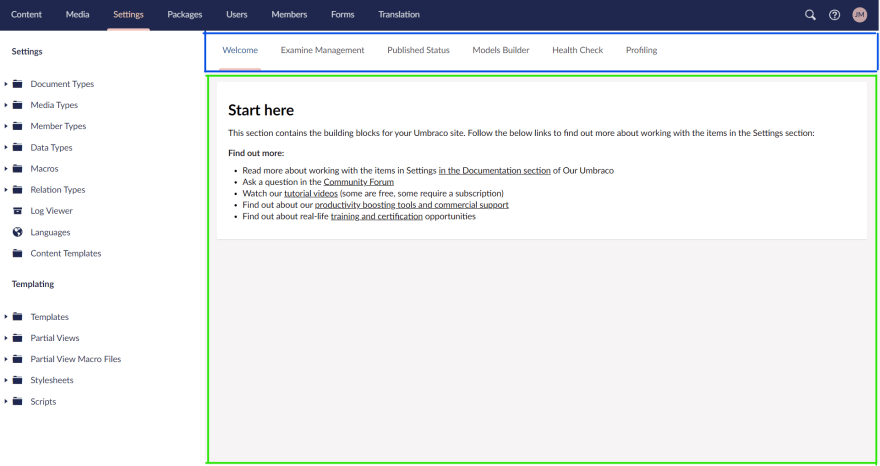
The highlighted green part is the dashboard while the highlighted blue part is the dashboard menu which Umbraco automatically generates.
Registering a dashboard
A dashboard can be created either through a package.manifest file or C# code - read more on adding a dashboard in Umbracos documentation.
For dashboards the difference between the two is also quite small. The package.manifest is the only way to add JS and CSS, whereas the C# registration allows you to set up more complex access rules.
Note: When adding a dashboard make sure you also include a lang file so the title gets output correctly - read more here.
When registering the dashboard you need to set a weight that is used to order it compared to other dashboards, as well as some access rights based on user groups and some sections you want the dashboard to appear on.
To quickly find the values for these:
Content Apps
A content app is a "new" UI element that was introduced with Umbraco 8. It is a bit of a misnomer these days as they relate to content, media and members.
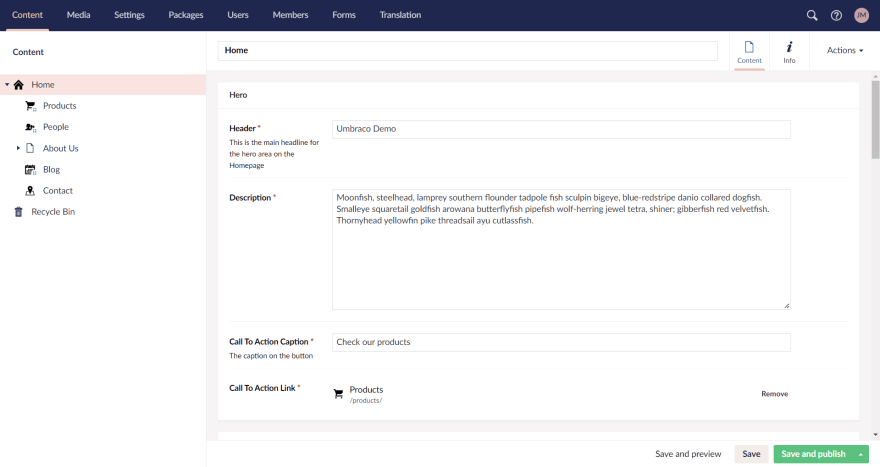
Umbraco uses content apps in several locations, here is an example from a content node which by default has the Content, Info - and if enabled, the List view - content apps.
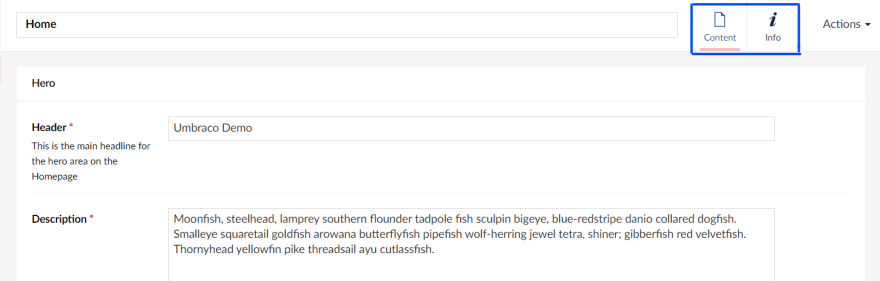
The intent for content apps is a way for developers to add things that aren't really content related or editable that would otherwise have to go in a property editor. So could be things like readability scores, SEO scores, traffic on the node, etc.
Registering a content app
Just like the sections and dashboards content apps can be registered in either a package.manifest or C# code.
For Content Apps there is one major benefit to registering it via C# code instead of a package.manifest, which is the possibility of hiding/showing it dynamically. For example if you have a content app doing some accessibility checks on Rich Text Editor content - since that is the one editor you can't control too much on the frontend - then you could set one up to only show on content nodes that has that editor present.
Example
Code example for dynamically showing a content app if the RTE is present:
using System.Collections.Generic;
using Umbraco.Core.Composing;
using Umbraco.Core.Models;
using Umbraco.Core.Models.ContentEditing;
using Umbraco.Core.Models.Membership;
using Umbraco.Web;

namespace Skrift.ContentApps
{
    public class RichTextEditorContentAppComposer : IUserComposer
    {
        public void Compose(Composition composition)
        {
            composition.ContentApps().Append<RichTextEditorContentApp>();
        }
    }

    public class RichTextEditorContentApp : IContentAppFactory
    {
        public ContentApp GetContentAppFor(object source, IEnumerable<IReadOnlyUserGroup> userGroups)
        {
            // only show for content nodes
            if (source is IContent content)
            {
                // check all properties
                foreach (var property in content.Properties)
                {
                    // as soon as we hit an RTE editor we return and show the app
                    if (property.PropertyType.PropertyEditorAlias == "Umbraco.TinyMCE")
                        return MyContentApp();
                }
            }

            // if no RTE is found we return null (don't show the content app)
            return null;
        }

        private ContentApp MyContentApp()
        {
            var myContentApp = new ContentApp
            {
                Alias = "myContentApp",
                Name = "My Content App",
                Icon = "icon-chat",
                View = "/App_Plugins/MyContentApp/view.html",
                Weight = 0
            };

            return myContentApp;
        }
    }
}
Property Editors
Property editors are another integral part of Umbraco which can be extended. It is hard to cover the diversity of property editors in an overview post like this, but there are several parts to one. It contains a view and angular controller for what the editor sees, some information on how to store the values from it in the database, and potentially a property valueconverter - which is what runs when you get the property from the cache and converts the stored data to a model.
The core comes with several great property editors like the textstring, textarea and content picker shown here:
The Umbraco documentation has a very nice tutorial that can be followed to begin with.
Registering a property editor
Just like the extension points, a property editor can be registered in either a package.manifest or C# code.
As always, there are pros and cons to both approaches - and it is often a good idea to do a combination of both.
One great benefit to registering through C# code is if you just want to extend an existing Umbraco Property editor and add some additional config options you can do it quite easily by inheriting from the Umbraco one, that way it will keep the Umbraco views and will likely just keep working when they upgrade them in the future.
One such example can be seen in the Skybrud.ImagePicker which takes the Umbraco Media pickers and extends them with an additional config field where you can return a different model than the IPublishedContent/MediaWithCrops that they return as default.
Trees
Trees are parts of a section, however if you create your own section you can also create a corresponding tree for that section. My initial example with Umbraco Forms shows that they have done so for the custom Forms section - the tree is on the left side in green:
Registering a tree
Trees differ from all the previous extensions, by not having the option of registering it through a package.manifest - however you probably still need to have one for the CSS, JS and view files.
The Umbraco documentation has an example on registering a tree controller.
NOTE: If you want the tree items to be searchable you need to also implement the ISearchableTree interface and set up some search logic. Example here.
Context menu
So this one should probably just go under trees above, as it is created via an event on the tree. But it is not super used, and has some cool applications, so I will add it as a standalone point.
Not sure if context menu is the correct name for it, but what I mean is the thing that appears when you right click a tree node:
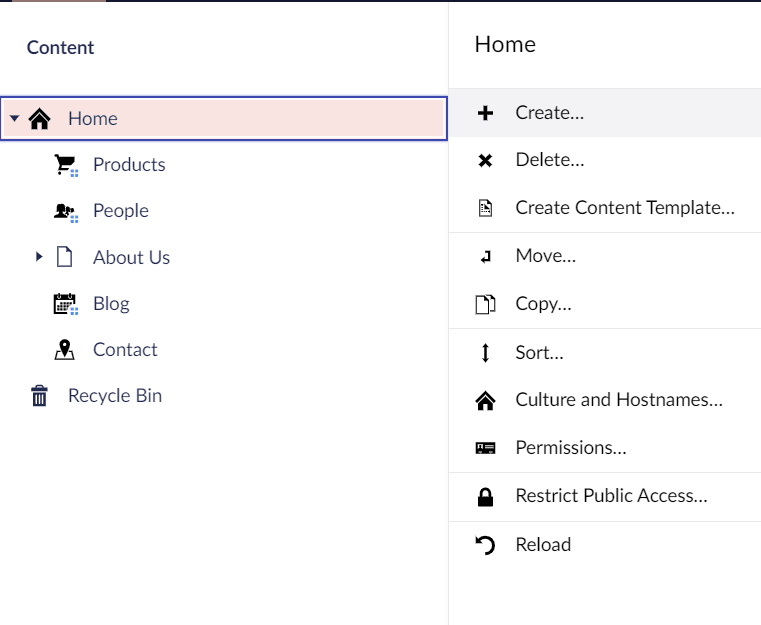
A context menu item is quite easy to make, it is covered in the Umbraco documentation.
"Custom" extension points
Alright so at this point we've covered the "intended" extension points, however with the backoffice being written in HTML, CSS and AngularJS there are some other things that can be hooked into and overwritten.
Being primarily a backender myself I am in no ways an AngularJS expert, so will just show some very simple examples!
Custom CSS and JS
It is always possible to create a package.manifest with CSS and JS, this gets loaded globally in the backoffice so you can easily do things like change colors, etc.
If you do something like this:
package.manifest:
{
"css": [
"~/App_Plugins/Skrift/styles.css"
]
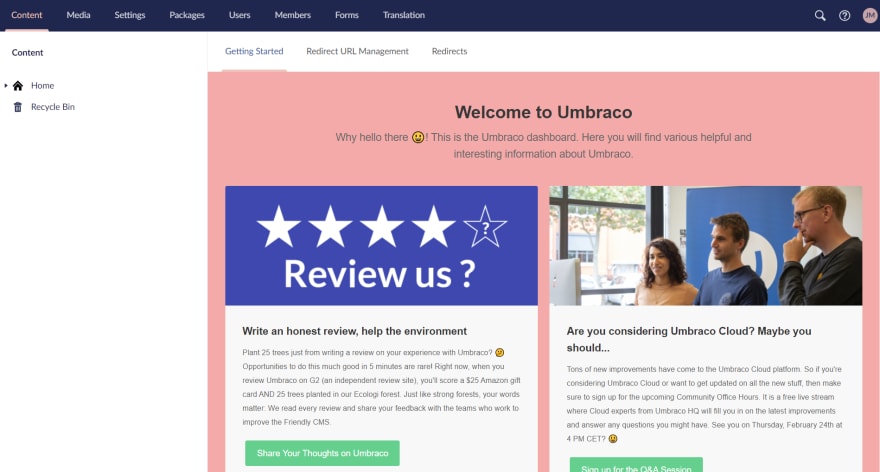
}style.css:
#contentcolumn .umb-editor {
    background: #ffa8a8;
}
You will get a "nice" welcome dashboard with pink:
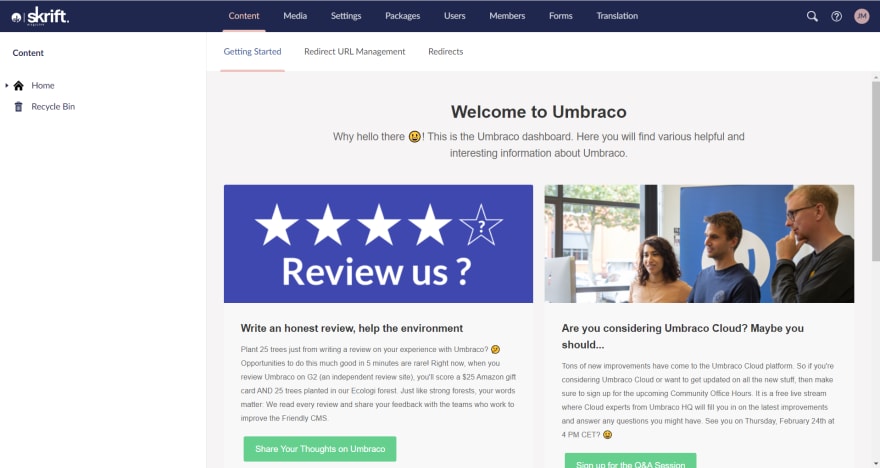
You can go further and inject JS to add / remove dom elements however you want.
For example if you want a nice Skrift logo in the backoffice you can steal their logo from Skrift.io and do something like this:
package.manifest:
{
  javascript: [
    "~/App_Plugins/Skrift/logo.controller.js"
  ]
}
logo.controller.js:
(function () {
    'use strict';

    function loader(eventsService) {

        // fired when a user is authenticated and logged in
        eventsService.on('app.ready', function () {
            insertLogo();
        });

        function insertLogo() {
            var header = angular.element(document)
                .find('.umb-app-header');

            if (header != null && header.length == 1) {

                // inject a new item into the header
                var item = document.createElement('img');
                item.src = '/App_Plugins/Skrift/assets/logo.svg';
                item.style.paddingRight = '15px';
                item.style.width = '100px';
                header[0].prepend(item);
            }
        }
    }

    angular.module('umbraco').run(loader);

})();
And you get a nice logo!
Coming soon...?
There is often talk of adding additional extension points, one thing that is currently in an open PR (as of writing this), is the option of adding "App header actions".
Which will allow you to add menu items to the top right menu:

You can see a nice example in the PR here.
Outro
Thanks for reading, hope you learned something - or just bookmark this as a nice index of backoffice extensions 🙂