
Following on from part one of my three-part series where I explained Azure, what resources would be required and how to prepare them for use with Umbraco. In this part I will show how to add your source control to Azure DevOps and create an artifact ready for deployment.
I will be using GitKraken to add my source code to the Azure DevOps repository. Please note you will need a Pro subscription for GitKraken to allow this. Alternatively you can host your source code in a GitHub repository and link that to Azure DevOps for the build pipeline without a subscription.
Set Up Azure DevOps
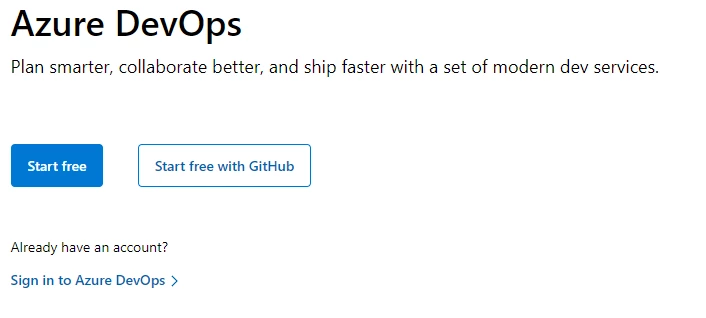
To begin you will need to create an Azure DevOps account. You can use the same account as your Azure subscription.
Visit dev.azure.com and click on the "Start free" button found in the middle of the screen. (Please note the button may be renamed or relocated.)
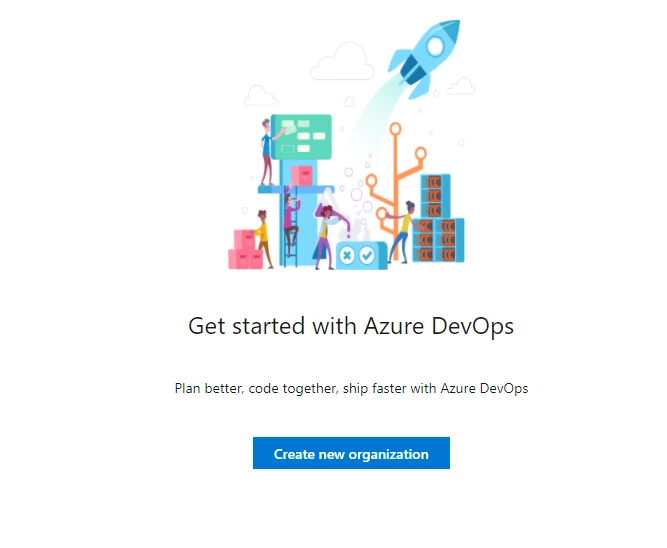
On the next screen either create a new Microsoft account, or sign-in with the account you wish to use with Azure DevOps.
Once you have created your account and have signed-in you will need to create an Organisation, this will act as a container for all of your projects.
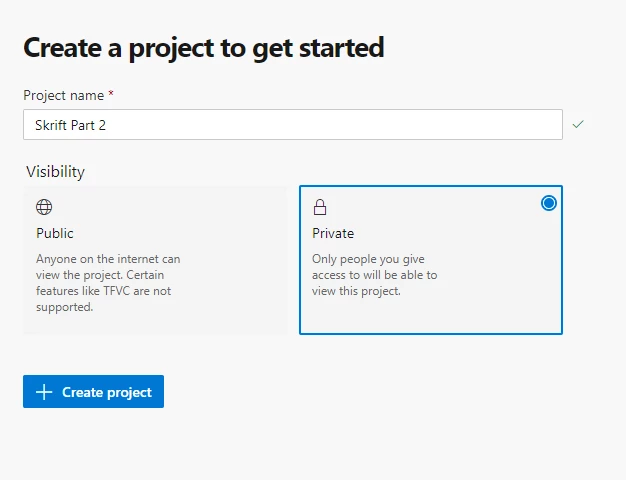
Next you will create the project to contain your source code and build pipeline. I suggest unless you are making an open source project to create it as Private.
Adding Your Project to Azure DevOps Repos
I will be using Azure DevOps Repos for this article, however there are other options available for use with the Pipelines.
The other options which are available can be found below:

(Other Git uses the HTTPS protocol)
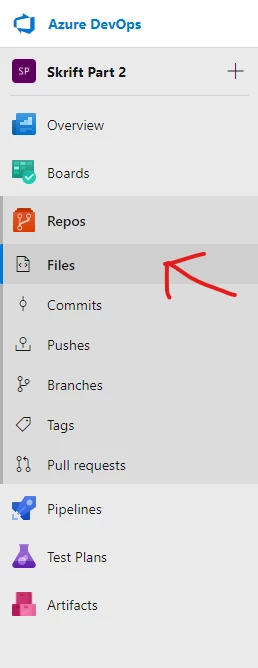
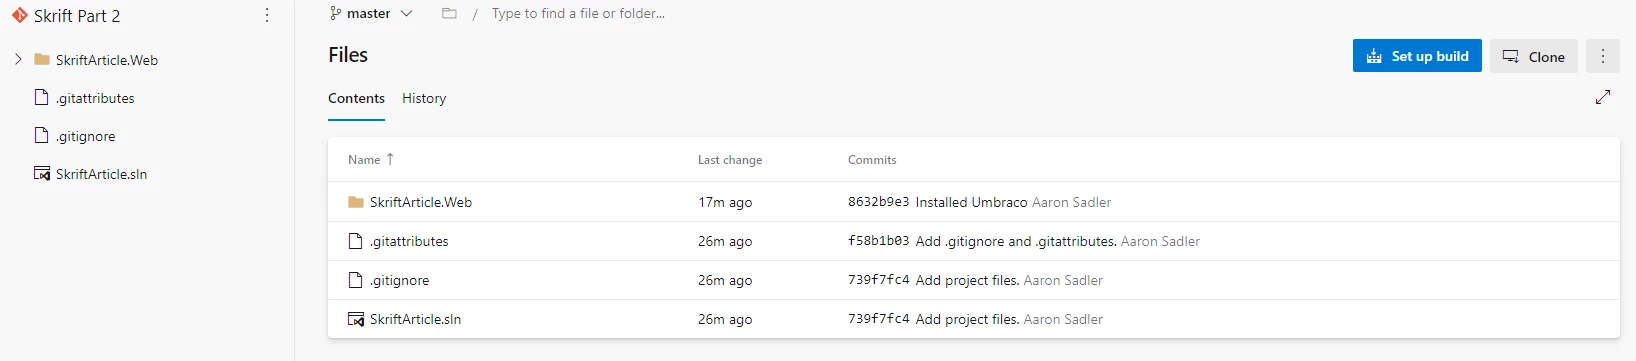
Now that the project is created you will need to add your source files to the project for use by the Pipeline. Firstly browse to Repos and then click on Files.
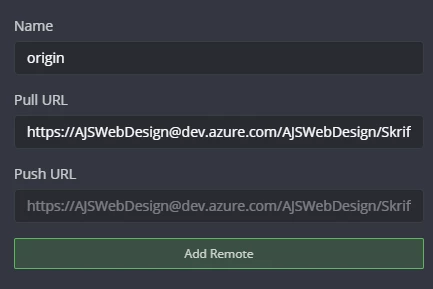
Then copy the HTTPS url from with the box titled "Clone to your computer" and click "Generate Credentials". You will need to use these within GitKraken as your username and password when requested. Using GitKraken open your local git repository and add a new Remote (This is the + which is visible when you hover over the Remote menu option)
Then enter your details into the boxes as shown below:
Alternatively you can use the GitKraken integration with Azure DevOps, the documentation for this can be found here.
Finally press "Push" to add your code to the repository within Azure DevOps Repos. Once the push is complete you can refresh the Azure DevOps Repos window, and your files will be visible.
Setting the build pipeline
Now that your source code is safely uploaded to Azure DevOps Repos it's time to create the build pipeline we will be using to create the artifact.
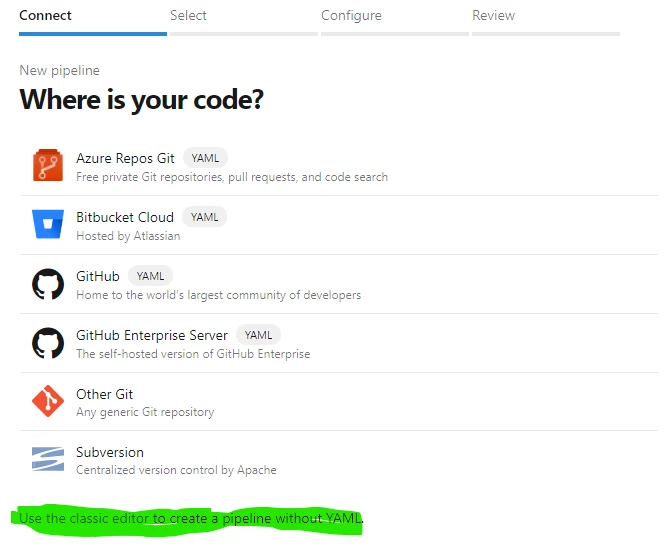
Begin by clicking on the "Set up build" button found to the top right of your repo. Alternatively click on the "Pipelines" button on the menu to the left and then "Create pipeline".
I won't be covering how to setup a Pipeline using YAML as that is far to complicated for the purposes of this article. However, you can read the documentation for that here.
On the screen titled "Where is your code?" click on the small text link to the bottom:
As the source code is held within Azure DevOps Repos, we choose that on the next screen, setting the drop down field to the relevant project, repo and branch names.
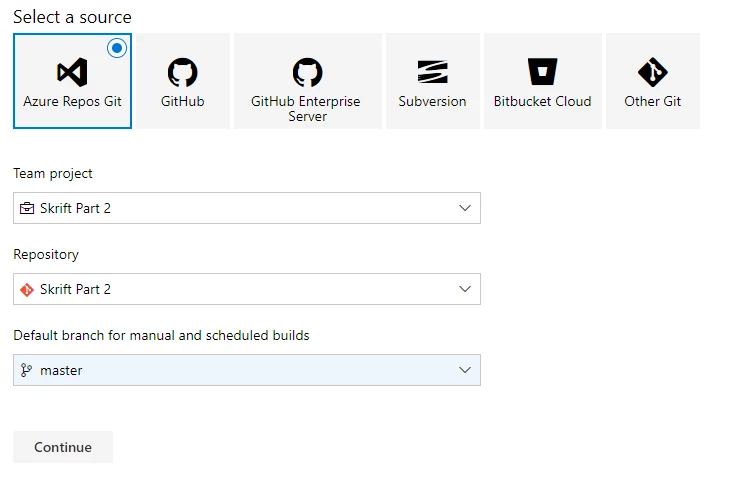
Once done, click Continue and select "Empty Job" on the final setup screen.
Configuring the build pipeline
On the next screen we need to name the pipeline, choose the agent and then most importantly save it. You can do this by clicking the down arrow next to "Save & Queue" on the top menu and then click "Save". We do not want to queue the pipeline yet as there is nothing for it to do.

With DevOps you get a generous 1,800 free build minutes with their build servers. You can see all the pricing options here.

Now we need to add some "Variables" which will be used as defaults during the build process. To do this click on the "Variables" tab and the enter them as below:
| Name | Value | Settable at queue time |
|---|---|---|
| BuildConfiguration | release | ✔ |
| BuildPlatform | any cpu | ✔ |
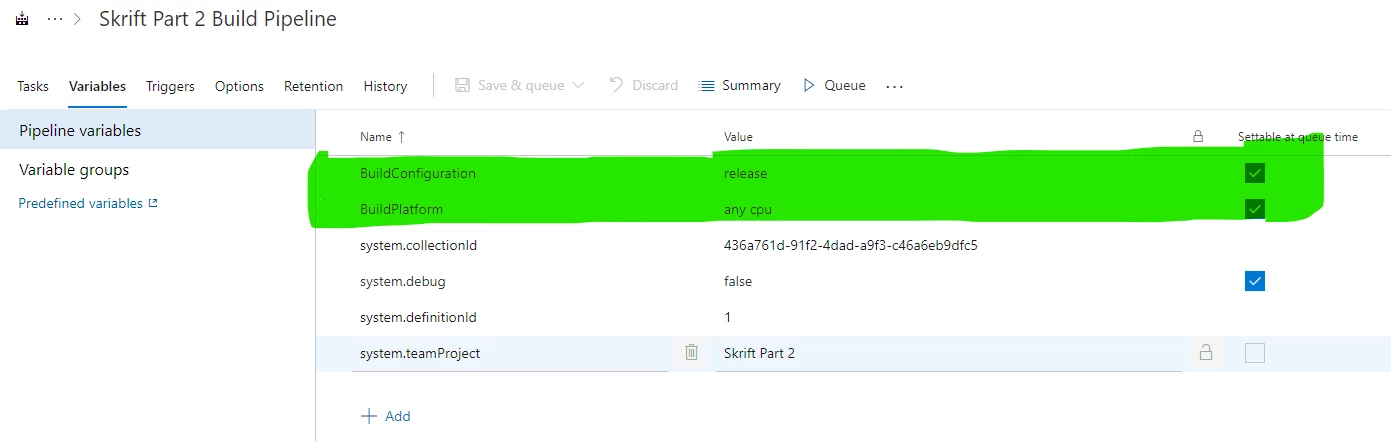
The "Settable at queue time" option allows these settings to be changed on the blade which shows when you trigger a build.
Next we need to add a useful build name for easy tracking or so that the artifact follows any company naming rules.
Personally I go with the following format:
Build-$(date:yyyyMMdd)$(rev:.r)
This will for example, generate a build name of:
Build-20201227.1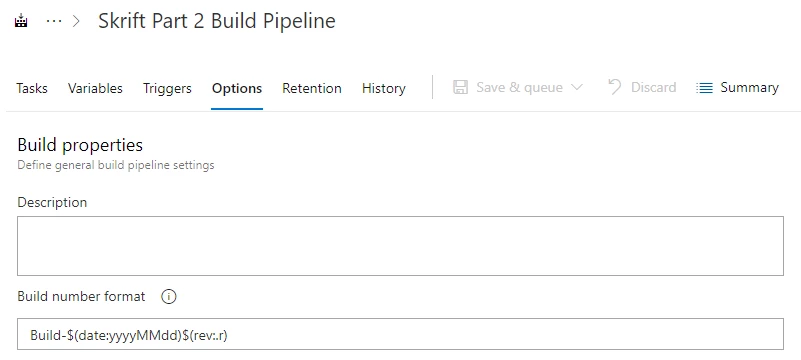
Now is a good time to save again before we move onto configuring the build tasks.
Configuring the build pipeline build tasks
So now we have a configured build pipeline, we need to add the tasks which will do the hard work of restoring, building, and then packing up the artifact.
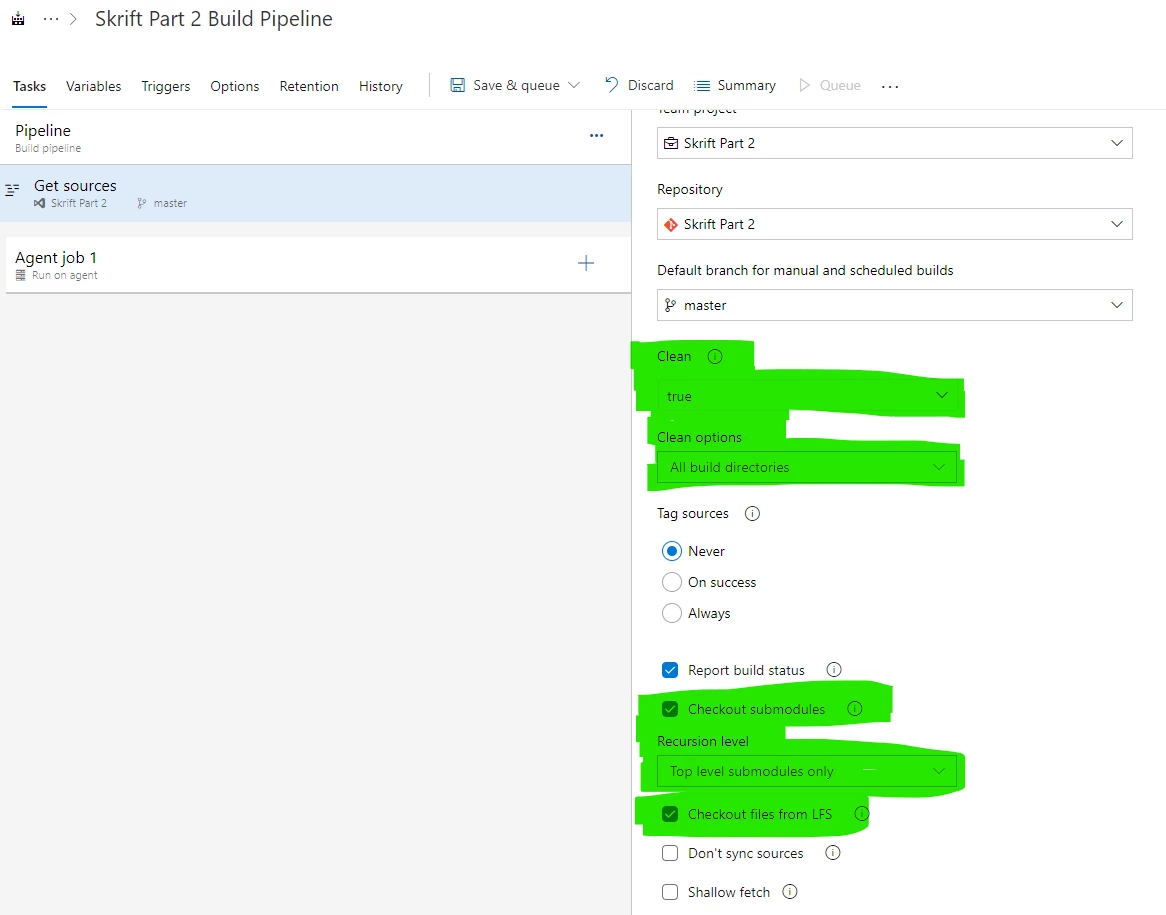
The following settings are optional based on your repository requirements. Click on "Get sources" to reveal the options.
Firstly if you would like to generate a clean build, make sure to set the "Clean" option as "true". Then within the "Clean Options" dropdown that appears set the level of clean. Typically if you need to use this then I would recommend going with "All build directories".
If you are using Git-LFS with your repository you will need to check the box next to "Checkout files from LFS". Git-LFS will only work with HTTPS Authentication.
If you are using submodules within your repository, you will need to check the box next to "Checkout submodules". I recommend you configure the submodule to use HTTPS Authentication.
Adding the build tasks
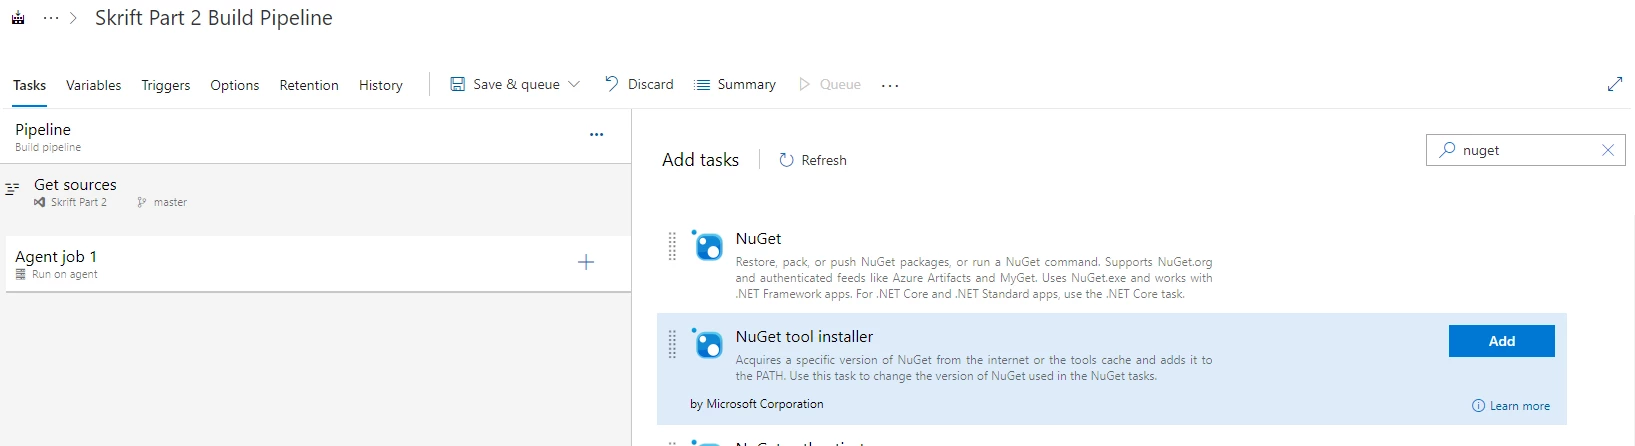
The first task we need to add is to install NuGet. We do this by clicking the ➕ next to "Agent job 1" and then searching for NuGet. In the results you will want the second one down the list called "NuGet tool installer", then finally click the "Add" button.
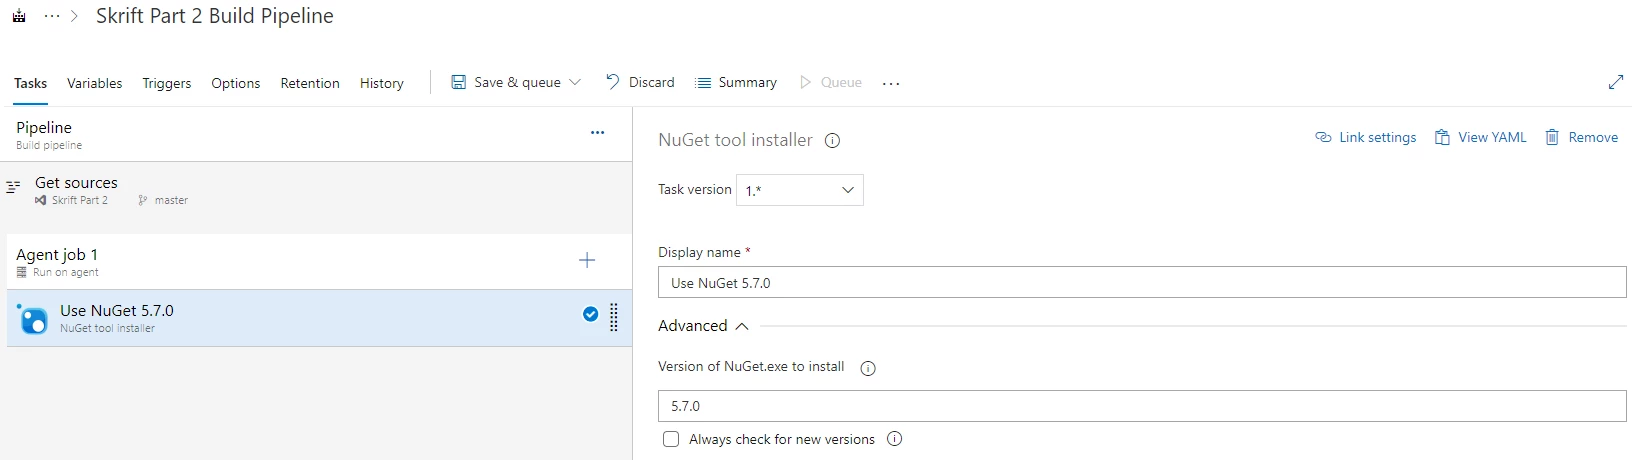
Once added to the stage you will need to set the NuGet version you wish to use. Personally I go for the latest version available at creation of the pipeline, however your version may be different.
If you tick the "Always check for new versions" checkbox the pipeline will always use the latest version available. However in some cases this can break the pipeline.
Next we need to add a task to restore the solution NuGet packages. Again we click the ➕ next to "Agent job 1" and then search for NuGet. This time you will want to select the first result called "NuGet" then click then "Add" button.
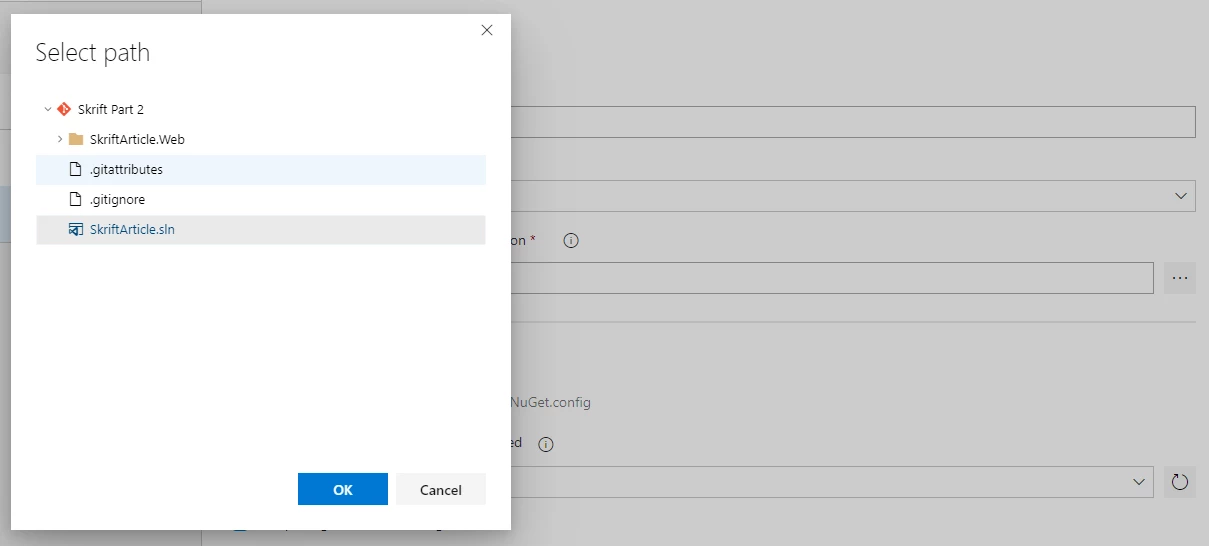
Once added to the stage click on the new task called "Nuget restore". You will then want to point this task at the solution, which you do by clicking the button with "...", browse to your solution file, and then click on the filename and then ok to select it.
Now we want to add the Task to build the solution. Again click the ➕ and then search for "Visual Studio Build. You will need to add the first result and once added click on the task called "Build solution **\*.sln"
In this task you will also need to browse to your solution file. You do this by clicking the "...", browse to your solution file, click on the filename and then ok to select it.
Next we will set the Visual Studio Version. You will want this to match the Visual Studio version you used to create your website. In my case it was "Visual Studio 2019".
We then need to set the MSBuild arguements so that it generated a pre-packaged build for us which is pre-zipped in the Web Deploy format, which is what Azure will require for the deployment in Part 3.
/p:DeployOnBuild=true /p:WebPublishMethod=Package /p:PackageAsSingleFile=true /p:SkipInvalidConfigurations=true /p:PackageLocation="$(Build.ArtifactStagingDirectory)\\" /p:IncludeSetAclProviderOnDestination=False
The last setting is not strictly required for Azure WebApps. However I recommend adding it if you decide to deploy to a dedicated server via Web Deploy as it will leave the folder permissions alone on the server. Otherwise Web Deploy will reset them on every deployment.
/p:IncludeSetAclProviderOnDestination=False
We now need to link up the Variables we added earlier. First in the "Platform" box enter:
$(BuildPlatform)
and in the "Configuration" box enter:
$(BuildConfiguration)
Link build parameters
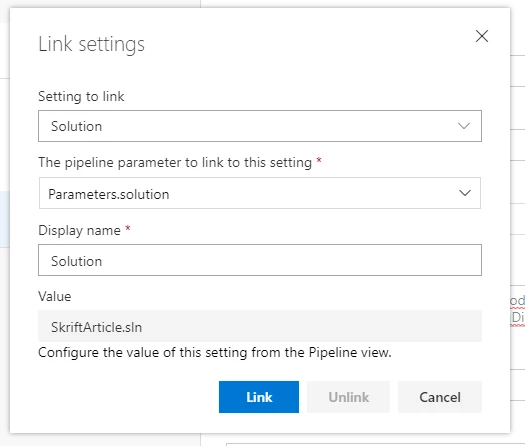
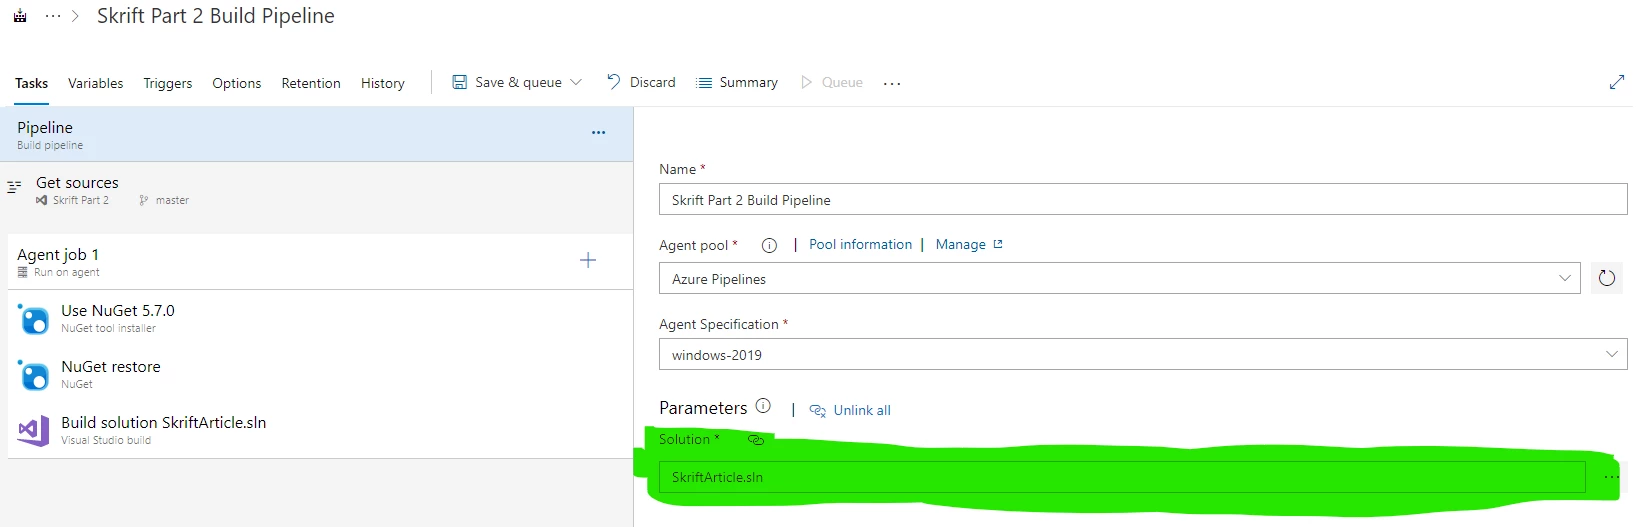
As you will see by two of the tasks above they both share the same parameter value "SkriftArticle.sln". We can make this a shared parameter and make it settable in a single location.
To do this click "Link Settings" in the top right, choose "Solution" in the pop up window, and then click the "Link" button.
Next click on the "NuGet restore" task, then again on the "Link Settings" option and set as below:
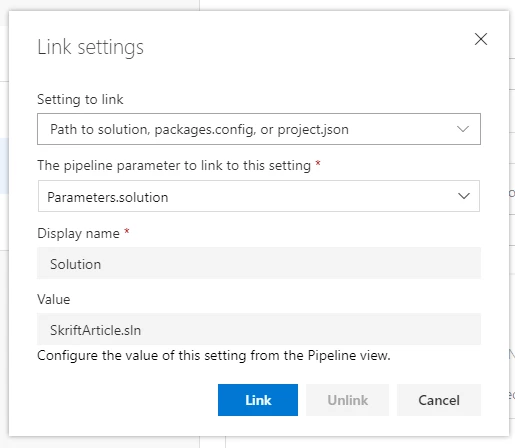
You can then set this in a single location by clicking "Pipeline" in the stage.
Adding final task
Finally we need to add the task which will upload our package for use in Part 3 by the deployment pipeline.
Once again click the ➕ next to "Agent job 1", search for "Publish build artifacts", and add the task to the stage.
We now need to configure this task. Click the task called "Publish Artifact: drop", set the "Path to publish" as below (being sure to keep the casing exact):
$(Build.ArtifactStagingDirectory)
Then set the "Artifact name" as:
$(Build.BuildNumber)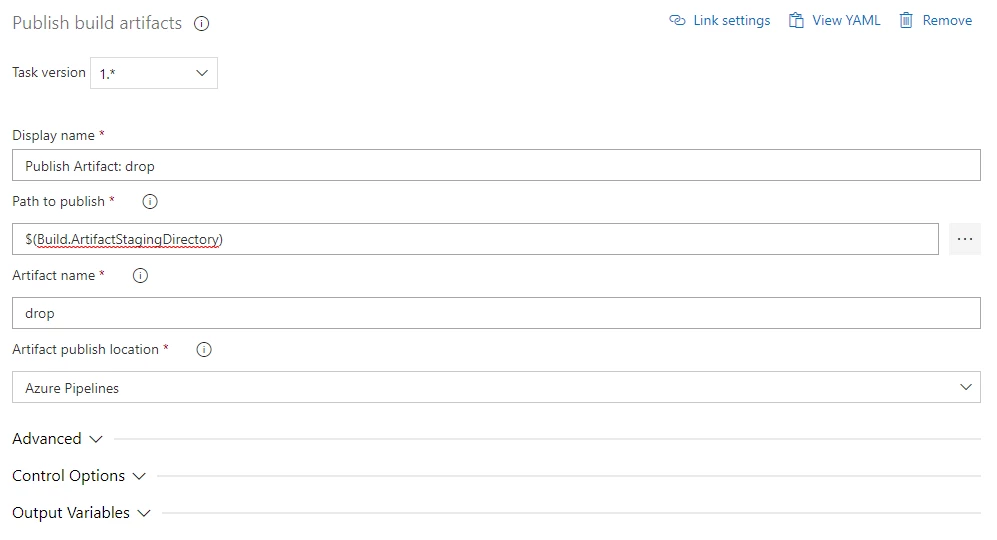
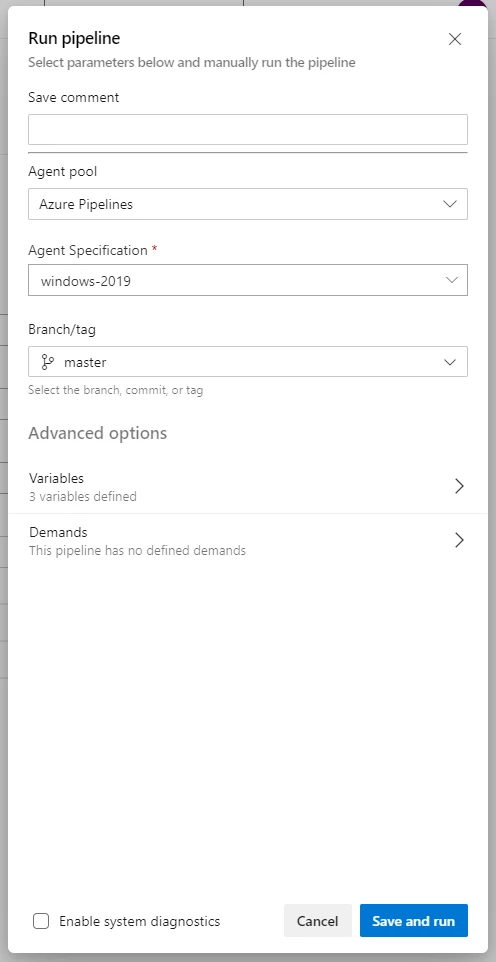
Queue the build
Once all the tasks are configured we can queue the build, we will want to save your changes at the same time, so click the "Save & Queue" option on the menu.
You can leave the settings as they are unless you need to build a different branch or would like to build in debug.
To change the later click the "Variables" link and then set "BuildConfiguration" to "debug".
Once you are finished click the "Save and run" button.
View build status
Once the build has started you can watch the build status by clicking the "Agent job 1" link in the Jobs list.
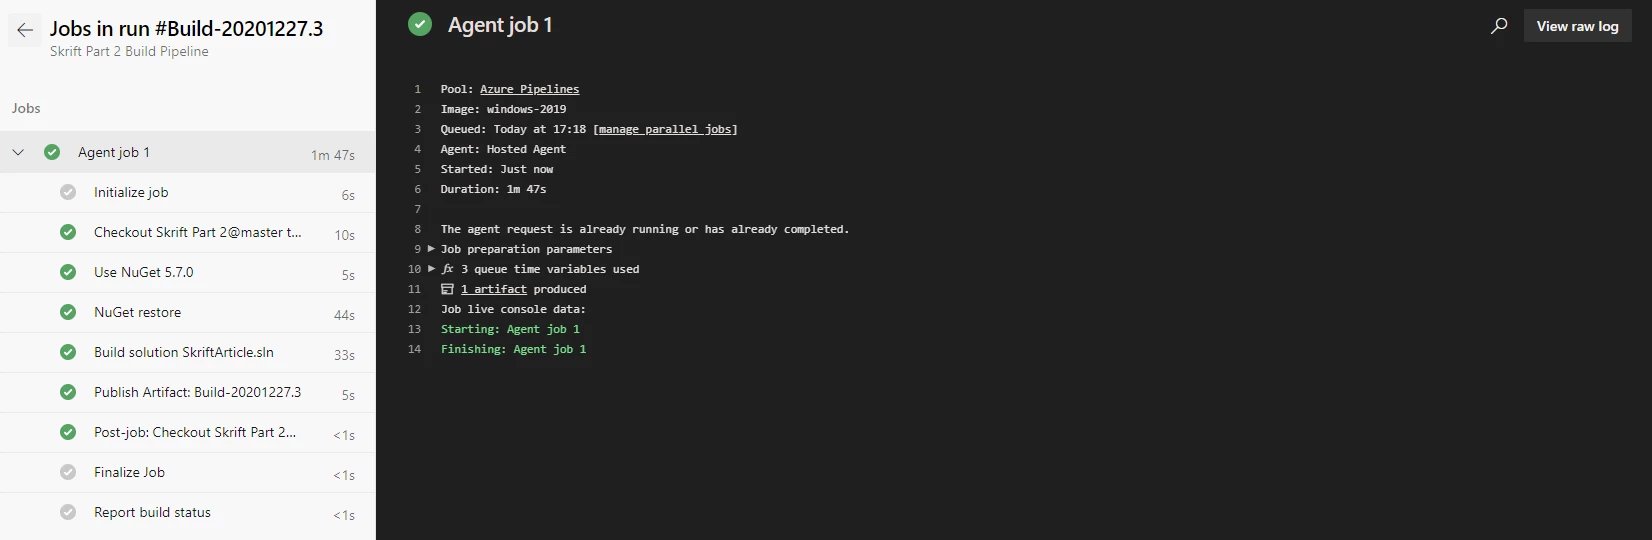
After the build is completed it is ready for Part 3, where we will create the release pipeline and then deploy to the Azure WebApp we created in Part 1.
Using NPM & Gulp as part of the build pipeline
If, like me, you use Gulp to generate your minified and optimised CSS / scripts then you can add this task as part of your pipeline.
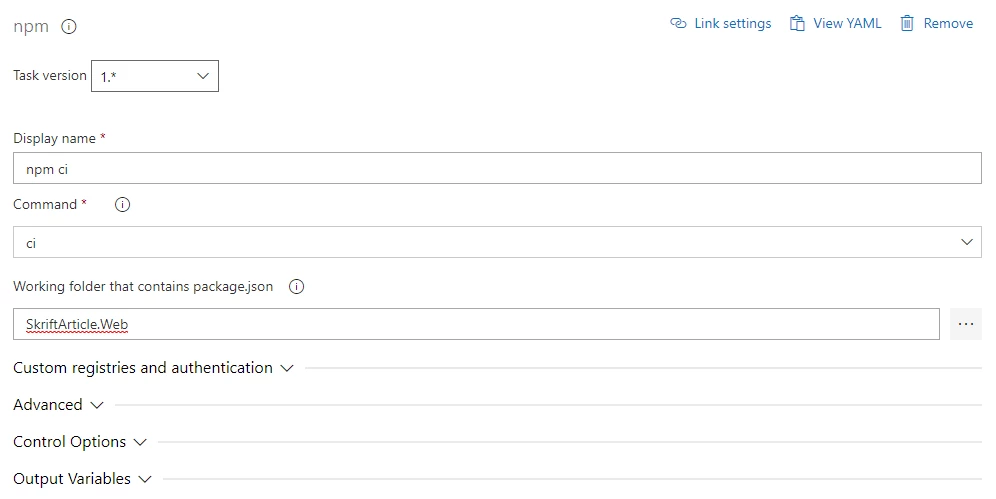
First you will need to add the NPM task, click the ➕ next to "Agent job 1", search for "NPM", and add the first result to your stage. You will then want to drag the task to the top of list so that it is the first task to run in the pipeline.
We now need to configure the NPM task. First change the "Command" dropdown to "ci", then in the "Working folder that contains package.json" dropdown click the "..." and browse to your package.json.
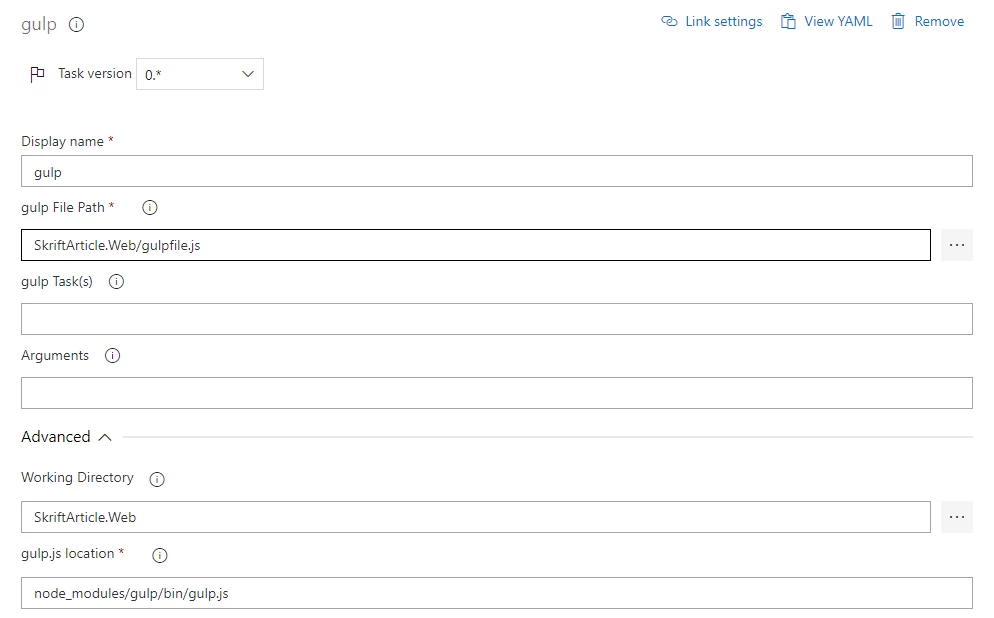
Next you need to add the Gulp task. Click the ➕ next to "Agent job 1", then search for "Gulp" adding the first result to the stage.
Make sure that the Gulp task is directly under the NPM task.
Click on the "gulp" task to configure, set the "gulp File Path" to the location of your gulpfile.js, and then in the "gulp Task(s)" box enter the tasks you wish to run (space delimitated). If you leave this box empty it will run the default task, finally click "Advanced" and set the "Working Directory" to the folder containing the gulpfile.js.
Further reading
This article only covers the basics on how to build an artifact using Azure DevOps. There is so much more than can be done which I have not covered here. As always I suggest reading the documentation for the system which can be found here.
Part 3
So part 3 which will be out in the February edition, will contain the final parts. I will show how to create the release pipeline, how to deploy to an Azure Web App, and the final configurations over at Azure to get the site running.