
By the end of my three-part series, you will have successfully created an Azure environment, Azure DevOps Build & Release Pipelines and configured Umbraco to run on Azure.
Firstly in this part, I will start off by covering each of the Azure services we need to run Umbraco, what they do, and why Azure in most cases is a better option than using dedicated or virtualized environments.
The second part will consist of how-to setup Azure Dev Ops, covering how to create a repository and how to create a build pipeline to generate an artifact ready for deployment to Azure.
In the final part I will cover how to create a release pipeline to publish the Umbraco artifact onto your Azure Web App, and then make any final configuration on the hosting environment.
Subscription Credits / Free Trial
If you or your employer is a Visual Studio subscriber, you can get an Azure subscription with a monthly credit of around £115. This will allow you to get hands on with Azure at no additional cost but with access to the same features as a normal Azure subscription. You can find out more about the Azure Visual Studio subscription here. Also, companies which are part of the Microsoft Partner Network can also benefit from monthly credits. You can find out more about the Microsoft Partner Network subscription here.
If you plan on using either of the above credit programmes please be sure to read of the terms and conditions and make sure you are covered for your use case.
If you do not have access to either of these credit programmes then you can start with an Azure Free Trial. This will give you £150 free credit to use within 30 days of signing up and 12 months access to selected free services.
Why Azure?
Azure is my go-to cloud infrastructure for running Umbraco. I feel the portal is extremely user friendly and easy to use. Where the portal cannot do something there are PowerShell scripts which can, and the accompanying documentation for both systems make using the service extremely easy to get going unlike some of their competitors.
In my experience moving sites onto the cloud usually reduces the monthly hosting costs over dedicated hardware and saves time by removing the need to monitor, maintain, and patch Windows servers as this is all done for you by Microsoft.
There are quite a few benefits to running Umbraco on an Azure cloud Web App rather than dedicated or virtualised environments. Below you will find the services you will need to run Umbraco on Azure.
App Service & Web App
With Azure Web Apps you have the same level of control you would have using IIS within Windows. The simplest way of managing this is via the Azure Portal & Kudu (I will touch on these later), however if PowerShell is your thing you can also manage it using that too. There is plenty of accompanying documentation to help with this.
It is possible to install (via Kudu) a Let's Encrypt plugin which will allow you to issue and automatically renew SSL certificates for free.
Microsoft also have a 99.95% uptime guarantee for the App Service infrastructure.
Azure App Service is the name for the service with contains resources which are available for your Web App(s), such as RAM and CPU. Azure App Service resources can be shared with multiple Web Apps.
If you would like to read more about Azure App Service take a look at the Microsoft documentation here.
Application Insights
One of the biggest advantages of using an Azure Web App is when it is combined with Azure Application Insights. This allows you to setup worldwide uptime alerts, error alerts, log searching and filtering, and a ton more features which will make monitoring your app a breeze.
If you configure Umbraco to write to Application Insights everything which would usually be logged into the 'App_Data/Logs' folder will be logged directly into Application Insights.
You will find more information on how to push the logs into Application Insights here: Serilog.Sinks.ApplicationInsights.
If you would like to read more about Application Insights in more details, take a look at the Microsoft documentation here.
Azure SQL
Azure SQL comes with 5-minute backups, auto indexing, and much more.
They are sold as an individual database, where each database has a set of resources available for it to consume.
This makes accessing SQL much more affordable than licensing a whole server with the full SQL software and more affordable and efficient than setting up a server to run SQL Express.
You can find out more about Azure SQL at the Microsoft documentation here.
Blob Storage
One of the recommendations Umbraco make themselves is to use Blob storage alongside the Web App. This will allow you to add Azure CDN, giving you direct access to the media folder using Azure Storage Explorer. It also removes the media folder from your source control, reducing the repository size. This subsequently will make automated deployments quicker.
You can find out how to configure your Umbraco website to use Blob Storage here. I highly recommend this is configured; however, it is not essential.
You can find out more about Azure Blob Storage at the Microsoft documentation here.
SendGrid
The App Service & Web App services have no SMTP software installed on them, and as such sending emails from your website will require a third party.
As part of your Azure subscription you can make use of a rather generous SendGrid partner subscription.
I will go through how to wire up Umbraco to use SendGrid as a SMTP provider in part 3, when I cover the final touches to go live.
Getting Started - Opening an Account
So, the first thing that is required is an account with Azure. I will be using their free trial to demo the sign-up process.
When choosing the free trial you will find a button at the top of the landing page called 'Activate'. Click the button to start the sign up process. You will then need to sign in to your Microsoft Account or create one.
The next 4 steps consist of setting up your profile, verifying your identity, and accepting the Azure Agreements.
Once you have completed your profile you will be taken to the QuickStart centre.
Creating a Resource Group
Once we have an account we can start to configure the Azure Services we are going to use to host the Umbraco website. All the Azure Services need are stored inside a Resource Group or it can be split into several.
For example, if you are going to host multiple sites for multiple clients you may decide to group by client or you may decide to group by resource.
Personally, I like to group by Resource and then add a tag to each resource containing the Client Name. How you decide to set this up is totally your choice; there is no right or wrong way to do it.
For the purposes of the tutorial I will create a single Resource Group to house all the resources.
To create a Resource Grou, click on the burger bar in the top left and then on 'create a resource'.

On the next screen in the 'Search the Marketplace' box type 'Resource Group' then select the result and click 'create' on the screen which follows.
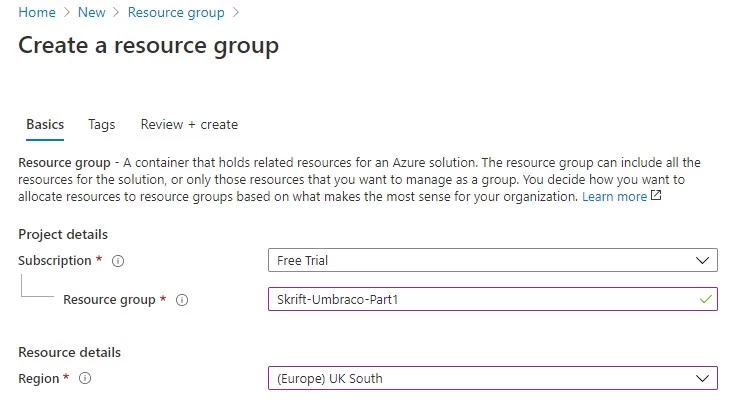
Then fill out the form as below, changing the subscription, name and region to your preference, and click the 'Review + create' button at the bottom.
 Once created there will be an alert in the top right notifying you. If you missed the alert then you can click on the bell icon to reveal the notifications blade and click the 'Go to resource group' button.
Create the App Service & Web App
The first service to create will be the App Service. To do this you can either click the burger button and click 'create a resource', click 'create service', or click the 'Add' button from within the Resource Group.
Next, in the 'Search the Marketplace' box type 'Web App', choose the first result with the same name, and then click 'create' on the next screen.
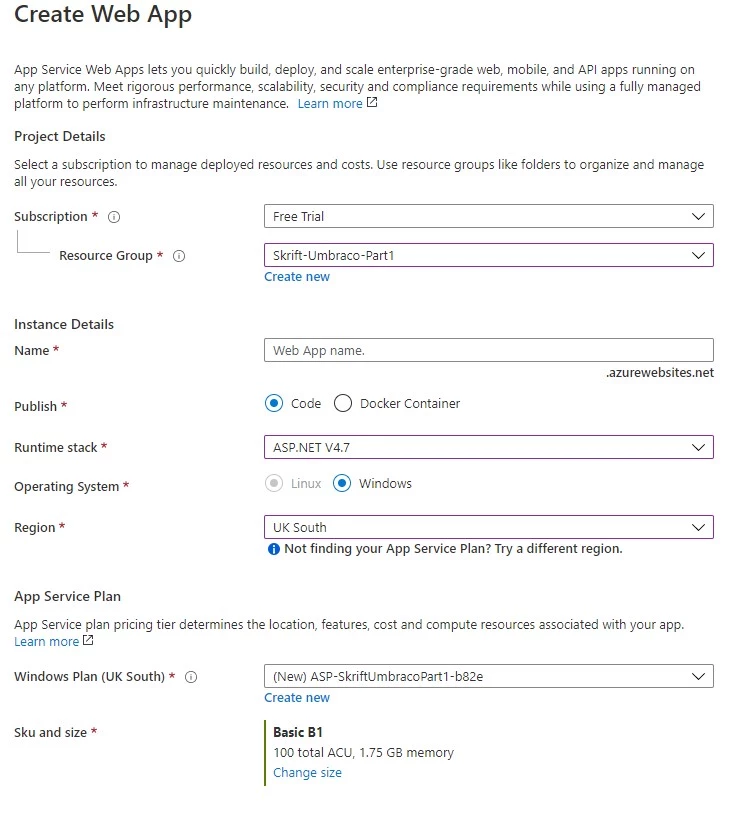
On the next screen, choose your subscription and then the Resource Group created earlier.
What you enter in the name box will be the subdomain your website will live under on the azurewebsites.net domain name. You may need to try several different variations if your preferred name is not available.
Under publish choose the 'Code' option.
Runtime Stack will be 'ASP.NET V4.7'.
Region is your preferred choice. Microsoft recommends keeping all the resources in the same region as to not encounter additional bandwidth costs and performance issues.
If you already have an App Service created in your subscription you can choose this from the dropdown. Otherwise you can create it here.
To change the name to something other than the auto generated name you can click the 'create new' link under the dropdown.
Next you will want to choose the size of your App Service. Click on the 'Change size' link to open the pricing / spec picker blade. Depending on your requirements and budget you can choose the resources you will have available here.
My blog aaronsadler.dev runs on the 'B1' option. I find there is more than enough resources available and the performance is fast enough for my requirements. You will need to go higher to gain features such as slots (ideal for dev / staging environments).
Please Note: The pricing varies between regions, and as such you may need to look around to get the correct balance between distance and cost.
Once this step is filled out, you should have something which looks like the below:
 Next click the 'Next: Monitoring' button to configure Application Insights for the web app.
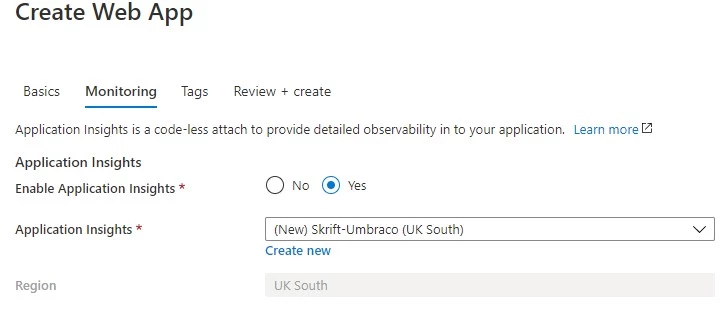
On the Monitoring blade check the 'Enable Application Insights' radio then click the 'Create new' text link. On the blade which opens enter a name and choose the same region as the App Service.
Please Note: Not all services are available in all regions, for example App Service is available in Canada East, however at time of writing Application Insights is not available.
Once you’re ready click on the 'Review + create' button.
Double check the details shown to you are correct and match what you entered earlier. If all is good click the 'create' button.
The creation can take a few moments to happen. While Azure is processing you will see a moving line in the bell icon on the blue bar. If you click the bell icon it will reveal a blade showing the current creation process.
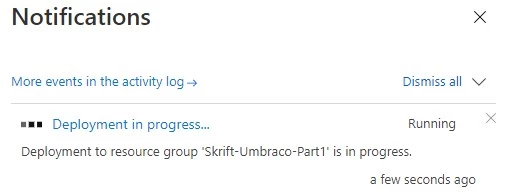 Once the process is completed you will see the below message:
 We will further configure this Web App in parts 2 & 3 of this Skrift 3-part series.
Create Azure SQL
To go with our new App Service & Web App we will need a SQL database.
To do this you can either click the burger button then 'create a resource', click 'create service', or click the 'Add' button from within the Resource Group.
Then in the 'Search the Marketplace' box type 'SQL Database', choose the first result with the same name, and click 'create' on the next screen.
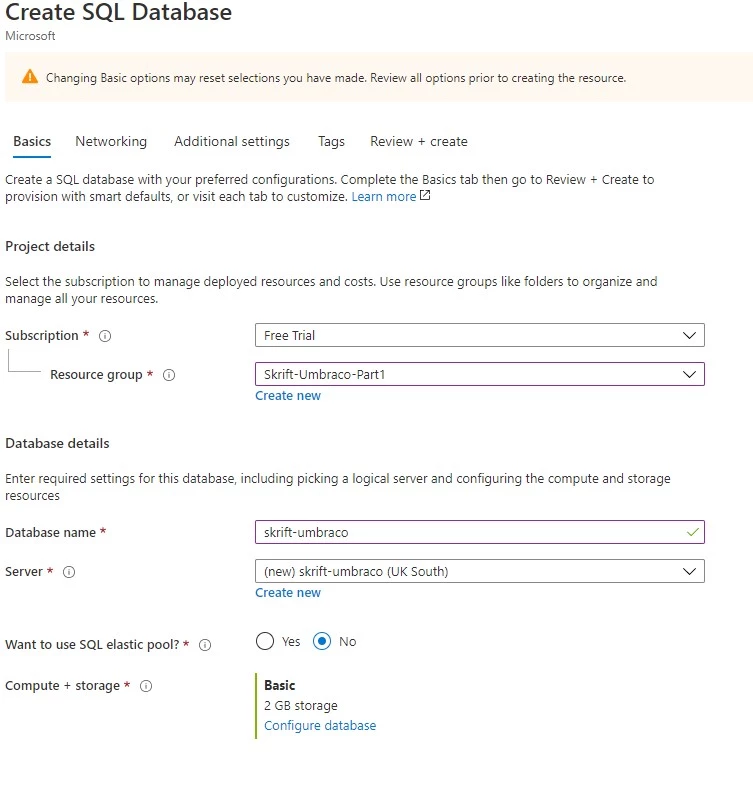
On the next screen choose your subscription and then the Resource Group created earlier.
Enter the name you would like for your database in the 'Database name' field.
If you have a SQL server already created in your subscription this will show under the 'Server' dropdown. Otherwise click the 'Create new' text link to open the 'New server' blade.
The information entered on this blade is totally your preference; however, be sure to select the same region as your 'App Service' for the best performance.
Choose 'No' to the 'Want to use SQL elastic pool?' question and then click 'configure database' next to 'Compute + storage'.
As with the App Service, pricing for Azure SQL is dependent on region and can vary. My blog uses the Basic option (5 DTUs). This is the lowest database available, and for static websites this is more than enough thanks to the Umbraco caching system minimising the need to read / write to the database.
Once you have chosen your database specs click 'apply'. This will reveal the 'database name' field.
Once you have something similar to below click the 'Review + create' button.
Once you have verified all the information is correct click the 'create' button. As with the App Service, this process can take some time to complete, and you will find the status in the notifications blade.
Unlike non-Azure databases you cannot create users via the SQL Server Management Studio (SSMS) GUI. You will need to run some commands to do this.
Once your database is created open SQL Server Management Studio (SSMS) and connect to your server using the details created in step 1. The server name will be for example: skrift-umbraco.database.windows.net.
On your first connection to the database it will ask you to add your IP address to the firewall. To do this click the 'Sign In' button on the prompt and follow the instructions.
Once you have logged in, browse to Databases -> DATABASENAME -> Security Users in the tree, then right click on Users and click 'New User'.
Then replace the content of the query window with the below, being sure to replace both USERNAME and PASSWORD with the details to be used with your website.
WITH PASSWORD = 'PASSWORD'

GO

-- Add user to the database owner role

EXEC sp_addrolemember N'db_owner', N'USERNAME'

GO
Then execute the query to create your database user.
When you are ready to migrate your local database to Azure I recommend using the Microsoft Data Migration Assistant. I found this tool extremely quick easy to use. The documentation can be found here.
Create Blob Storage
To do this you can either click the burger button then 'create a resource', click 'create service', or click the 'Add' button from within the Resource Group.
Then in the 'Search the Marketplace' box type 'Storage Account' and choose the first result with the same name, then click 'create' on the next screen.
On the next screen choose your subscription and then the Resource Group created earlier.
Fill out the fields with your preferences, being sure to choose 'Hot' for the 'Blob access tier' question.

Once finished click 'Go to resource' and then click the 'Containers' button on the dashboard. On the next screen click the '+ container' button on the top menu. On the blade which opens enter a name of 'media' and change the public access level to 'Blob (anonymous read access for blobs only), and finally click create.
For the rest of this configuration I recommend reading the documentation on the Umbraco website, as you will be required to make changes to your project and install some NuGet packages to complete the setup.
Step 2 - Configure Deployment
This is all the services created ready for our Umbraco website. Next is to create the Azure Dev Ops Build & Release Pipelines to get our code from our Source control and onto the Web App created earlier.
Step 2 will follow in January on Skrift as part of this 3-part series on Umbraco & Azure.
Step 3 - Final Web App Configurations
The final step is to configure the web app with Umbraco specific Azure configurations, adding a custom domain, configuring Let's Encrypt and joining all the dots to get the site running.
If you need any help with getting started with Azure please reach out on Twitter, and I will be happy to help where possible.