
AI-powered Algolia empowers the Builders with Search and Recommendation services to deliver world-class digital experiences. It is a cloud-based search platform that helps businesses deliver fast and relevant search results to their users. Algolia offers a range of search features, such as typo-tolerance, autocomplete, and faceting, which enable users to find what they are looking for quickly and easily.
One of the key benefits of Algolia Global Search is its speed. It is designed to deliver sub-second search results, regardless of the volume of data being searched. This is achieved through Algolia's distributed architecture, which allows search queries to be processed across multiple servers in parallel.
Find Out More About Algolia
Algolia is divided into two components: search execution and searching statistics. Your programmers will find it simpler to build and maintain a fantastic user search experience with the help of the implementation tools. Your business units can even directly address your changing business goals by analyzing the effects of those interactions and improving them thanks to advanced analytics tools.
Why Should You Use Algolia Search Instead of Examine?
- Algolia is a search-as-a-service API that focuses on providing the best experience for the end users. That means being fast and relevant, by returning the best results in a few milliseconds, even with limited input. On the other hand, Examine search has limitations in order to give out of the box features like Algolia.
- Algolia offers you a range of customizable search UI components out of the box. Federated search, search-as-you-type autocomplete, filters and facets, and Personalization and merchandising tools are instantly available, helping put you on the fastest path to building robust search. Apart from that it has Built-in analytics. While on other hand Examine requires lots of custom code in order to build search-as-you-type autocomplete, filters, and facets, Personalization, and merchandising tools are instantly available, helping put you on the fastest path to building robust search.
- For Algolia, It takes milliseconds to get your search results. while as compared to Algolia, Examine takes more time.
- Algolia provides Analytics about top search results, top searchers, and Search by Geo, searches without clicks, etc. Algolia has many built-in features that you can configure and integrate into your search implementation. All are available out of the box and don’t require any additional development. i.e. Typo-tolerance, Highlighting and snippeting, Faceting, Synonyms, Advanced language processing, Geo-awareness, Multiple sorting strategies, and so on... While on the other hand, Examine is not providing these OOB features.
Features of Algolia Include:
- Multiple language support
- Customized typing feature
- Snippets and highlights
- Faceting
- Synonyms
- Superior linguistic processing
- Geo-awareness
- Several methods of sorting
- Combining with duplication
- Personalization
For more detailed, please refer official documentation from here.
Let's start with the integration of Algolia in Umbraco.
Umbraco Back-Office Configuration
Some additional configuration properties are to be added in the Root node.
Algolia required below information in order to establish connection.
- Application ID
- API Key
- Index Name
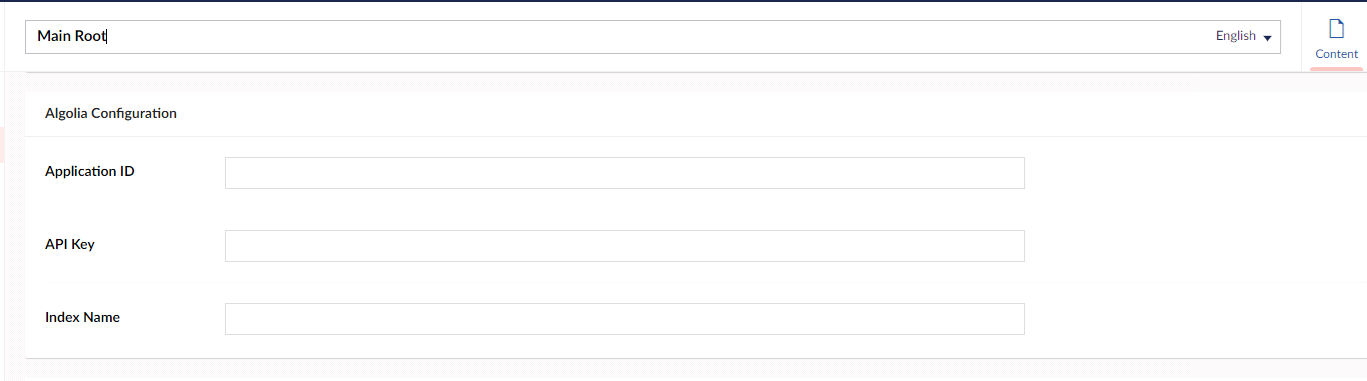
Algolia configuration in Umbraco backoffice
You can get the Application ID from the Algolia backend here.
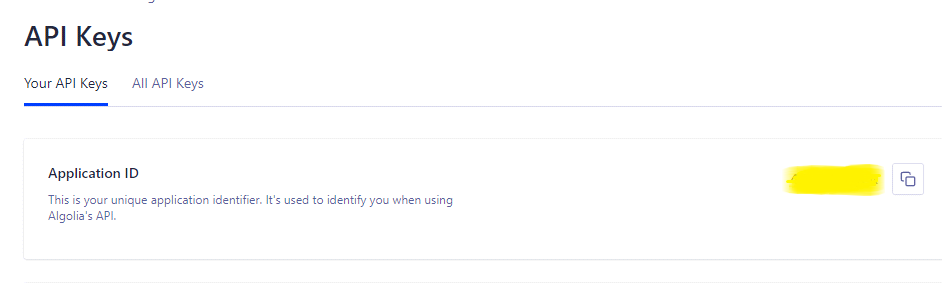
You can find the Application ID in your Algolia account.
You can also find the Admin API Key in the same panel.

To create an Index, go to Dashboard > Create a New Index. Multiple indexes are allowed in the same panel.
Indexing Your Site in Algolia
We have two approaches here in order to index your site data from Umbraco in Algolia.
- Direct data migration
- Custom data migration
1. Direct Data Migration
You can upload your data to Algolia using below 2 methods:
- In the Algolia dashboard, you can upload a JSON file.
- Using the Algolia Crawler. It automatically crawls your content directly from your site and indexes it into Algolia. The Algolia Crawler is available as an add-on.
2. Custom Data Migration in Algolia
To start with our custom data migration there are 2 steps we have to follow. First, we will configure the Algolia search in our backend. Then we will build the search UI on the front end.
Let's start with API Client.
Algolia's API Clients
Algolia's Crawler is an add-on product that requires you to purchase it. Using the API method is an alternative to achieve the same goal without spending money.
Let’s perform a few steps in order to migrate data from Umbraco to Algolia.
1. Install the Algolia.Search Package from Nuget Package Manager
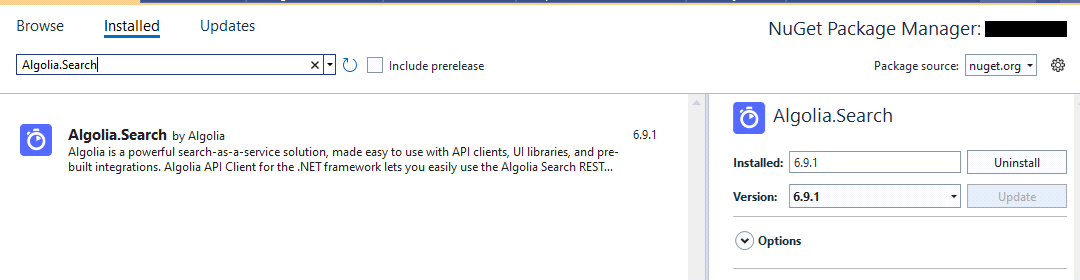
Algolia.Search on the Nuget Package Manager
You can find the documentation for Algolia here.
2. Set up the Configuration to Publish Data in Algolia
Create SearchConfiguration class using the same properties we have added in the Umbraco back office.
searchconfiguration.cs
public class SearchConfiguration
{
    public string  ApplicationId { get; set; }
    public string  APIKey { get; set; }
    public string  IndexName  { get; set;}
}
3. Create a new component with the name ContentComponent, which should be inherited from IComponent
ContentComponent.cs
public class ContentComponent : IComponent
{
    private IUmbracoContextFactory _umbracoContext;
    private readonly IVariationContextAccessor _variationContextAccessor;
    public void Initialize()
    {
        ContentService.Published += ContentService_Published;
        ContentService.Unpublished += ContentServiceOnUnpublished;
        ContentService.Deleted += ContentServiceOnDeleted;
        ContentService.Trashed += ContentService_Trashed;
    }

 public ContentComponent(IUmbracoContextFactory umbracoContext, IVariationContextAccessor variationContextAccessor)
    {
        _umbracoContext = umbracoContext;
        _variationContextAccessor = variationContextAccessor;
    }
    public void Terminate()
    {
    }
    private void ContentService_Published(IContentService sender, ContentPublishedEventArgs e)
    {
        PublishedUnpublishedDeleteContentService(e.PublishedEntities, "published");
    }
    private void ContentServiceOnUnpublished(IContentService sender, PublishEventArgs e)
    {
        PublishedUnpublishedDeleteContentService(e.PublishedEntities, "unpublished");
    }
    private void ContentServiceOnDeleted(IContentService sender, DeleteEventArgs e)
    {
        PublishedUnpublishedDeleteContentService(e.DeletedEntities, "deleted");
    }
    private void ContentService_Trashed(IContentService sender, MoveEventArgs e)
    {
        // Method intentionally left empty.
    }
}
Use the below methods to perform an action in order to publish data in Algolia.
contentservicemethods.cs
ContentService_Published
ContentServiceOnUnpublished
ContentServiceOnDeleted
ContentService_Trashed
Once a publish/unpublish/delete/trashed triggers from the backoffice the below method will be called to perform add/remove/update content in Algolia.
PublishedUnpublishedDeleteContentService.cs
private void PublishedUnpublishedDeleteContentService(IEnumerable PublishedEntities, string type)
{
    using (UmbracoContextReference contextReference = _umbracoContext.EnsureUmbracoContext())
    {
        UmbracoContext context = contextReference.UmbracoContext;
        foreach (var entity in PublishedEntities)
        {
            var cultures = entity.AvailableCultures;
            if (type == "published")
            {
                cultures = cultures.Where(x => entity.WasPropertyDirty(ContentBase.ChangeTrackingPrefix.ChangedCulture + x));
                if (!cultures.Any())
                {
                    cultures = entity.AvailableCultures.Where(x => entity.WasPropertyDirty(ContentBase.ChangeTrackingPrefix.UnpublishedCulture + x));
                    type = "unpublished";
                }
            }


            foreach (string cult in cultures)
            {
                _variationContextAccessor.VariationContext = new VariationContext(cult);
                var content = context.Content.GetById(entity.Id);
                IPublishedContent root = content.Root();
                var cnfg = new Configuration(root.SearchSetting());
                if (type == "published")
                {
                    if (content.Value("stopCrawling"))
                        cnfg.DeleteObject(content);
                    else
                        cnfg.SaveObject(content);
                }
                else
                    cnfg.DeleteObject(content);
            }
        }
    }
}
If we have a multilingual site in Umbraco, we can handle it by creating a new Index name in Algolia and we can manage operations accordingly.
4. Create a Class With a Few Methods to Post and Remove Data in Algolia Using the Rest API.
Configuration.cs
public class Configuration
    {
        private readonly SearchClient client;
        private readonly SearchIndex index;
        public Configuration (SearchConfiguration searchConfiguration)
        {
            client = new SearchClient(searchConfiguration.ApplicationId, searchConfiguration.APIKey);
            index = client.InitIndex(searchConfiguration.IndexName);
        }
        public void SaveObject(IPublishedContent publishedContent)
        {
            var content = publishedContent.BasicPageContent();
            if (content != null && content.Count() > 0)
            {
                foreach (var _cntnt in content)
                {
                    index.SaveObject(_cntnt);
                }
            }
        }
        public void DeleteObject(IPublishedContent publishedContent)
        {

            var items = publishedContent.GetPageContentToDelete();
            if (items != null && items.Count() > 0)
                foreach (var item in items)
                    index.DeleteObject(item);
        }
    }
Once step 3 executes, we need to call the Save/Delete function based on our operation needs.
- Content publish event will create data in Algolia using the SaveObject method.
- Content unpublished/Delete/Trashed will remove data from Algolia by calling DeleteObject.
So far we have achieved one way to publish Umbraco content to Algolia using one of the above methods. Now it’s time to get search results in milliseconds and it's the Algolia widget that will give us the desired results. Let’s talk about widget integration.
Widget Integration (Building the Search UI)
Let’s perform few steps to integrate the widget into a HTML Page.
1. Install instantsearch.js in the Header
InstantSearch.js is a vanilla JavaScript library that lets you create an instant search results experience using Algolia’s search API.
<script src="https://cdn.jsdelivr.net/npm/algoliasearch@4.14.2/dist/algoliasearch-lite.umd.js" integrity="sha256-dImjLPUsG/6p3+i7gVKBiDM8EemJAhQ0VvkRK2pVsQY=" crossorigin="anonymous"></script>
<script src="https://cdn.jsdelivr.net/npm/instantsearch.js@4.49.1/dist/instantsearch.production.min.js" integrity="sha256-3s8yn/IU/hV+UjoqczP+9xDS1VXIpMf3QYRUi9XoG0Y=" crossorigin="anonymous"></script>
2. In the Master Template or _layout Page Declare searchClient
To proceed with further actions in order to get search results, let’s declare searchClient which required to pass ApplicationId & ApiKey in Algoliasearch() and its js function being called from algoliasearch-lite.umd.js.
from SearchClient we want results from a particular index. So, let’s pass the index in the instantsearch function.
<script>
const searchClient = algoliasearch(
            '@home.ApplicationID',
            '@home.APikey'
        );
const search = instantsearch({
            indexName: @home.IndexName,
            searchClient,
        });
        search.addWidgets([
            instantsearch.widgets.searchBox({
                container: '#searchbox',
            }),
            instantsearch.widgets.hits({
                container: '#hits',
            })
        ]);
        search.start();
</script>
3. Create an HTML Element to Show the Results
To show results we need to make an HTML structure at the desired place on the page.
<div class="form-inline hide-tab">
	<div id="searchbox" class="search-input" data-placeholder="@Umbraco.GetDictionaryValue("Search", "Search")"></div>
	<div id="hits"></div>
</div>
To make search autocomplete, you can follow this guide.
4. Let's Check How it Looks on the Front End
Now, as the widget is added to the header search box will show at top of the page. The below example shows an autocomplete search result. And the result will be populated in milliseconds once the user starts typing.
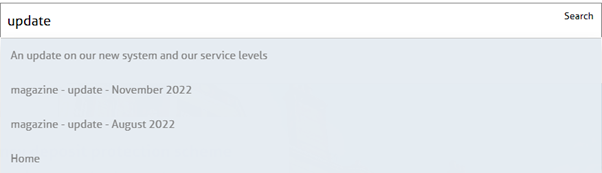
Autocomplete search result
Here's an example of a normal search without autocomplete. It will load data once the actual click event is triggered. We can decorate the search result as per our needs based on the JSON search result response. And you will have the result below.
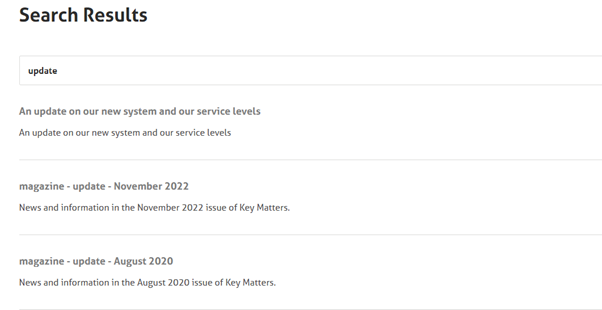
Search result
Insights and Analytics
Building an outstanding search is about its purification & how users run around with it. Algolia’s analytics give constant and reliable feedback. This is often crucial to understanding whether or not your search resolution is achieving your goals. Algolia provides such feedback by capturing user activity and providing you with the flexibility to trace click and conversion events, perform A/B testing, and alter connections.
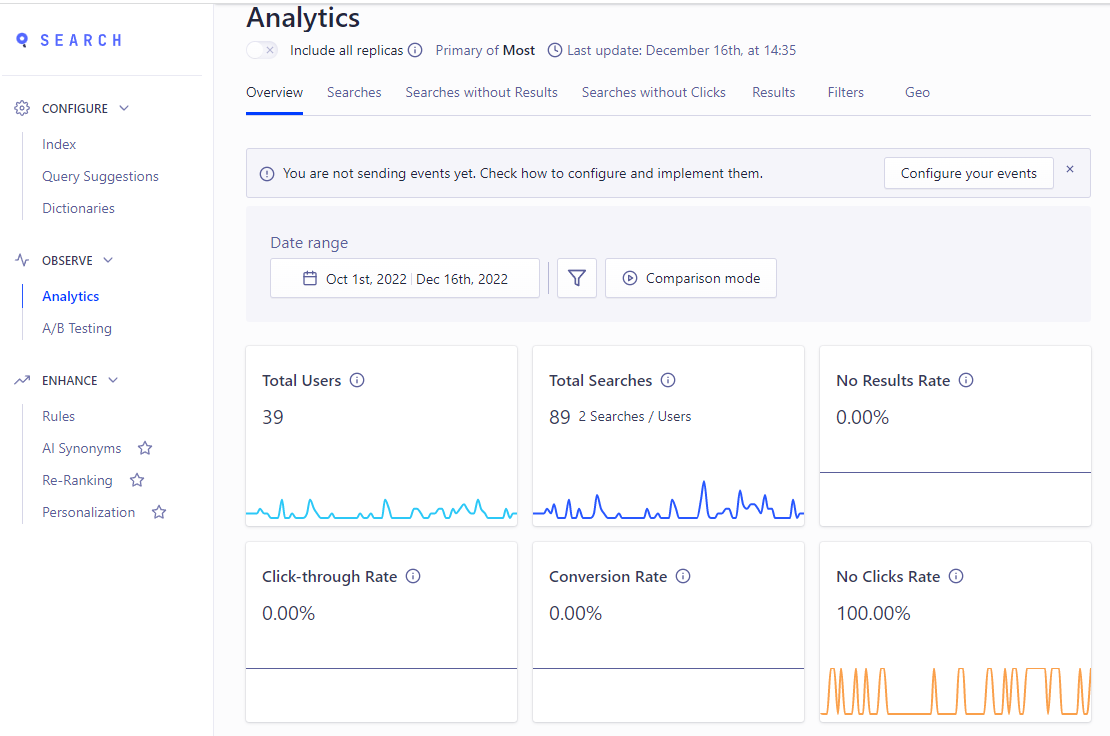
The Analytics Dashboard on Algolia
You can visit Algolia's documentation on analytic metrics and reports for more information on this topic.
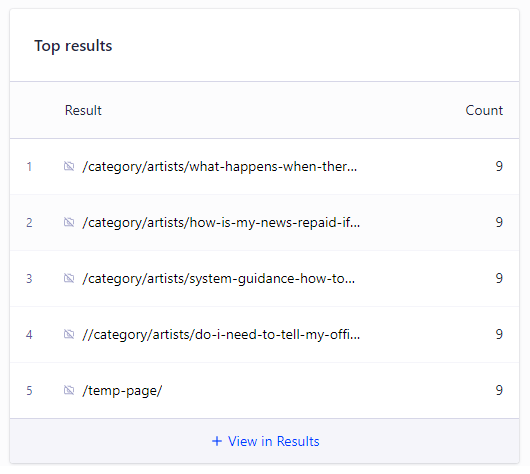
Example top search result metrics in Algolia
To Wrap Up
Algolia Global Search is used by a wide range of businesses, from small start-ups to large enterprises, across a variety of industries, including e-commerce, media, and travel. Its customers include Twitch, Under Armour, and Lacoste.
Overall, Algolia Global Search is a powerful search platform that can help businesses improve the search experience for their users, resulting in increased engagement, conversion rates, and customer satisfaction.