
Since version 8.7 Umbraco has included a new editor type called the Block List Editor. Designed as a replacement for things like Nested Content, it’s a very flexible system that lets you define PublishedElements that can be used to build blocks of content or things that you want to display on a page.
I’ve seen it used a LOT on sites as a flexible page builder that allows editors to construct pages out of sets of elements, such as titles, lists, blocks of text, images etc. Allowing the user to be creative with the page layout, but not so creative that they completely break everything or violate the site style guidelines.
The only thing is, is that in it’s default state, sometimes the block editor isn’t the most user-friendly editing experience for the poor content editors. In this article I’m going to show you how you can easily customise your Block Lists to make them more user friendly for you editors!
NOTE: Umbraco 8.14 was released while I was writing this article and the new media picker may require you to tweak some of the code examples that use the pickers. But fear not, you can download an example repo with the code in for you to play around with at the end of the article!
The Set Up
I created a new Umbraco V8 project (8.13.1 at the time of writing), set it up to use SQL CE and installed the basic starter site. I’m not going to go through how I set up my example block list, as there are plenty of excellent articles out there already about that, for example Umbraco/Microsoft MVP Poornima Nayar’s excellent introduction to the block list.
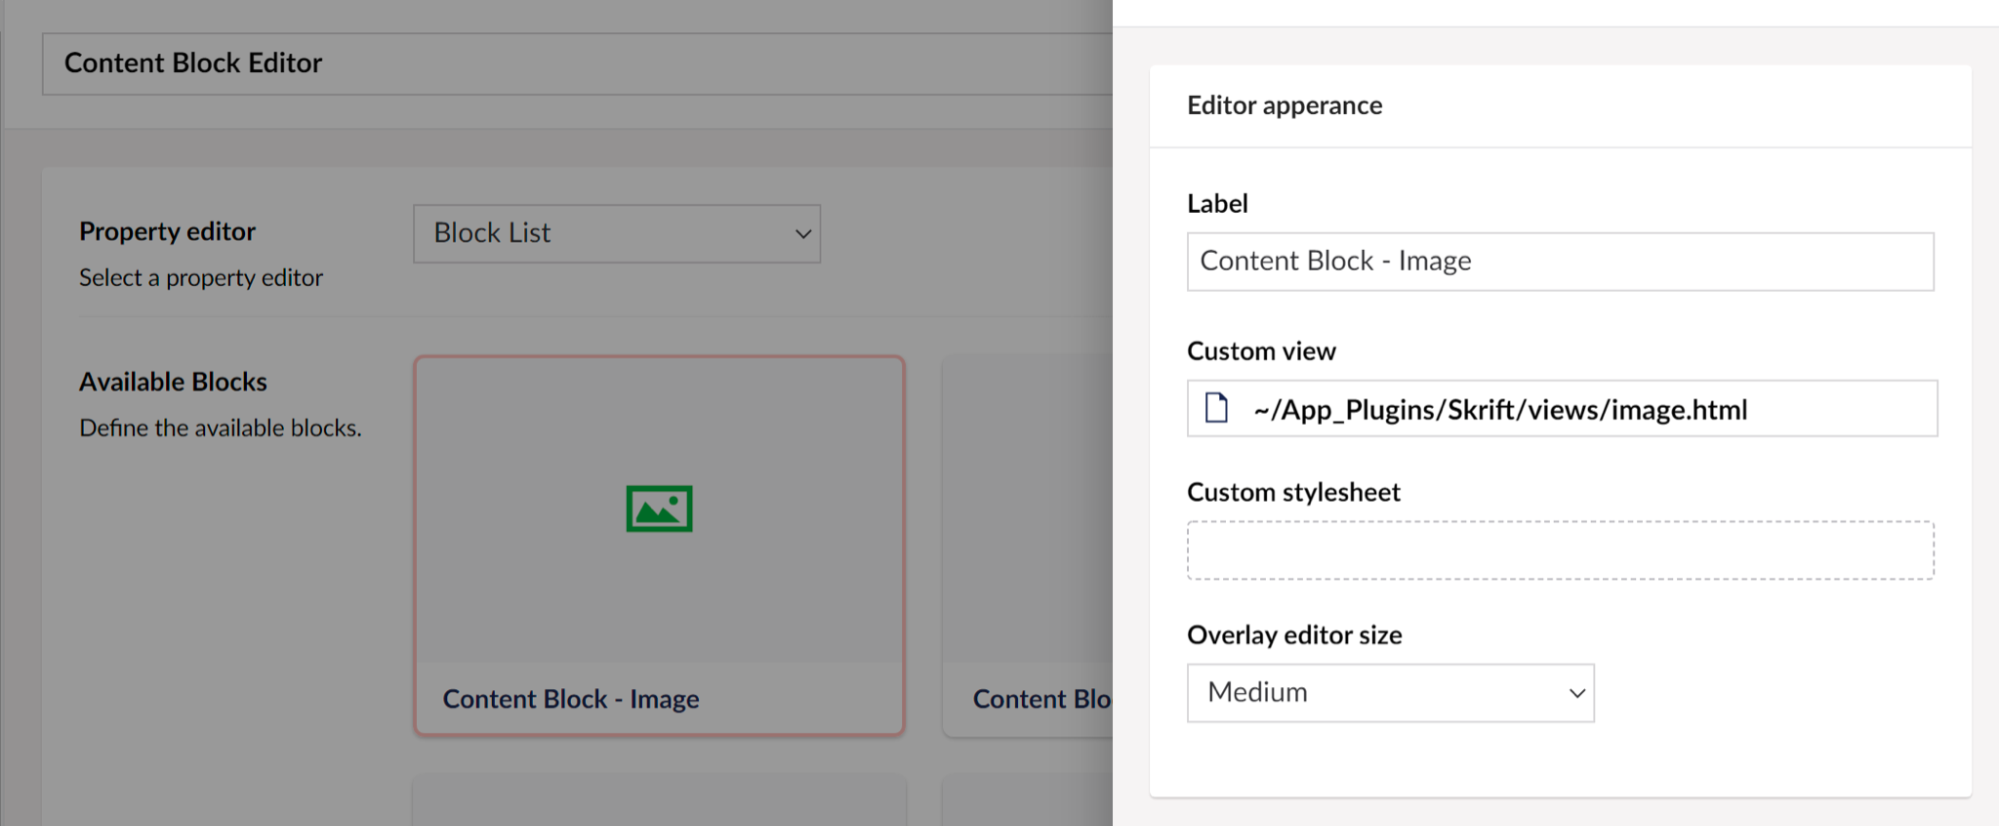
In my site, I’ve created a very simple block list editor, and swapped out the grid editor for the content pages on the site. Here’s a quick screenshot of my editor setup so far:
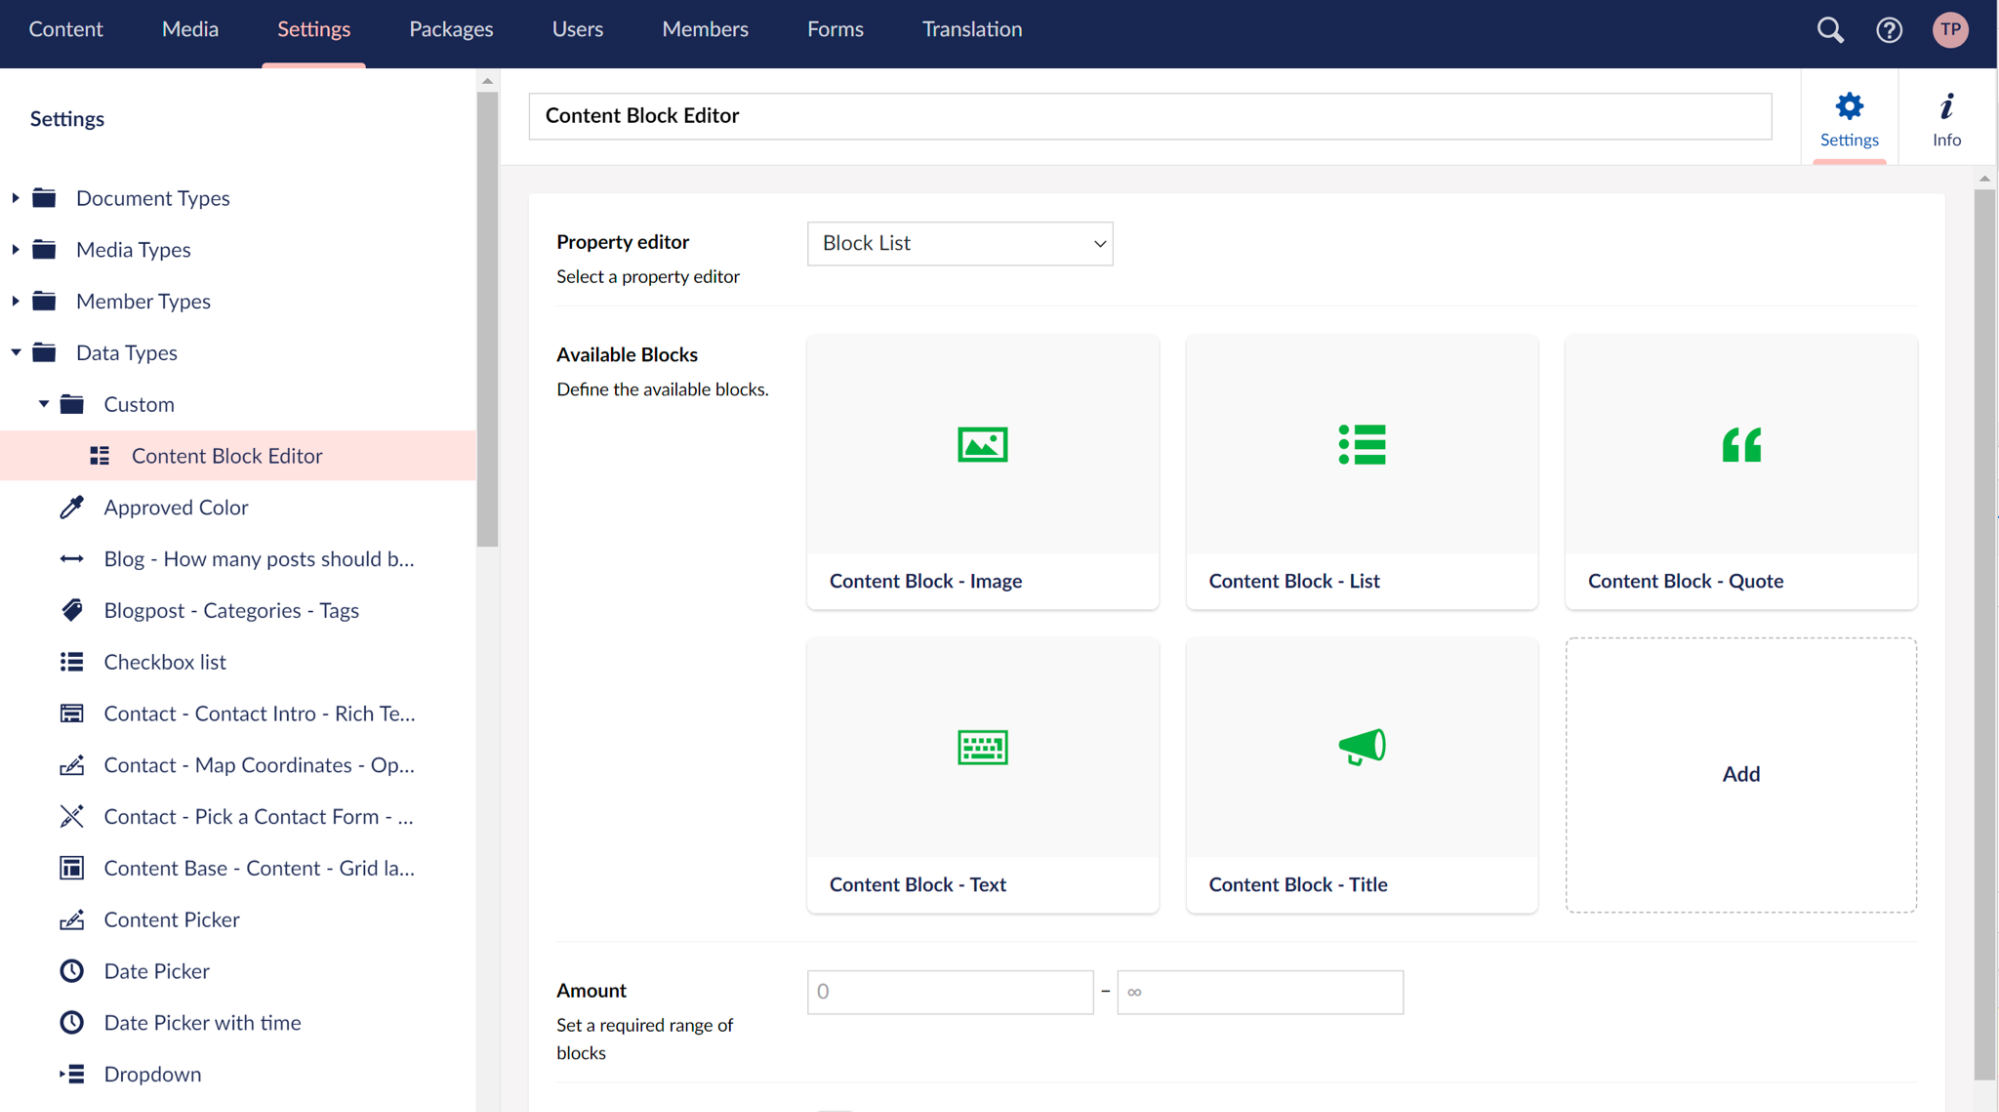
The block types I’ve added are:
- Image - allows you to select an image from the media library and set a caption for the image
- List - allows you to enter simple text strings to be displayed as a list of some kind
- Quote - allows you to display a quote with an attribution
- Text - allows you to enter blocks of very simple rich text, that allow only basic formatting and the inserting of links
- Title - add a subheading to the page
Most of these are fairly straightforward examples of content blocks, in a real world site, you might have many more block types with much more complexity, like call to action blocks, carousels (boo, hiss), image galleries or forms.
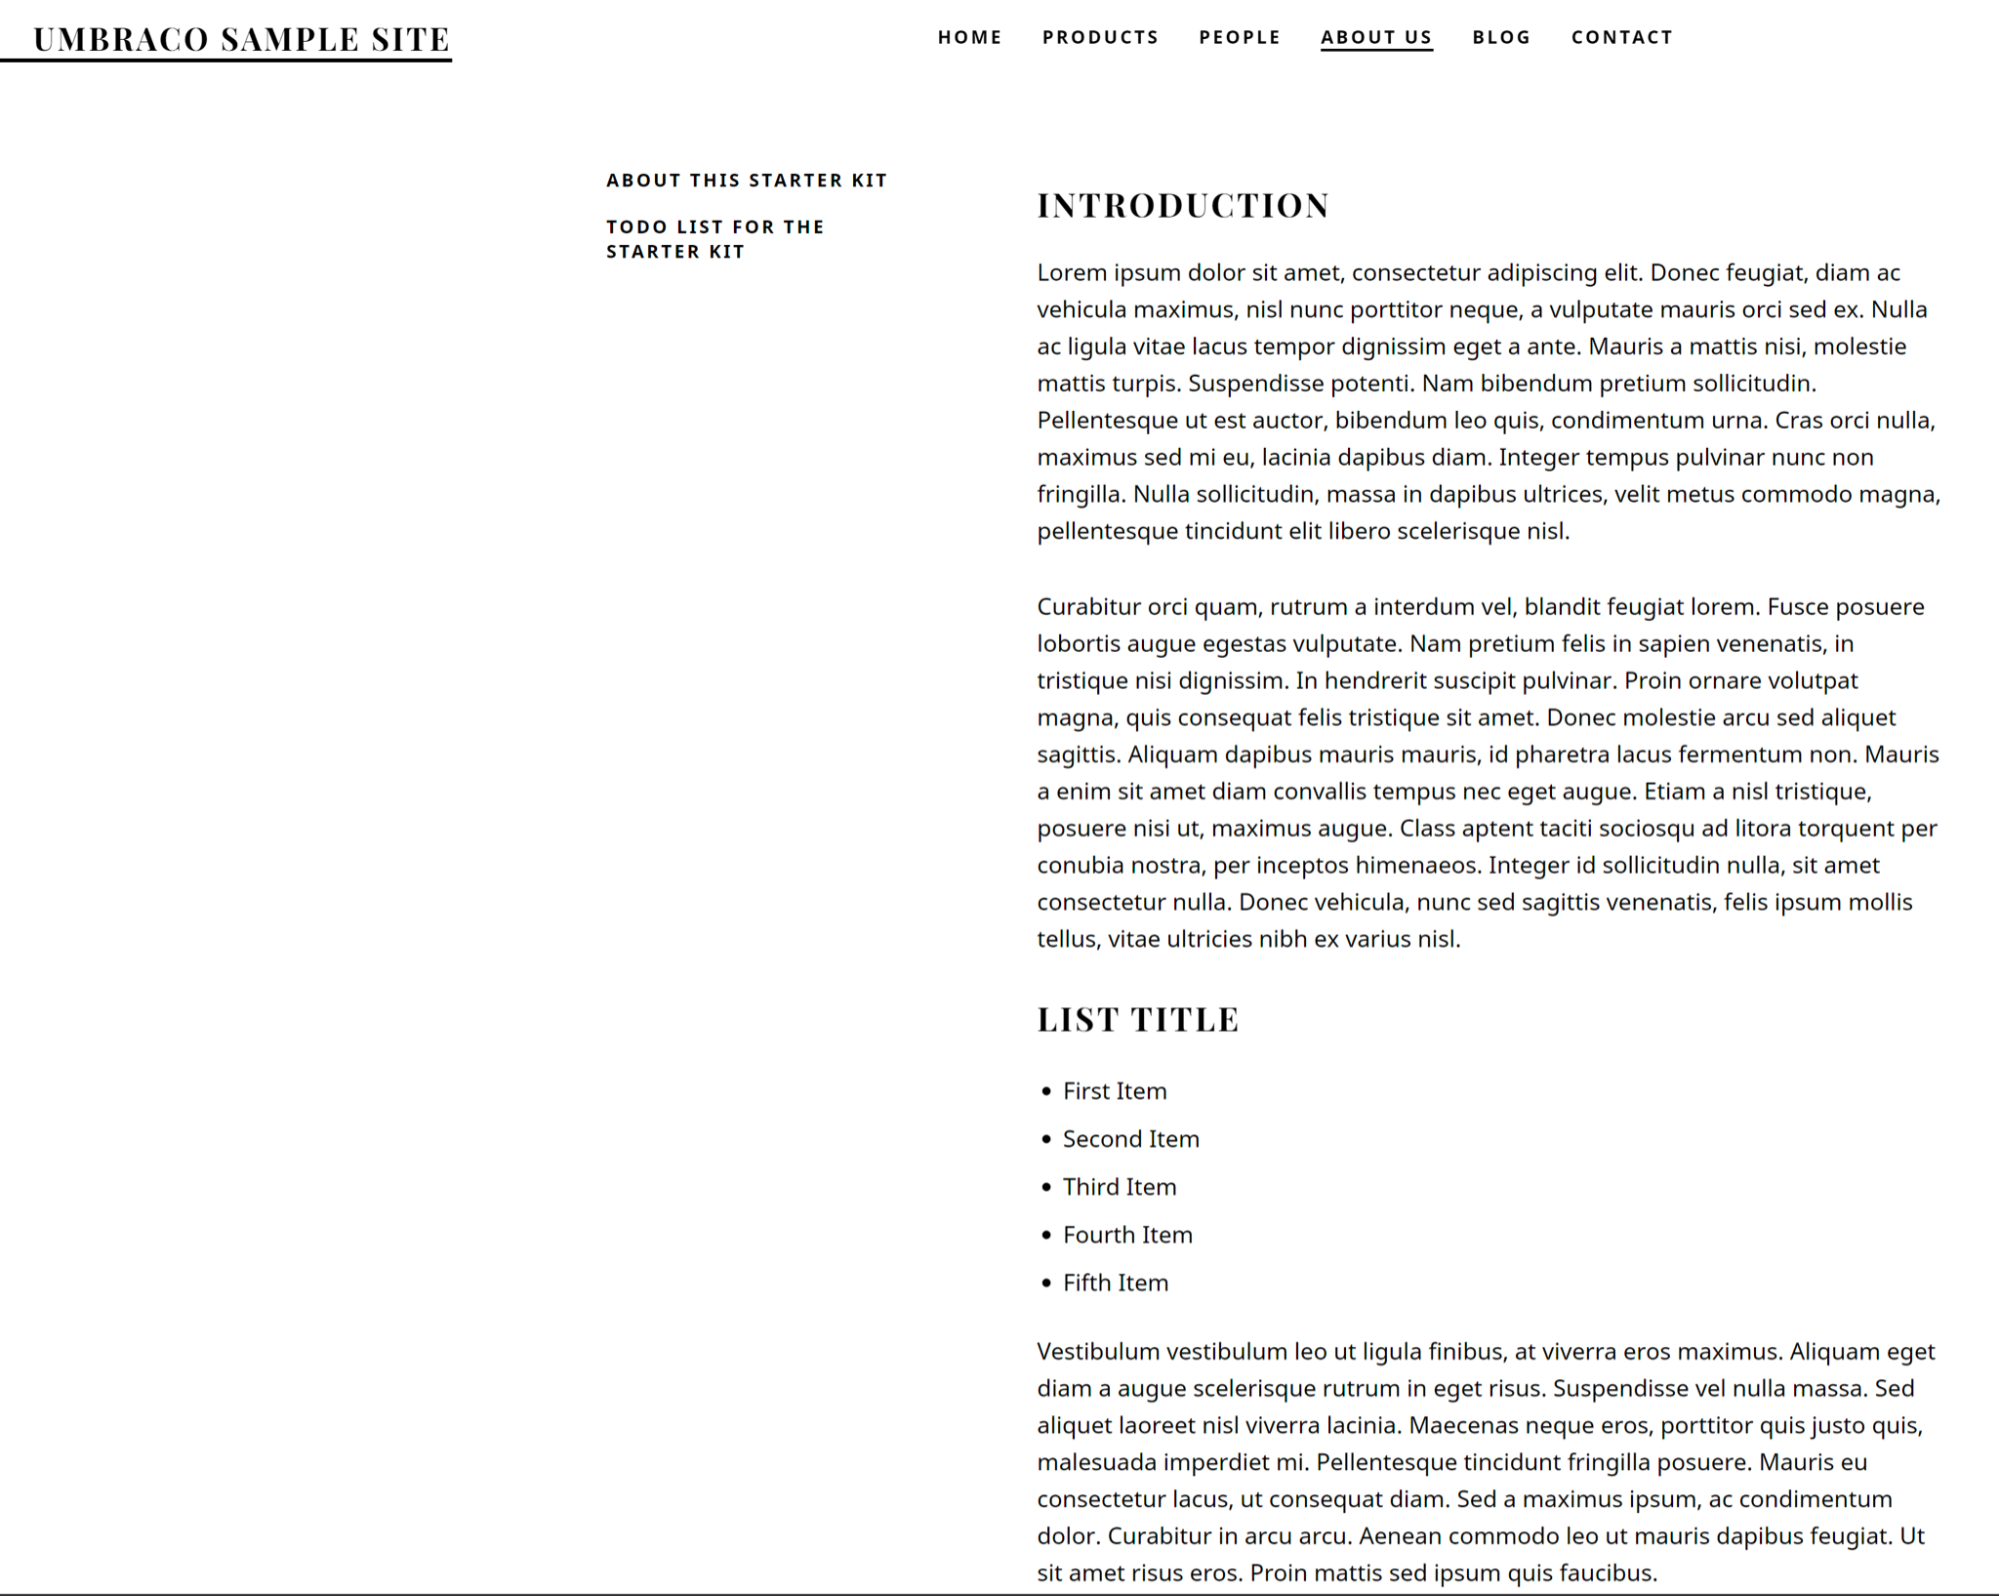
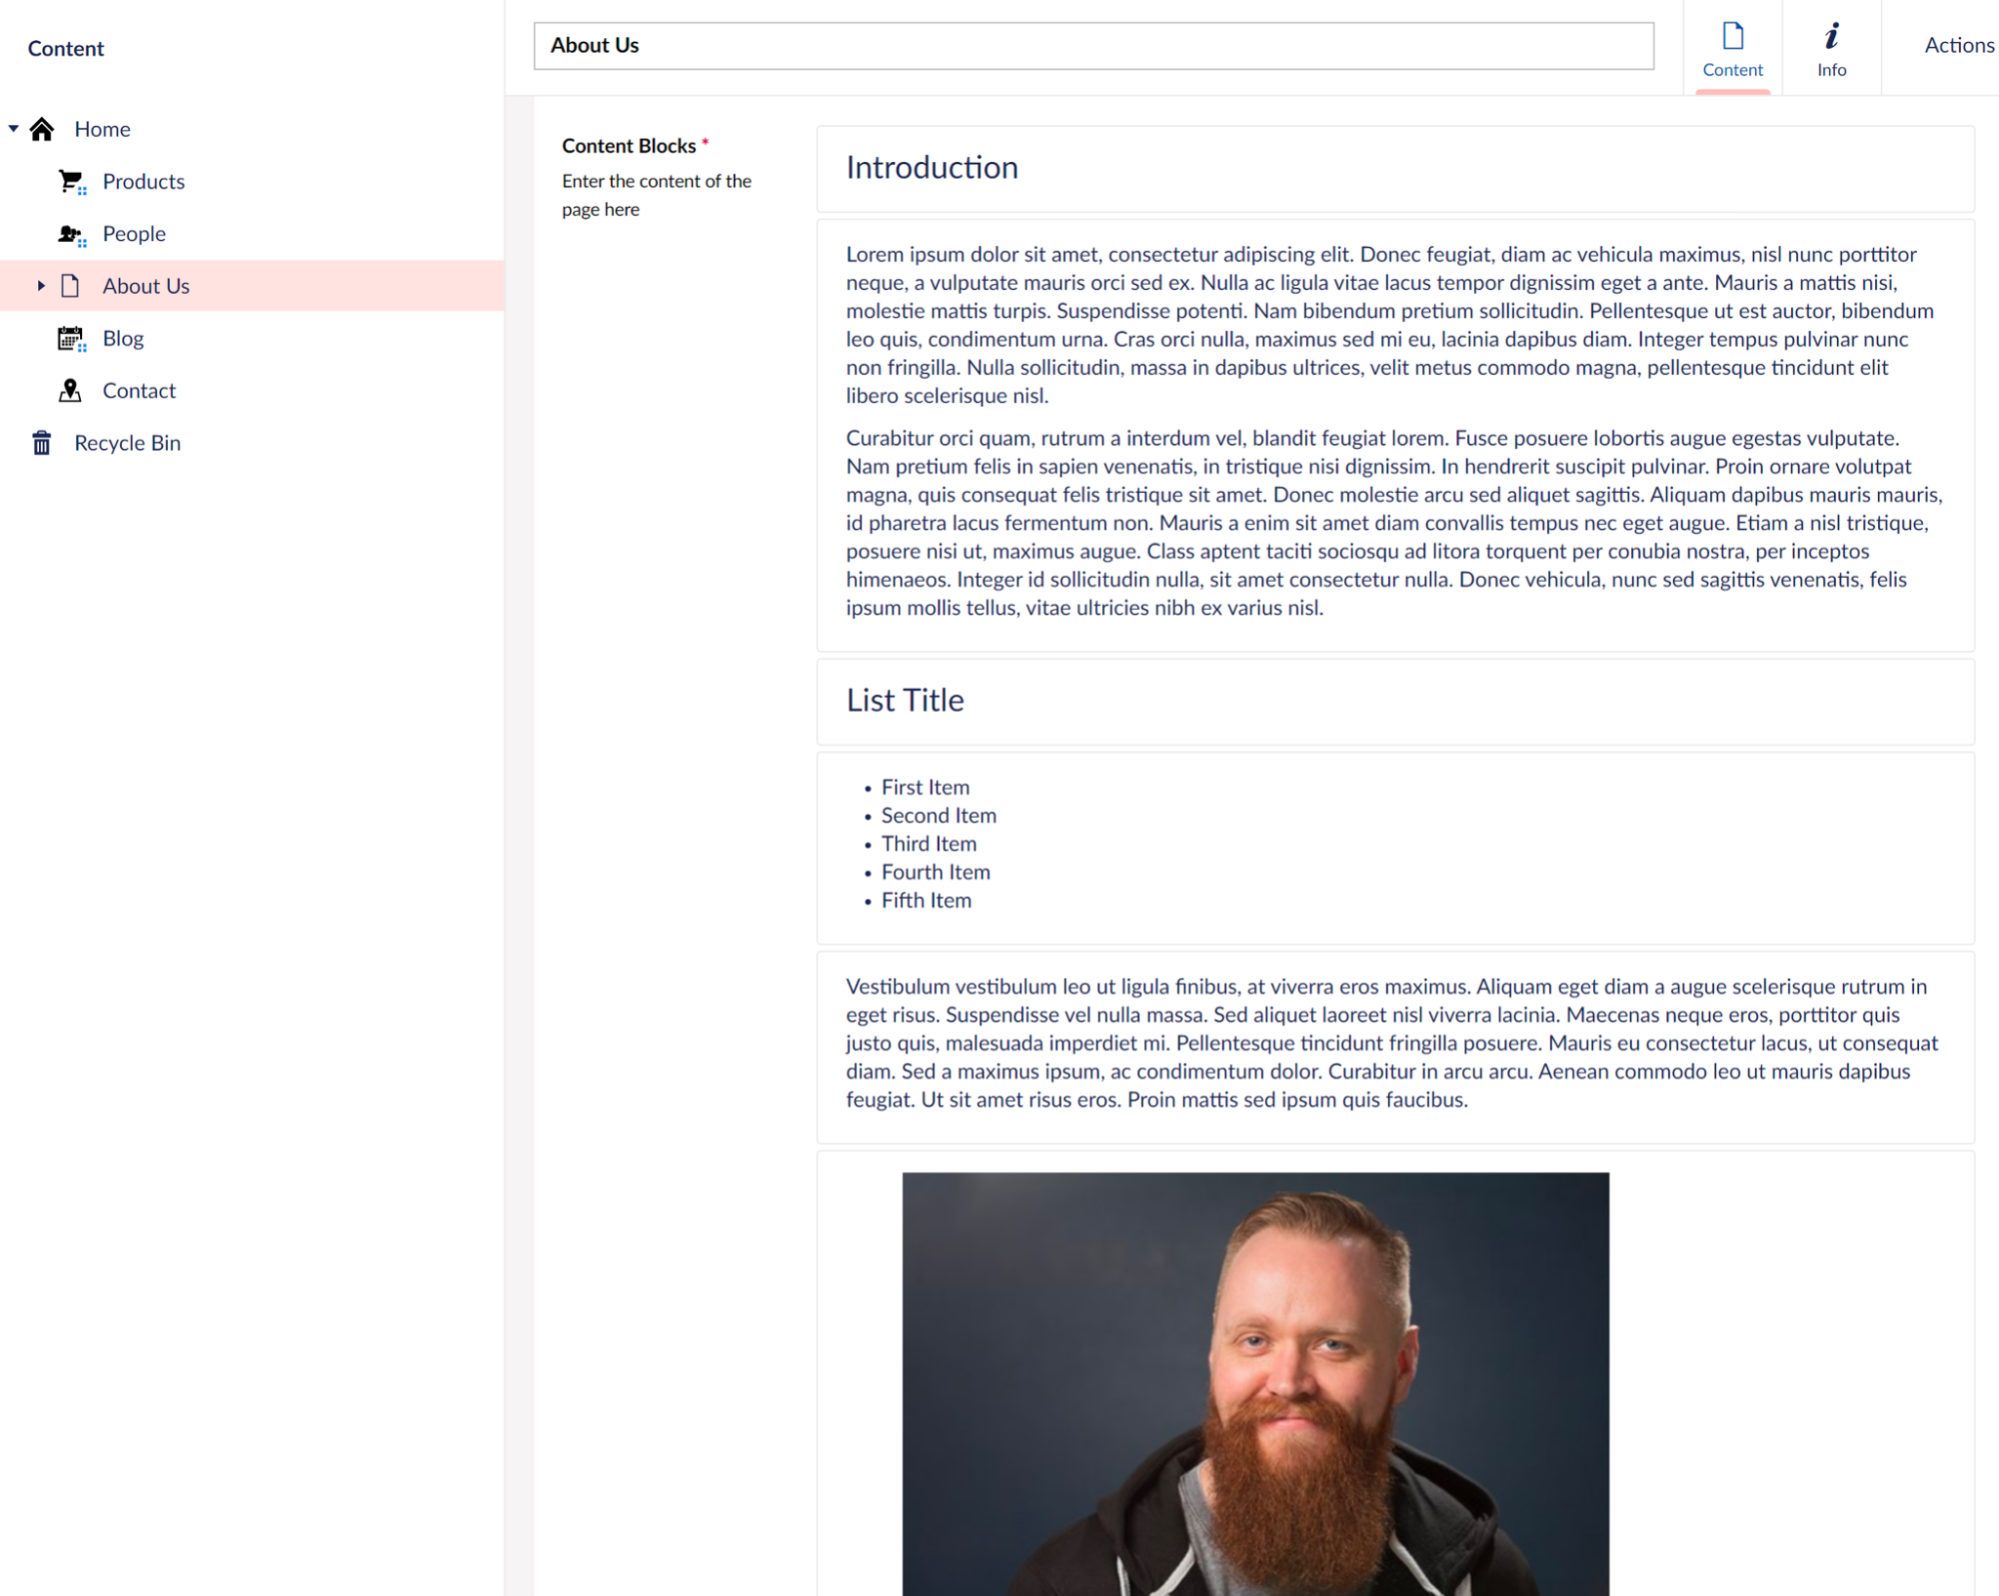
I’ve updated the front end pages to render my shiny new grid, here’s my example page with examples of the blocks on:
But now, this is where it’s not so great for the editor. If we look at the default view for the block list items, it’s not that user friendly. We have a list of names of the block type, but we can’t see what’s in the individual blocks.
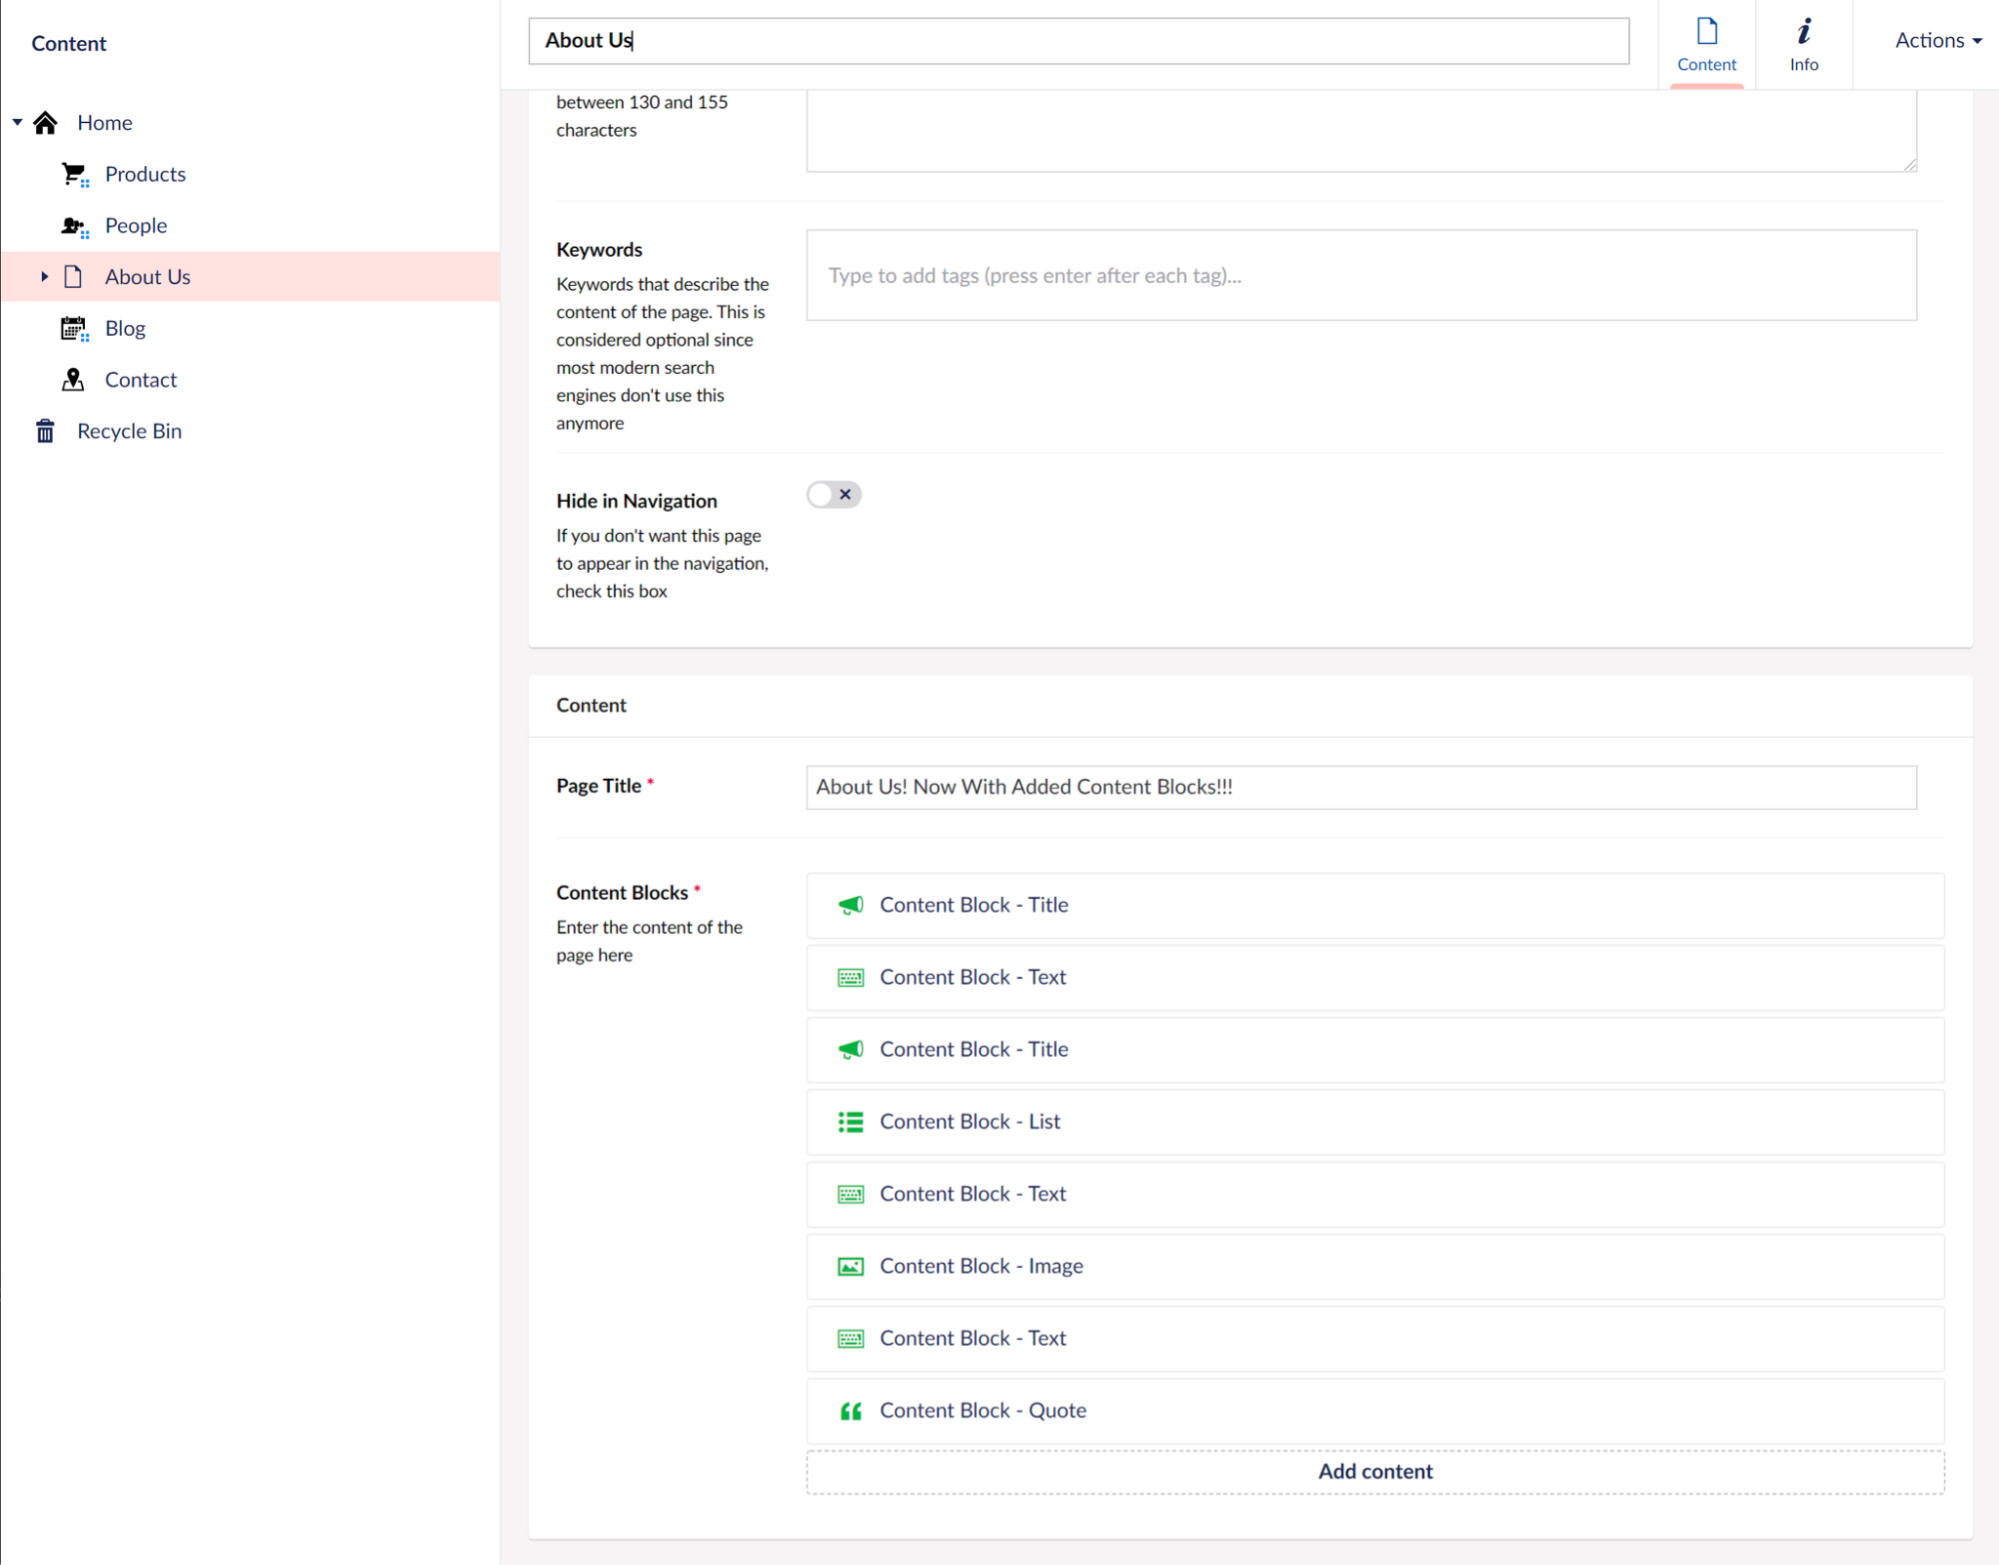
Let's say the editor has to fix some typos on the page, but there are a LOT of blocks. How do they know which is the right block to edit? They don’t. They have to click each block and open it to see if it’s the right one or not, which will get very frustrating for the editors if they need to make a lot of changes.
So, what can we do to make an experience that will make the editor’s lives easier? We COULD customise the labels of the blocks, but that only really works for very simple blocks, and still isn’t great for things like blocks with rich text editors in. Well fortunately the Block List allows you to create your own custom views for each of the blocks that you define in the CMS! I’ll show you how to set them up for each of our block types so that instead of just the name of the block, the editor can see a simple preview of what the block looks like on the front end!
Create the Files We'll Need
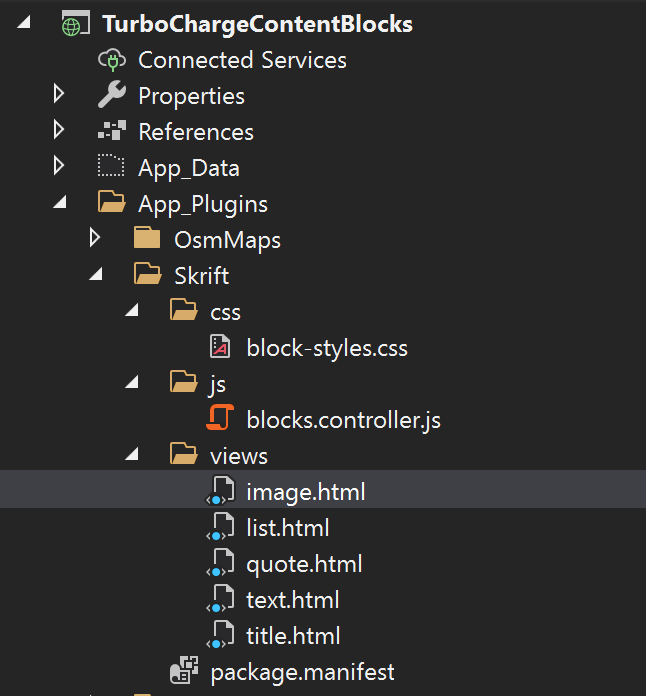
First up, we’re going to create some files in the App_Plugins folder. We’re going to need an HTML view file for each of the blocks we have, a custom CSS file for any styling we want to add (you can add a custom stylesheet for each individual block, but I prefer one sheet with everything in), a custom JS file for any custom logic we might need (more on that later) and a package manifest to load in the CSS and JS.
Here’s a screenshot of the files I’ve created:
Let’s start with the easy bit, the package manifest. All we’re going to do is tell it to load our custom CSS and JS:
{
  "javascript": [
    "~/App_Plugins/Skrift/js/blocks.controller.js"
  ],
  "css": [
    "~/App_Plugins/Skrift/css/block-styles.css"
  ]
}
That was nice and easy! Next up, let’s create the view for the title block, as that’s the easiest. To do that, open the title view and paste in the following code:
<button type="button" ng-click="block.edit()" class="btn-reset umb-outline blockelement-labelblock-editor blockelement__draggable-element">
    <div class="content-block-title">
        <h2 ng-bind-html="block.data.titleText"></h2>
    </div>
</button>
Let’s take a look at what we’ve added! The outer button is what renders the block in the editor, and the extra classes allow it to be re-ordered with drag and drop. The ng-click directive calls the Umbraco code to open the editor for the block as an overlay. Inside the button we have a div with a class that allows me to specifically target this block in my custom stylesheet, and inside that is a H2 element, bound with angular to the “Title Text” property of my data block.
Your custom views will have access to the “block” object, which should contain everything you need to bind to your custom view and display. You can also access the settings for the block as well if you need to.
Here is the code for the rest of the block types:
List:
<button type="button" ng-click="block.edit()" class="btn-reset umb-outline blockelement-labelblock-editor blockelement__draggable-element">
    <div class="content-block-list">
        <ul>
            <li ng-repeat="item in block.data.listItems" ng-bind-html="item.value"></li>
        </ul>
    </div>
</button>
Quote:
<button type="button" ng-click="block.edit()" class="btn-reset umb-outline blockelement-labelblock-editor blockelement__draggable-element">
    <div class="content-block-quote">
        <figure>
            <blockquote ng-bind-html="block.data.quote"></blockquote>
            <figcaption ng-bind="block.data.attribution"></figcaption>
        </figure>
    </div>
</button>
Text:
<button type="button" ng-click="block.edit()" class="btn-reset umb-outline blockelement-labelblock-editor blockelement__draggable-element">
    <div class="content-block-text" ng-bind-html="block.data.text">
    </div>
</button>
But wait, what about images? Now this block type is slightly more complex, as the block object only has the UUID for the selected media, which won’t mean much to the editor. We’re going to need to turn that into the image path! To do that, we’re going to need to create a custom controller for the view we create, so we can use teh Umbraco JS services to get the image.
First up, here’s the code for the view, notice that it specifies a controller.
<button type="button" ng-click="block.edit()" class="btn-reset umb-outline blockelement-labelblock-editor blockelement__draggable-element">
    <div ng-controller="imageBlockController" class="content-block-image">
        <div ng-if="imageUrl">
            <figure>
                <img ng-src="{{imageUrl}}" />
                <figcaption ng-bind-html="block.data.imageCaption"></figcaption>
            </figure>
        </div>
        <div ng-if="!imageUrl">[no image selected]</div>
    </div>
</button>
Now we need to add our controller to the JS file we created earlier. Credit for this goes to Lotte Pitcher, who figured out how to get this working nicely on a project we worked on together! The controller gets the UDI if it’s set and then loads in the image URl using the mediaResource in the back office.
angular.module("umbraco").controller("imageBlockController", function ($scope, mediaResource) {

    $scope.$watch(
        function () { return $scope.block.data.image; },
        function () {
            var imageUdi = $scope.block.data.image;
            if (imageUdi) {
                mediaResource.getById(imageUdi)
                    .then(function (media) {
                        $scope.imageUrl = media.mediaLink + "?width=500&upscale=false";
                    });
            } else {
                $scope.imageUrl = "";
            }
        }
    );
});
Now we’ve created everything we need for our nice editor previews!
Wiring It In
Wiring all this in is pretty straightforward. Go to the data type for your block editor and for each block, you’ll see an option to define a custom view. Point each of your blocks at the correct view and save your data type. That should be it, you are now good to go!
Lets go and edit our about us page again and see what the editor sees now! Hopefully we should see nice previews of the various block types in the CMS, so now it’s really simple now for the editor to see where copy, images, etc. are and to know where to click to edit them.
They can still drag and drop and add new blocks, and the block previews will update when you close the property editing overlay that appears when you click on a block.
You can add styles to your custom stylesheets if you want (I’ve added some on mine to tidy up padding and make the titles slightly smaller). You might want to style the blocks so they look almost identical to how they look on the front end, but for this example, I’ve kept it pretty simple!
And now your editors have a MUCH nicer experience working with the Block List!
Conclusion
Although these are fairly simple examples, you can use these as a starting point for more complex blocks in your own site. For REALLY complex or interactive blocks, I’d generally just make sure the preview shows how it looks in its default state rather than being fully functional!
It doesn’t take a lot of work to set all this up, and once you’ve done it, you can probably re-use some of it across projects as well. Your editors will definitely thank you for it too!
I’ve uploaded a git repo with the code in for you to play around with if you like, you can find it here: https://github.com/Attackmonkey/Turbo-Charge-Your-Content-Blocks
If you want to find out more about the content blocks and customising them, you can check out the official docs here: https://our.umbraco.com/Documentation/Fundamentals/Backoffice/property-editors/Built-in-Property-Editors/Block-List-Editor/
I hope you found this useful, and it helps you to make awesome editing experiences for your content editors!