
Developers on open source projects often have a lot of other commitments, and can sometimes take a while to review and accept pull requests. This can be especially frustrating when the project you are working has a supporting library which requires a small change, or you want to try out a new feature in an as-yet unreleased version.
In the Javascript ecosystem, both yarn patch and the patch-package package provide mechanisms for managing local patches to referenced libraries locally. Unfortunately, as Nuget packages are distributed as binaries rather than sources, we have to use a slightly different approach.
In this series of articles, I'm going to walk you through how to go about using your own forked version of a library.
- Part 1: Setting up a Forked Library In Part 1, we'll start by forking the library and incorporating the projects as direct references.
- Part 2: Using a Local NuGet Repository In Part 2, we'll swap to re-building the libraries independantly and referencing them using a local nuget folder.
- Part 3: Resolving Library Compatibility Issues In Part 3, we'll look at how to resolve some of the build conflicts you might get when referencing pre-release versions of libraries.
Setting up A Forked Library
In this article, I'm going to walk you through how to go about using your own forked version of a library, incorporating the projects as direct references to help build the patches you need for your project.
For this example, I'm going to show how to bring the Examine package into my Umbraco website project so I can make local changes. To do this I need to complete the following steps:
- Creating a fork
- Building the library independently
- Incorporating Projects directly
- Building and tweaking the library
Creating the Fork
The first step is to create your own fork of the library. A fork is just a copy of the library's source history somewhere where you can add to it separately from the official history.
If your organization uses Azure DevOps or Bitbucket, you may want to store a copy alongside your project. Both source control systems offer an "Import Repository" function to clone a repo directly from GitHub, GitLab, or any other publicly accessible git url.
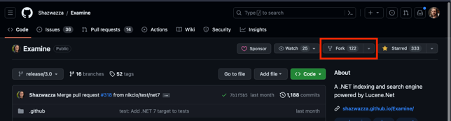
In my case, since I want to use my personal GitHub account and Examine is hosted on GitHub, I'll go to the library's homepage and click the "Fork" button.
GitHub tries to limit the amount of commits copied, so the default option is to limit your fork to the main branch only. If you want to try out a new beta release, uncheck the "copy the release/3.0 branch only" option.
Once you have created the fork or imported the repo to your organizations source control system, you need to clone the repo down to your machine and attempt to build it.
Building the Library Independently
Most libraries come with build instructions and a sample application or suite of tests you can run as part of the project, to ensure you have built the project correctly.
In the case of Examine the readme doesn't have build instructions in it, so we have to go hunting. The package is built using GitHub actions, so our first step is to look at the .github/workflows/build.yml file.
The file is broken up into two sections: the first tells GitHub when to trigger the build, and the second lists out all the steps to perform when the build runs.
name: Examine Build

on:
  workflow_dispatch:
  push:
    branches:
      - "master"
      - "dev"
      - "release/*"
    tags:
      - "v*"
  pull_request:
    branches:
      - "*"

jobs:
  build:
    runs-on: ubuntu-latest

    env:
      Solution_File: src/Examine.sln
      Test_Proj: src/Examine.Test/Examine.Test.csproj
      Configuration: Release

    steps:
      - name: Checkout
        uses: actions/checkout@v2
        with:
          fetch-depth: 0

      - name: Create copyright value
        run: |
          $Copyright = "Copyright " + [char]0x00A9 + " Shannon Deminick " + (Get-Date).year
          echo ("Copyright=" + $Copyright) >> $Env:GITHUB_ENV
        shell: pwsh

      - name: Setup .NET Core SDK 5.0.x
        uses: actions/setup-dotnet@v1.7.2
        with:
          dotnet-version: 5.0.x

      - name: Setup .NET SDK 6.0.x
        uses: actions/setup-dotnet@v2
        with:
          dotnet-version: 6.0.x

      - name: Install GitVersion
        uses: gittools/actions/gitversion/setup@v0.9.9
        with:
          versionSpec: "5.x"

      - name: Determine Version
        uses: gittools/actions/gitversion/execute@v0.9.9

      - name: Install dependencies
        run: dotnet restore ${{ env.Solution_File }}

      - name: Build
        run: dotnet build ${{ env.Solution_File }} --configuration ${{ env.Configuration }} --no-restore

      - name: Test
        run: dotnet test "${{ env.Test_Proj }}" --no-build --verbosity normal --results-directory ${{ github.workspace }}/_TestResults  --logger "trx;logfilename=tests.trx"

      - name: Upload test results
        uses: actions/upload-artifact@v2 # upload test results
        if: success() || failure() # run this step even if previous step failed
        with:
          name: examine-test-results
          path: ${{ github.workspace }}/_TestResults/tests.trx

      - name: Pack
        if: success()
        # This will do a rebuild
        run: |
          dotnet pack ${{ env.Solution_File }} \
            --configuration ${{ env.Configuration }} \
            --no-restore \
            -p:PackageVersion=${{ env.GitVersion_SemVer }} \
            -p:AssemblyVersion=${{ env.GitVersion_AssemblySemVer }} \
            -p:FileVersion=${{ env.GitVersion_AssemblySemFileVer }} \
            -p:InformationalVersion=${{ env.GitVersion_InformationalVersion }} \
            -p:ContinuousIntegrationBuild=true \
            -p:Copyright="${{ env.Copyright }}" \
            --output=${{ github.workspace }}/_NugetOutput

      - name: Upload artifacts
        uses: actions/upload-artifact@v2 # upload nuget
        if: success()
        with:
          name: examine-nuget-${{ env.GitVersion_SemVer }}
          path: ${{ github.workspace }}/_NugetOutput/*.*

      - name: Publish to GitHub Packages
        run: dotnet nuget push "${{ github.workspace }}/_NugetOutput/*.nupkg"  --api-key ${{ secrets.GITHUB_TOKEN }} --source "https://nuget.pkg.github.com/shazwazza/index.json"
        run: dotnet nuget push "${{ github.workspace }}/_NugetOutput/*.nupkg"  --api-key ${{ secrets.GITHUB_TOKEN }} --source "https://nuget.pkg.github.com/shazwazza/index.json"
The list of steps follows the standard pattern:
- Checkout repo
- Install dependencies
- Build solution
There are 2 steps that are of interest to us at this point:
- Determine Version
- Build
The key point to note about the "Determine Version" step is that the version number is being automatically determined by the Git history itself using GitVersion -- it's NOT coming from a properties or project file. This will be important later.
Next we can look at the "Build" step:
- name: Build
  run: dotnet build ${{ env.Solution_File }} --configuration ${{ env.Configuration }} --no-restore
We can see that it's referencing environment variables, and if we look further up, we'll see those defined:
env:
  Solution_File: src/Examine.sln
This confirms that all that we have to do to build the project, is to run dotnet build on the Examine.sln solution.
Incorporating as Project References
There are two approaches you can use at this point to create the references from your solution projects to the Examine projects:
-
Copy each project folder from the library into your git repo and reference them directly, as if they were a support library you had built for this solution.
Pros: Any changes to the files appear as changes in YOUR repo.
Cons: It's harder to keep up-to-date with changes to the source library. If you wish to contribute the changes back you need to duplicate them in your source library's fork.
Use Case: Adding solution specific patches or functionality.
-
Add a project reference that points directly to the copy of the cloned copy of the library you already built in the step above.
Pros: Makes it easy to contribute the changes back to the library and easy to try out different branches of the library's source code.
Cons: Any changes live in the library's repo, not your solutions.
Use Case: Testing during package development
For this solution I chose the first option, as I wanted to incorporate the changes in my git-repo and keep everything self-contained. The downside is that I had to replicate the changes in the cloned version later to contribute them back to the library.
Note: The examine projects use a Directory.Build.props file to extract common msbuild properties. If you copy the individual project folders without the file they will fail to compile in Visual Studio. Instead, create an "Examine" subdirectory inside your solution folder and copy the contents of the Examine "src" folder into it.
IMPORTANT: Use git commits to document your steps. Create a new branch and commit at the following times:
- After you've added the projects to the solution but BEFORE you try and compile anything
- Once you've got the imported projects to compile
- Once you've got the entire solution to compile
- Once you've fixed your problem
Making commits at these stages helps you identify which changes you should need to make over again or contribute back to the source library, and which ones were only to get the project to run inside your own solution.
Building as Imported Project
Once the projects are added try first to build those projects separately from your main solution.
Add the Project References (and Remove any direct NuGet references)
Once you've got the new projects building -- it's time to add them as project references to your solution.
In order to get the project to successfully load the new projects instead of the default NuGet ones I had to make two changes:
-
Add a reference to the "Examine" project to my startup project
-
Change the version number in the Directory.Build.props from 2.0.0 to 3.0.1.
The second change is needed because of the way that Examine does it's version numbering. Because it's using GitVersion to determine the version number at build time, the version that's committed into the Directory.Build.Props file is 2.0.0. If you don't change it to be the version that Umbraco is expecting, you will get a type load error message like this:
System.IO.FileLoadException: Could not load file or assembly
\'Examine.Core, Version=3.0.1.0, Culture=neutral, PublicKeyToken=null\'.
The located assembly\'s manifest definition does not match the assembly
reference.
Note: The assembly referenced here might be Examine.Core, Umbraco.Examine.Lucene, or one of your other projects that happens to also have an indirect reference to Examine. The issue is the same.
.Net loads our solution version into memory first because it's referenced directly. However, when we try to load the Umbraco assembly, the binding fails as 2.0.0 is less than the minimum required version as stated in the assembly manifest. Changing the version number on our project version to anything higher than 3.0.1 (the version referenced by the Umbraco assembly) allows the binding to succeed and the error disappears.
Running the Solution
Now we should be able to run the solution and calls to Examine will go to the versions in our project instead of the Release copies.
Summary
In this article, we've looked at how to:
- Create a fork of a library
- Reference it within your project directly to debug or extend it
In Part 2, we'll swap to re-building the libraries independently and referencing them using a local nuget folder.