
1. Installing LM Studio
- First, you'll need to download LMStudio. https://lmstudio.ai/ It is free, and supports multiple platforms, including Windows, Mac, and Linux.
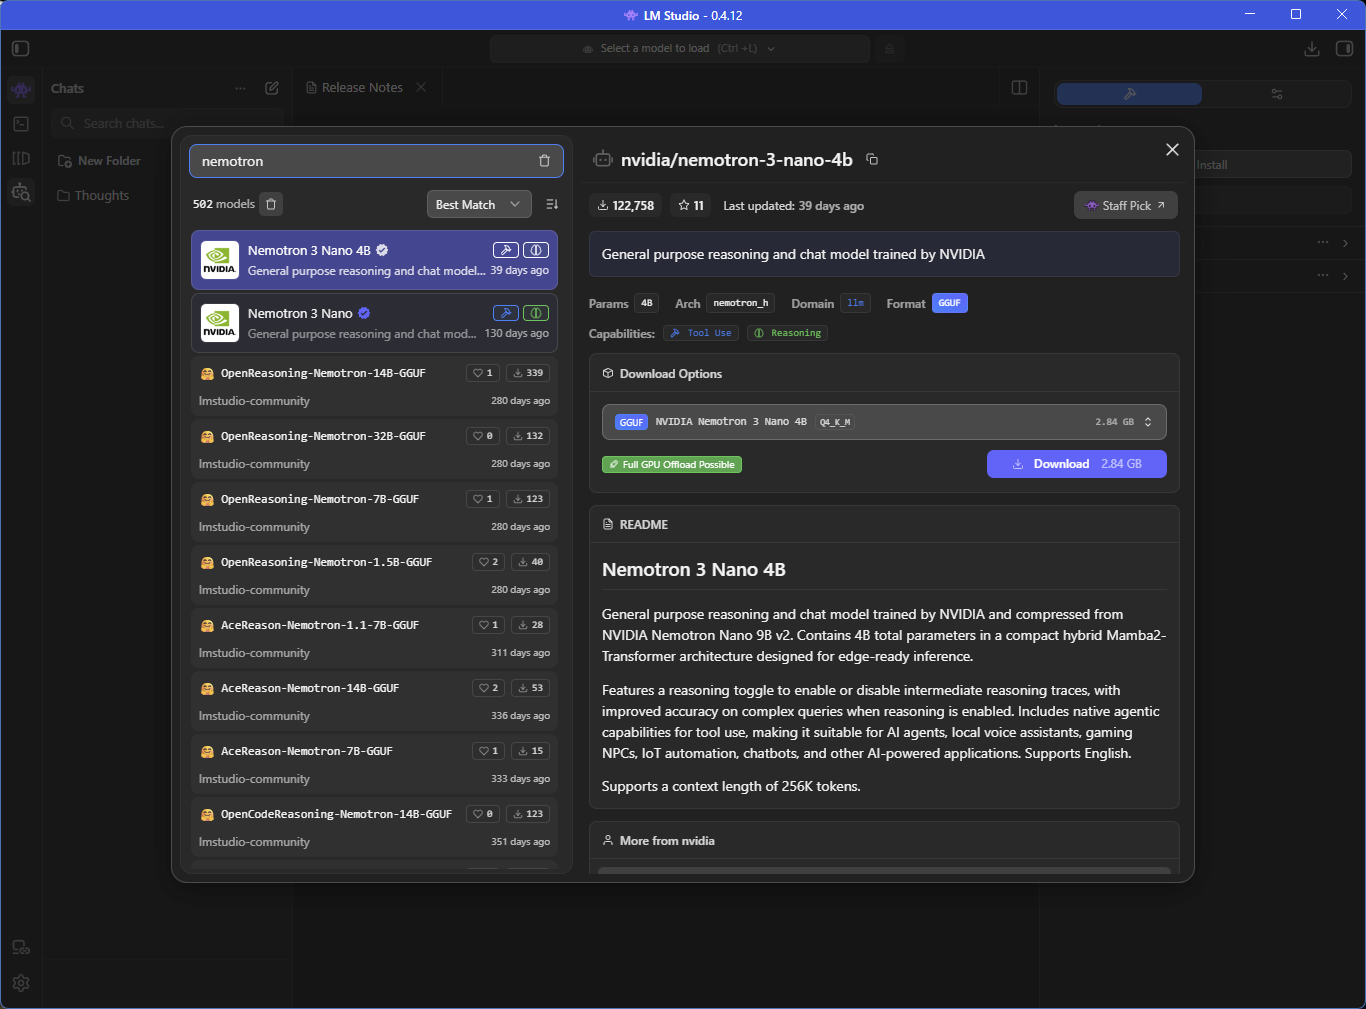
- Run through the install process. In this example, once it is installed, you will want to download the Nemotron model by NVIDIA. This is a lightweight model build for efficient agentic operations. To install it, click the Model Search icon, it looks like a robot face with a magnifying glass. Now search for "nemotron", and download "Nemotron 3 Nano 4B". Close the window.
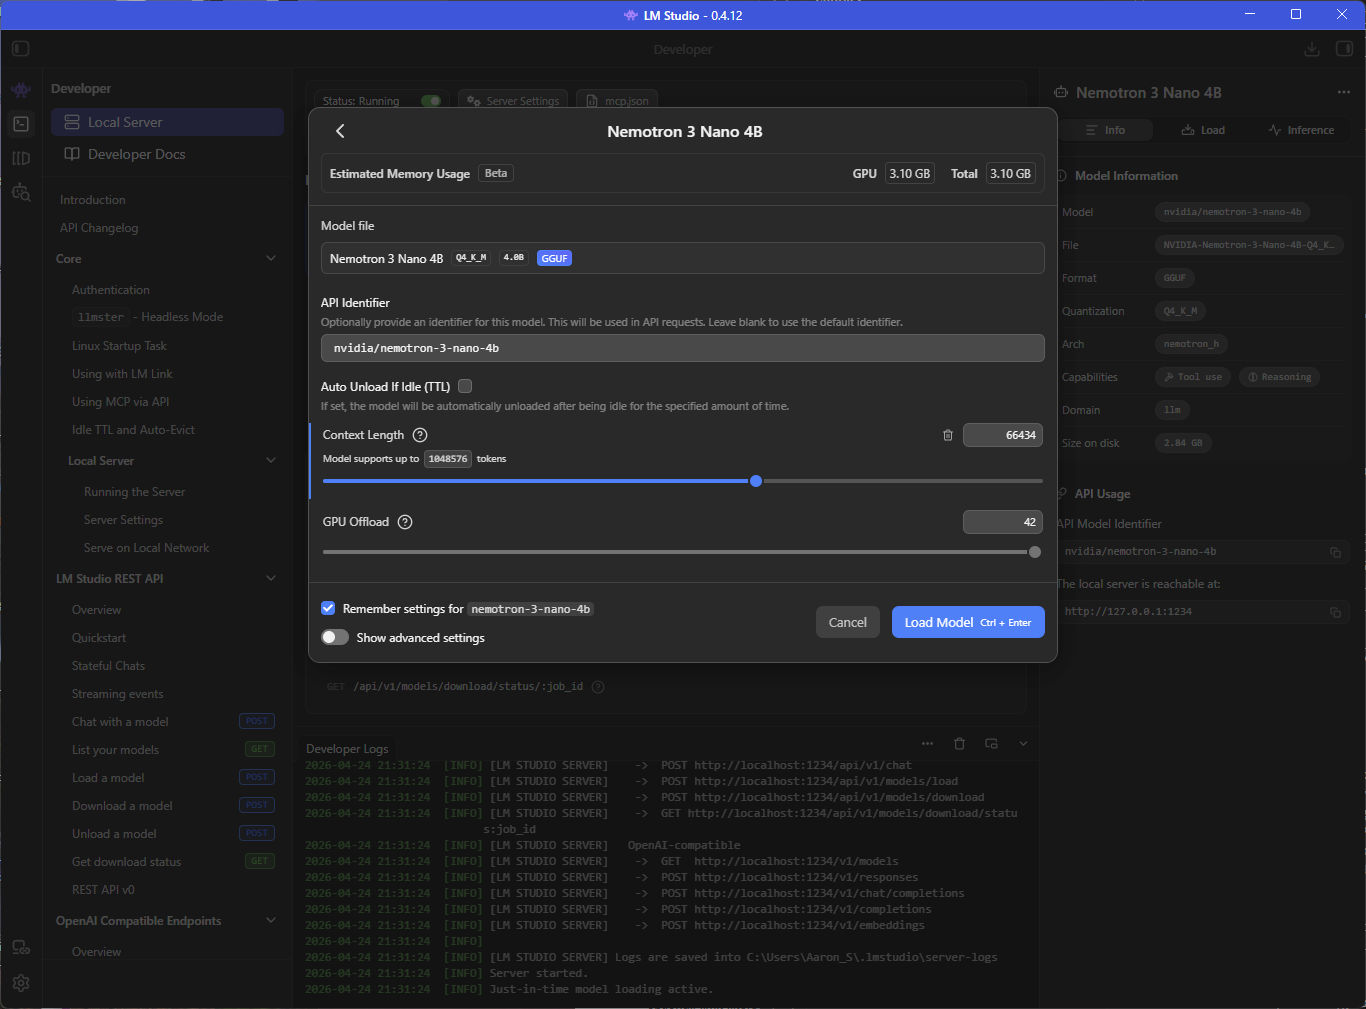
- Next, click the My Models icon on the left, which icon looks like a series of windows. We are going to expand the Context length. Select the Nemotron model and click the load button in the right pane. Change the Context Length from 4096 to at least 66434. This will give it enough context space to do some MCP processing.
2. Install a Sample Umbraco Site
I'm going to install a sample umbraco site like so, but you can skip this if you want to run MCP against another site.
Follow instructions here: https://docs.umbraco.com/umbraco-cms/tutorials/starter-kit/install-the-starter-kit
- Install the latest .NET SDK. https://dotnet.microsoft.com/en-us/download
- Install Umbraco.Templates, if you don't have it already: dotnet new install Umbraco.Templates
- Open a command terminal, navigate to desired root location that will contain the project folder, run:
- dotnet new umbraco --name MyUmbracoSite
- cd MyUmbracoSite
- dotnet add package Umbraco.TheStarterKit
- dotnet build
- dotnet run
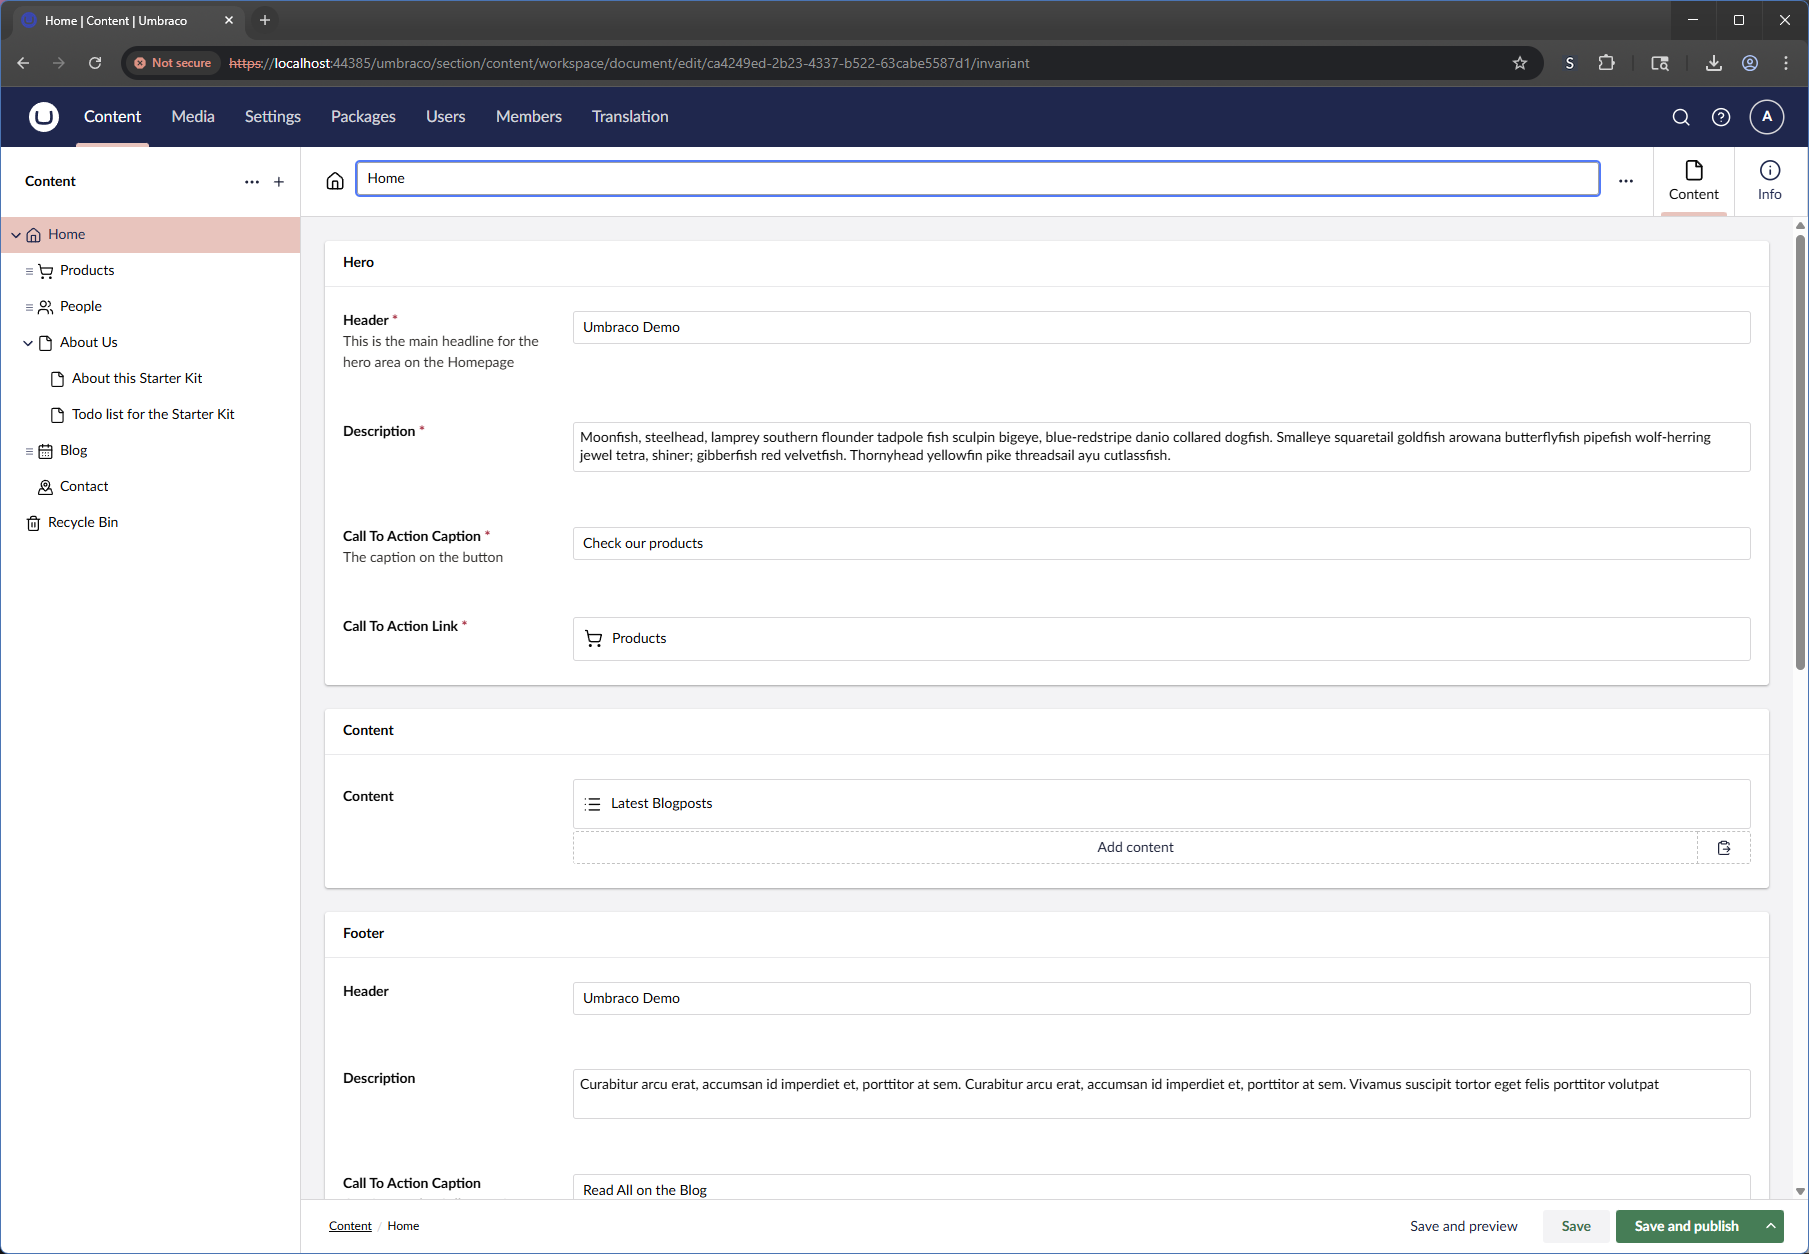
- Go to https://localhost:xxxx/ to view the Starter Kit site, and set up your installation. Set up your user account, set a hostname, publish any unpublished nodes, etc.
- Your starter site is ready: https://localhost:xxxx/
3. Enable MCP For Umbraco Site
We need to configure the Umbraco site to allow MCP.
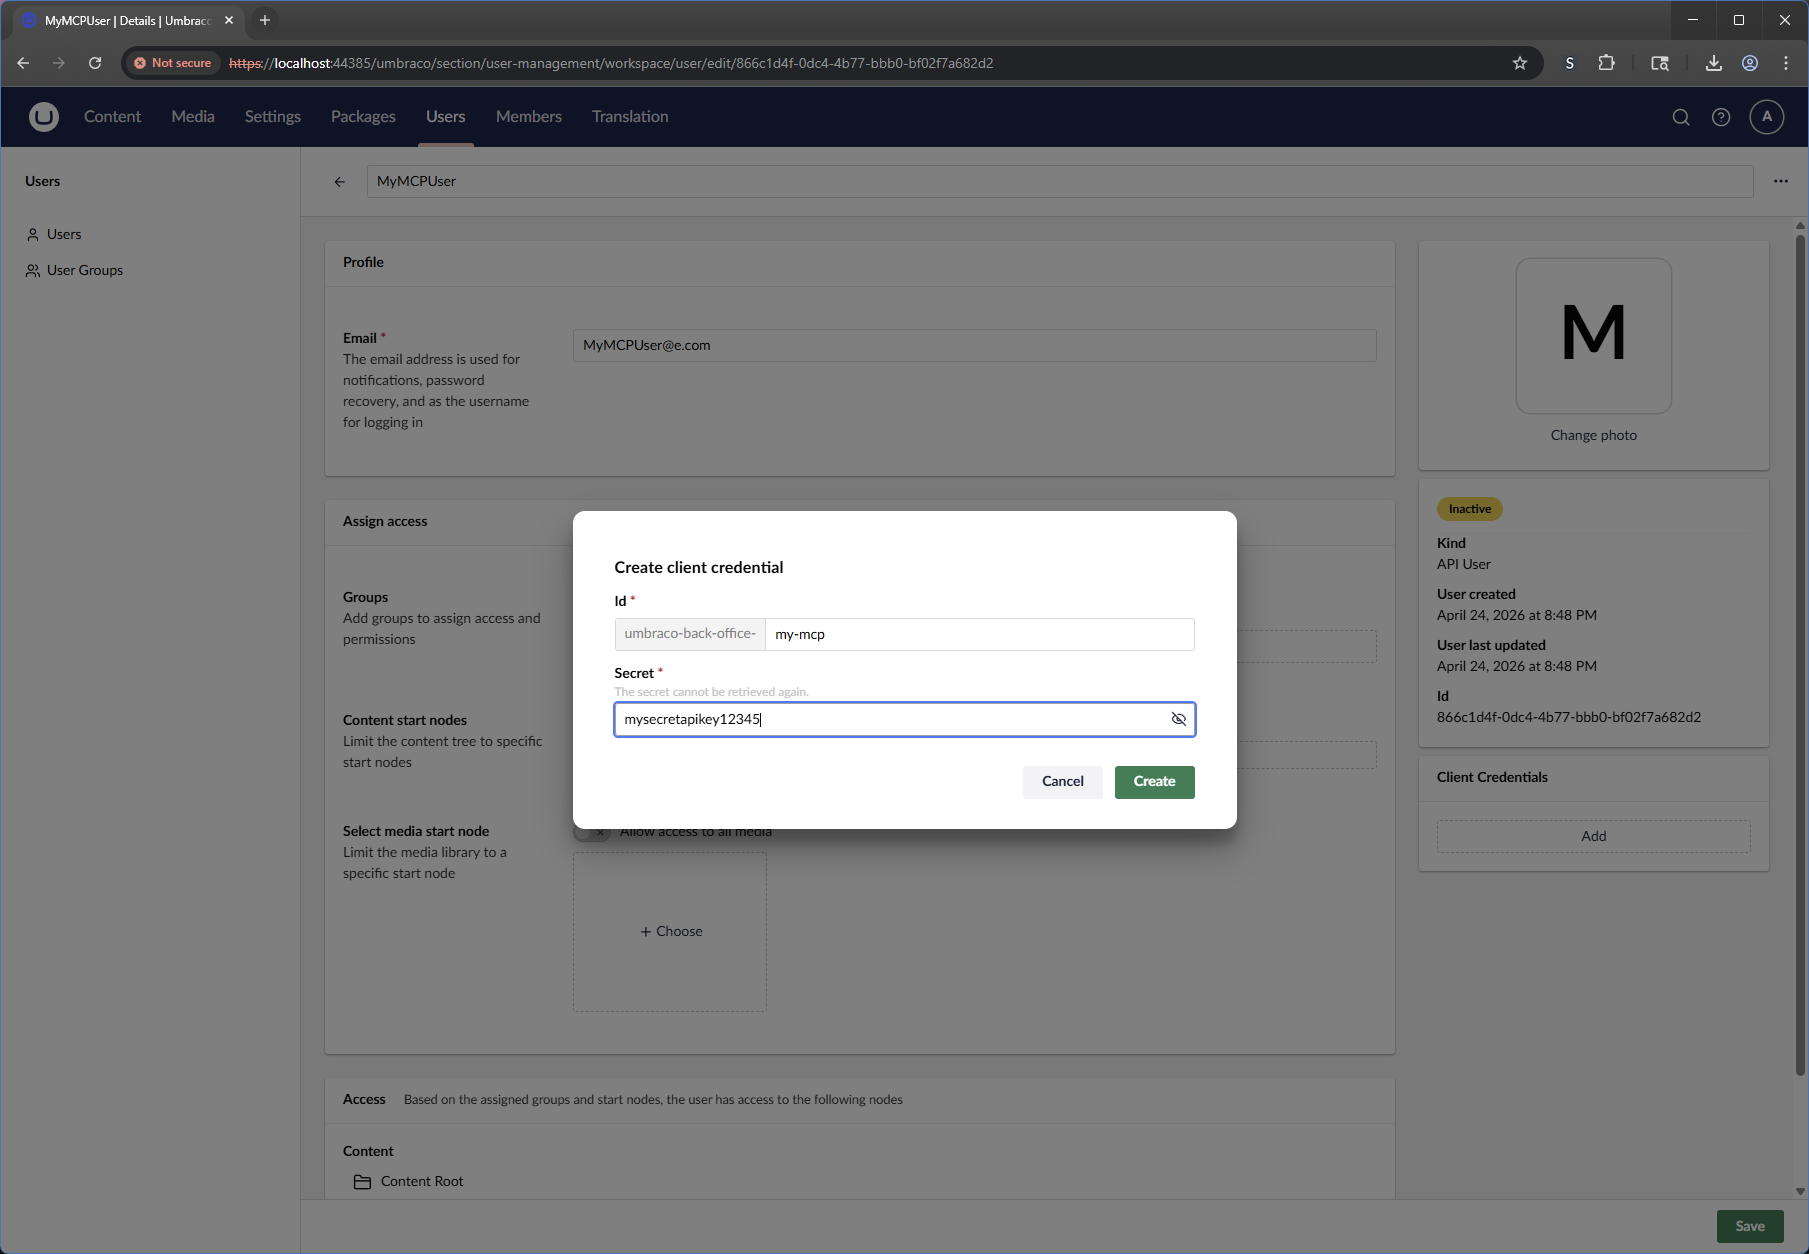
- Add api user account with client secret. To do this, in the backoffice, go to Users > Create > Api User.
- Create the user with whatever rights you want.
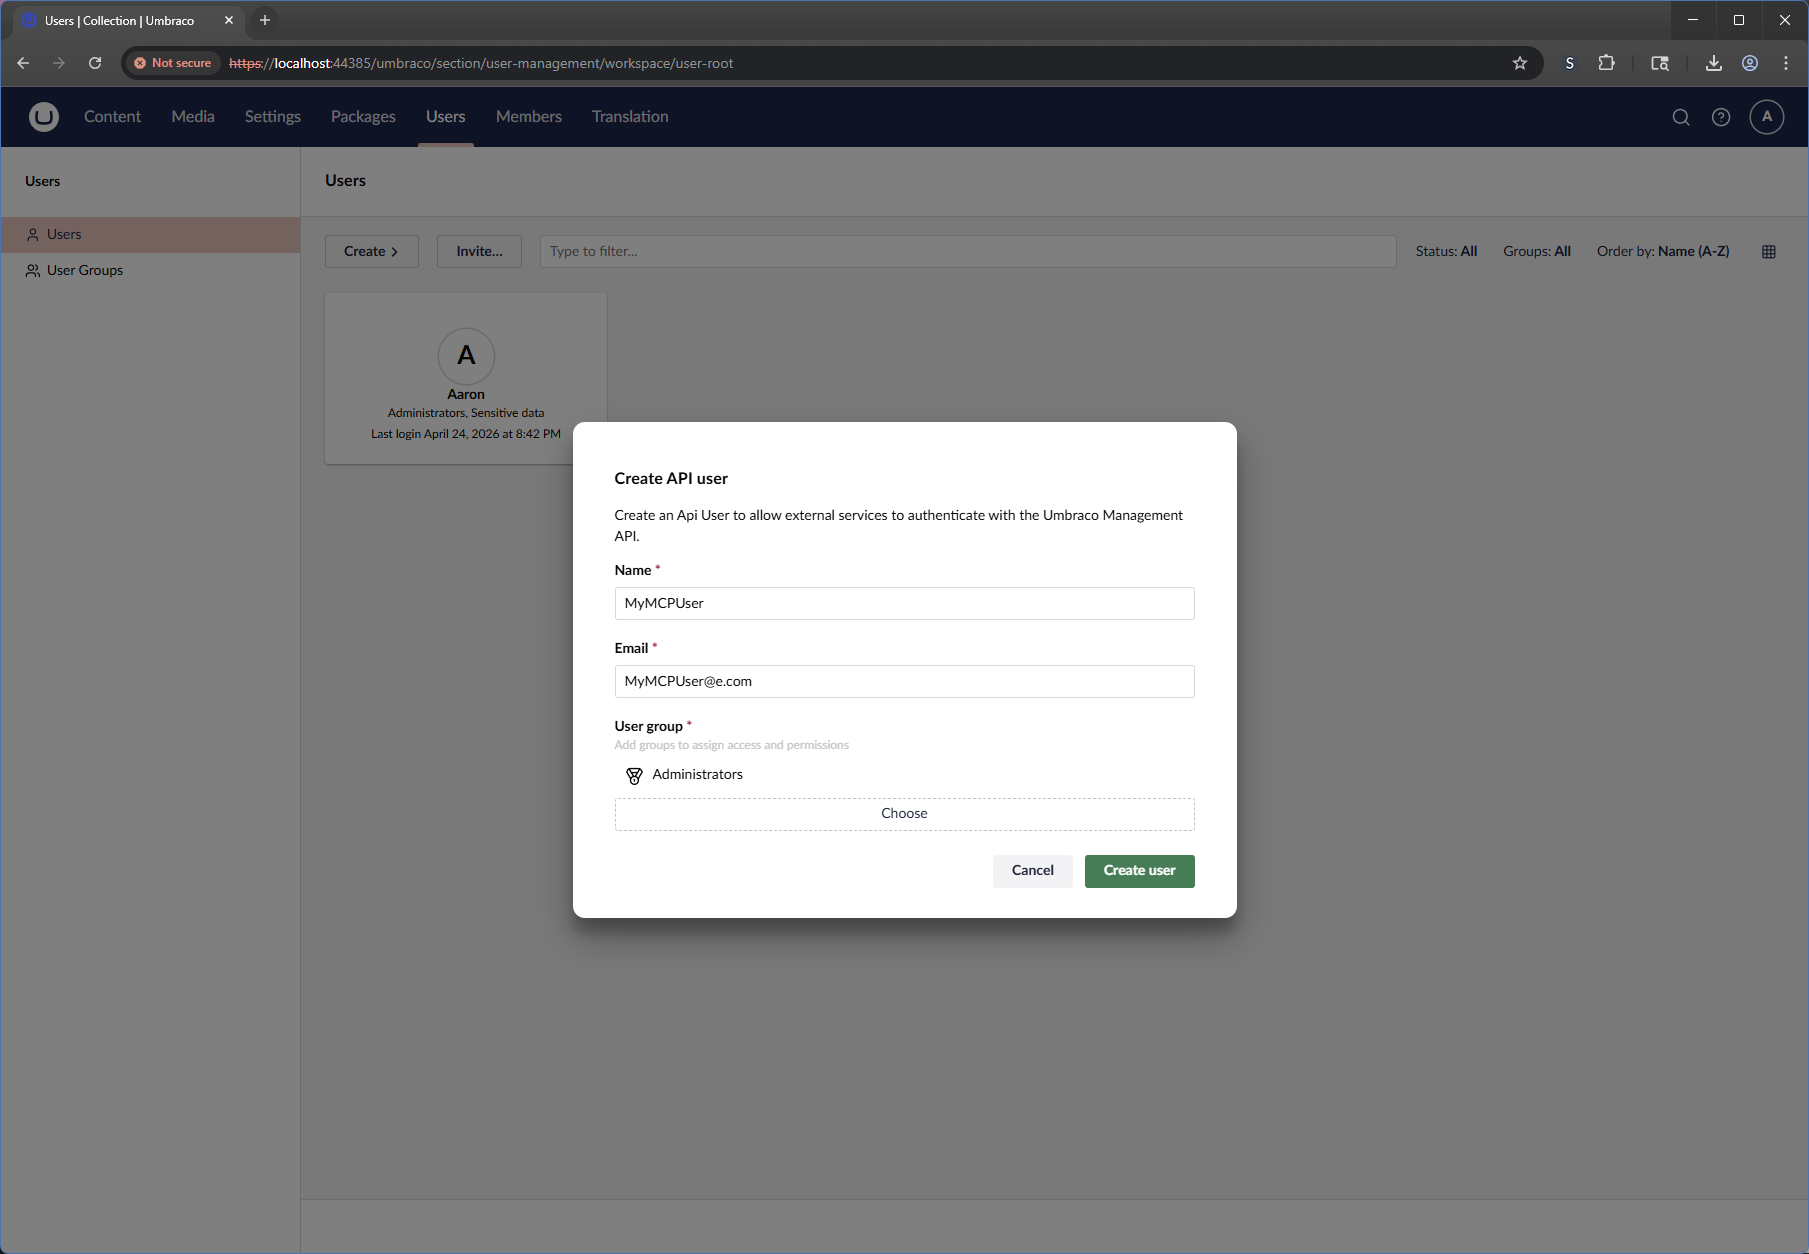
- You need to add client credentials. Click the Add button under the user account page > Client Credentials. Add an id and a secret. Remember these, you'll need them later.
4. Install Umbraco MCP
For the sample site (or your desired local Umbraco site). Make sure you have installed node version 22 or higher. https://nodejs.org/en/download
- Open a command terminal, navigate to your website project folder, run:
- mkdir mcp
- cd mcp
- Create a .env file in this folder, with content like this: (the UMBRACO_CLIENT_ID, UMBRACO_CLIENT_SECRET, and UMBRACO_BASE_URL must match your client credentials and running local website.)
UMBRACO_CLIENT_ID=umbraco-back-office-my-mcp
UMBRACO_CLIENT_SECRET=mysecretapikey12345
UMBRACO_BASE_URL=https://localhost:44385
NODE_TLS_REJECT_UNAUTHORIZED=0
UMBRACO_INCLUDE_TOOL_COLLECTIONS=data-type,document-type,document,media-type,media
- npx @umbraco-cms/mcp-dev@latest
MCP is now running!
5. Use Umbraco MCP
- Open LM Studio.
- Click the Developer icon on the left sidebar.
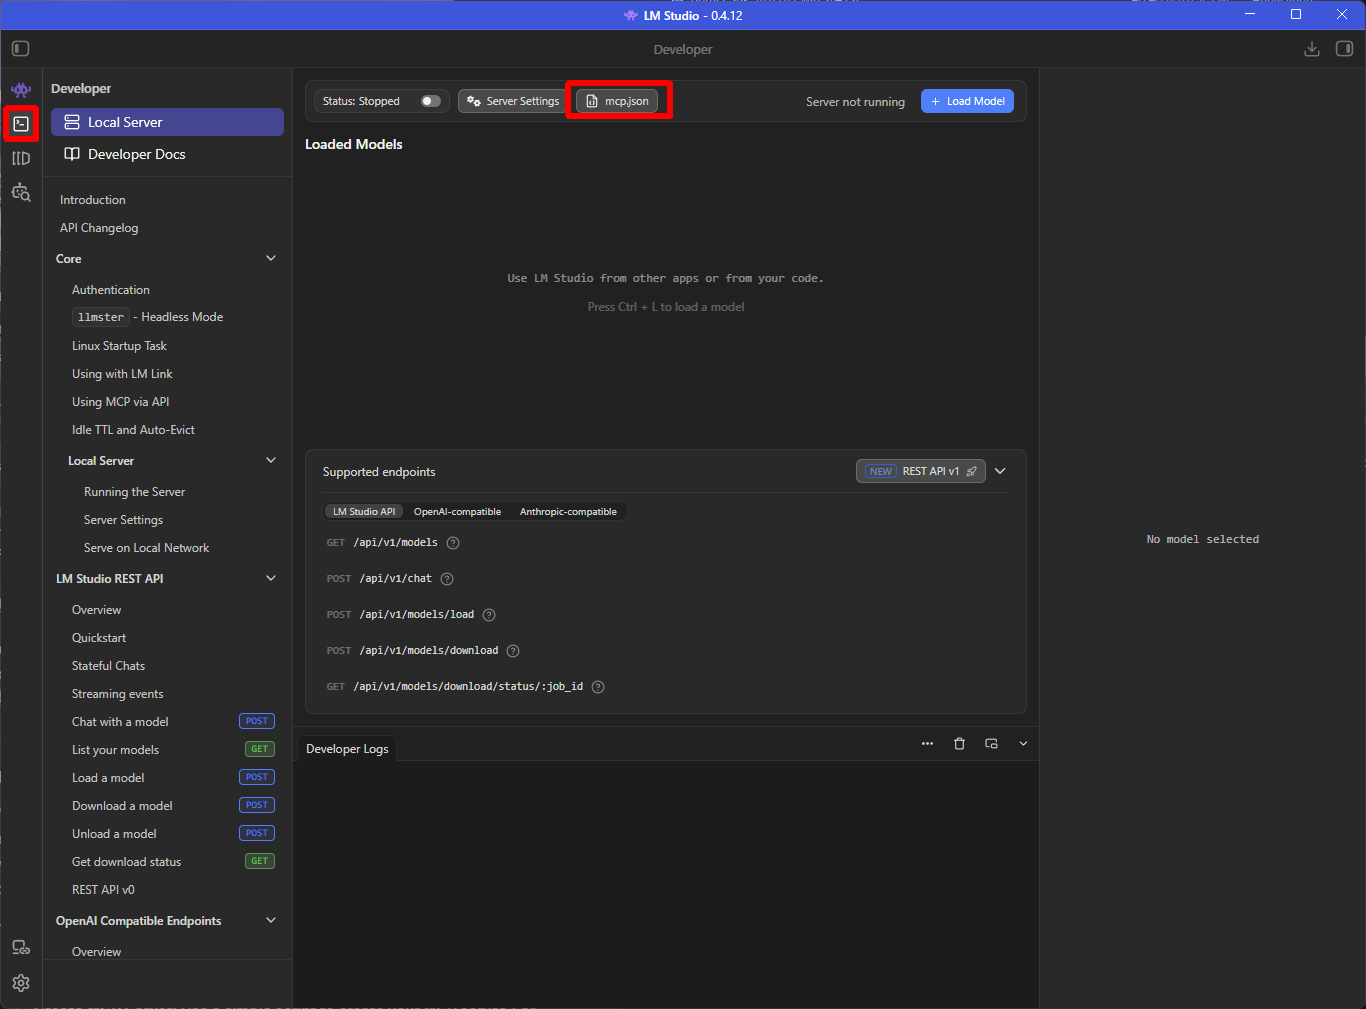
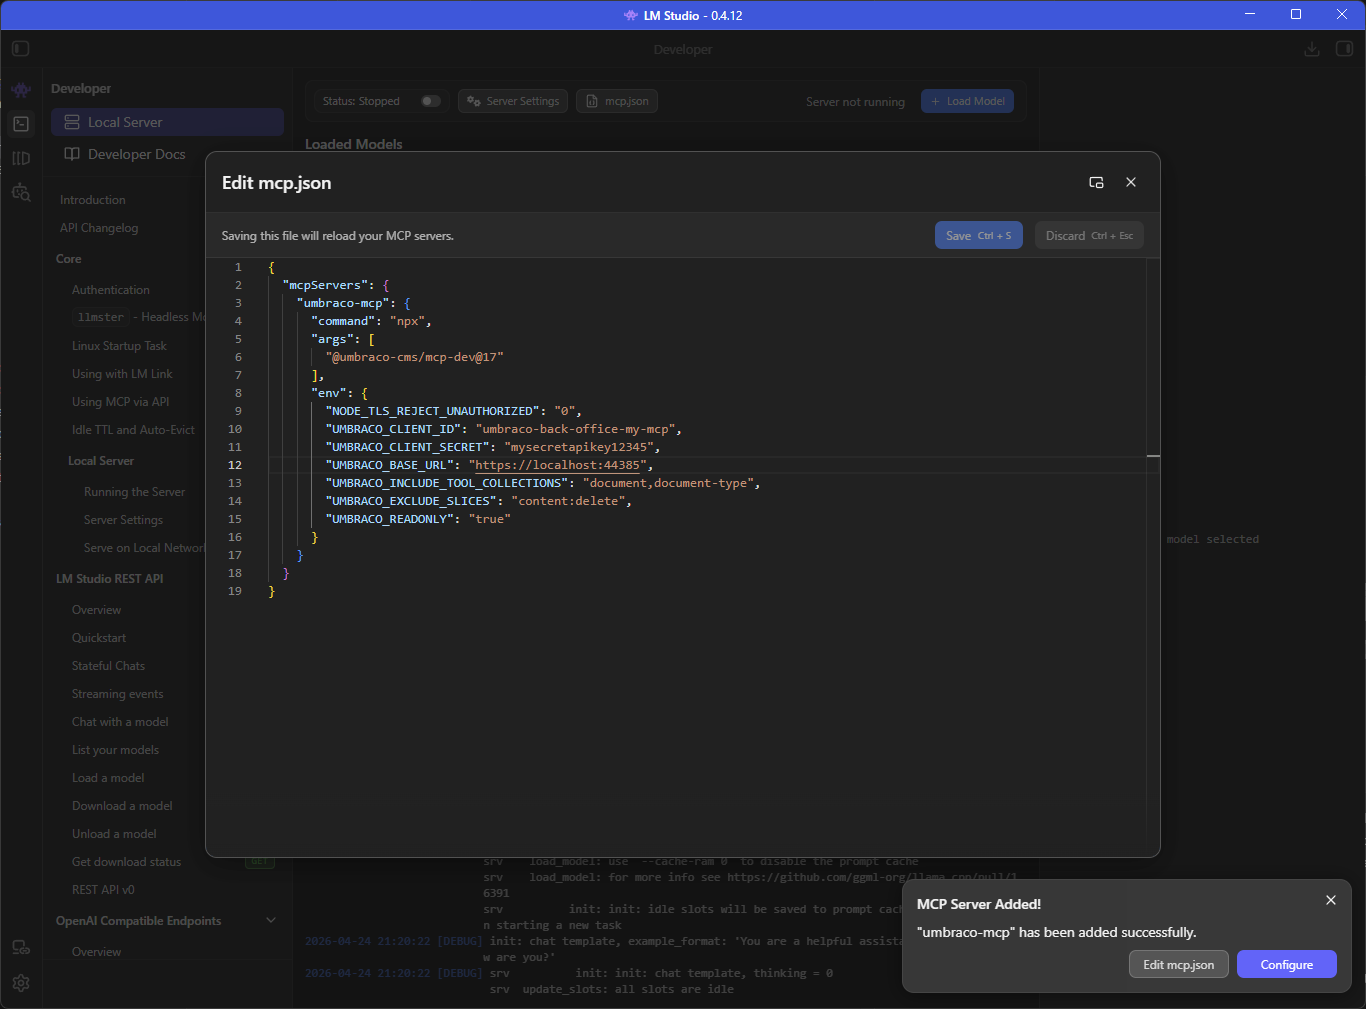
- Click the mcp.json button. Paste in your MCP rules, like so:
{
  "mcpServers": {
    "umbraco-mcp": {
      "command": "npx",
      "args": [
        "@umbraco-cms/mcp-dev@17"
      ],
      "env": {
        "NODE_TLS_REJECT_UNAUTHORIZED": "0",
        "UMBRACO_CLIENT_ID": "umbraco-back-office-my-mcp",
        "UMBRACO_CLIENT_SECRET": "mysecretapikey12345",
        "UMBRACO_BASE_URL": "https://localhost:44385",
        "UMBRACO_INCLUDE_TOOL_COLLECTIONS": "document,document-type",
        "UMBRACO_EXCLUDE_SLICES": "content:delete",
        "UMBRACO_READONLY": "true"
      }
    }
  }
}
These settings should take precedent over the default ones in .env, I believe. Note how restricted we are, we are only loading a few tool collections. Scaling back on these options will speed up / lower the overhead of MCP. The fewer tools the more performant. If you just want to query nodes and document types, this is fine. You can change UMBRACO_INCLUDE_TOOL_COLLECTIONS as necessary to enable writing data later.
- Click Save. It should save. Close the mcp.json dialog window.
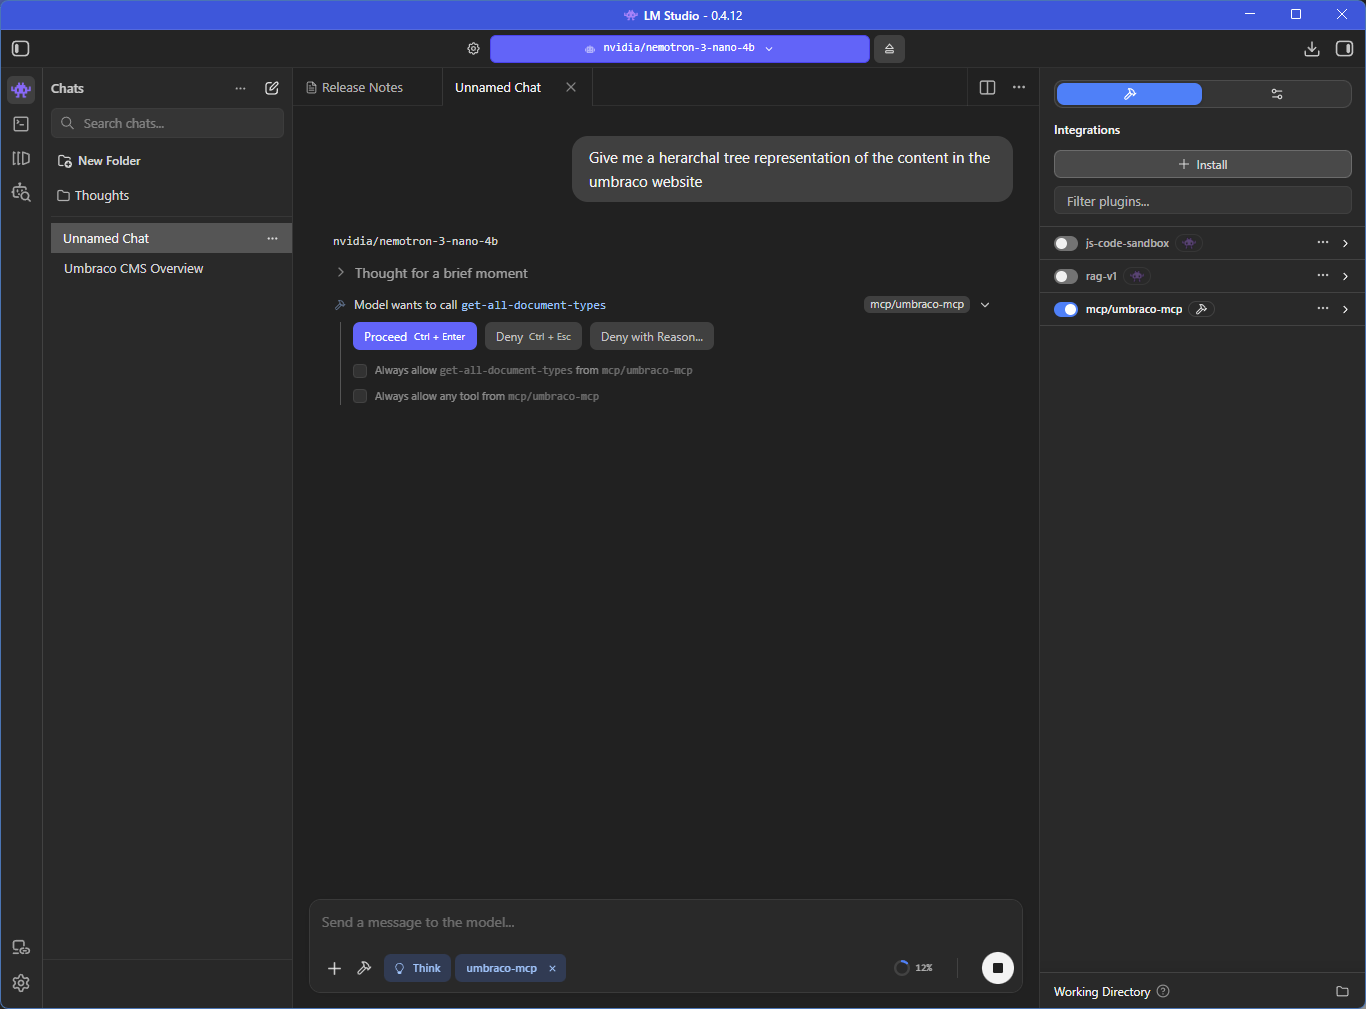
- Open a chat window by clicking the chat icon on the left sidebar. Load the nemotron model.
- Enable the mcp/umbraco-mcp plugin for your chat window. [img:mcp-enabled]
- Configuration is done! Ask it anything you want. For example:
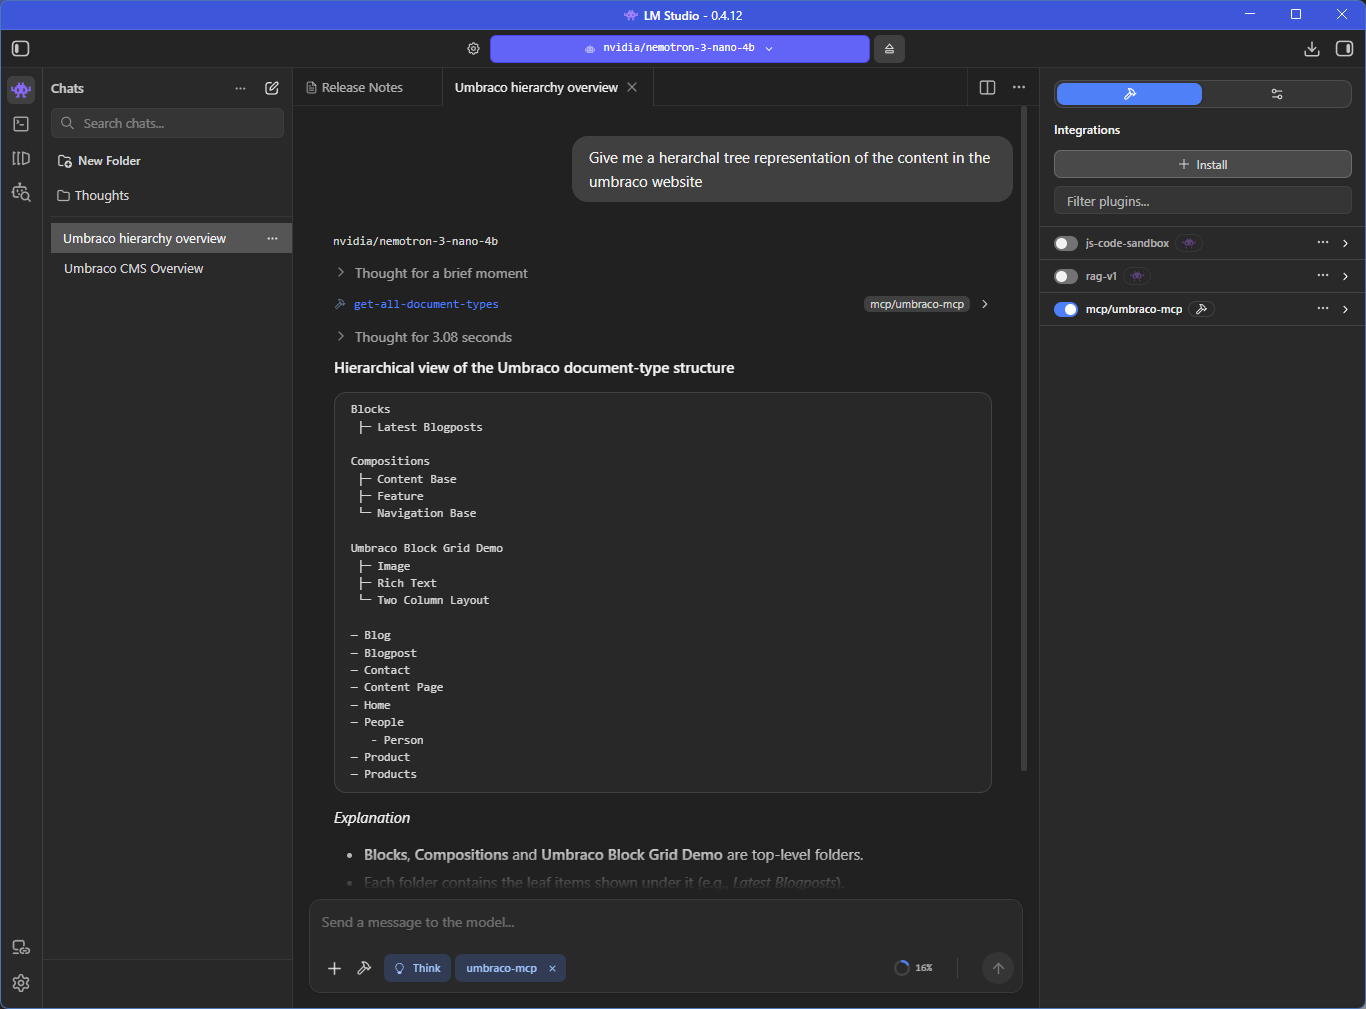
Give me a hierarchical tree representation of the content in the Umbraco website.
- It will ask for permission to proceed. Grant access.
- Ask it something else, like:
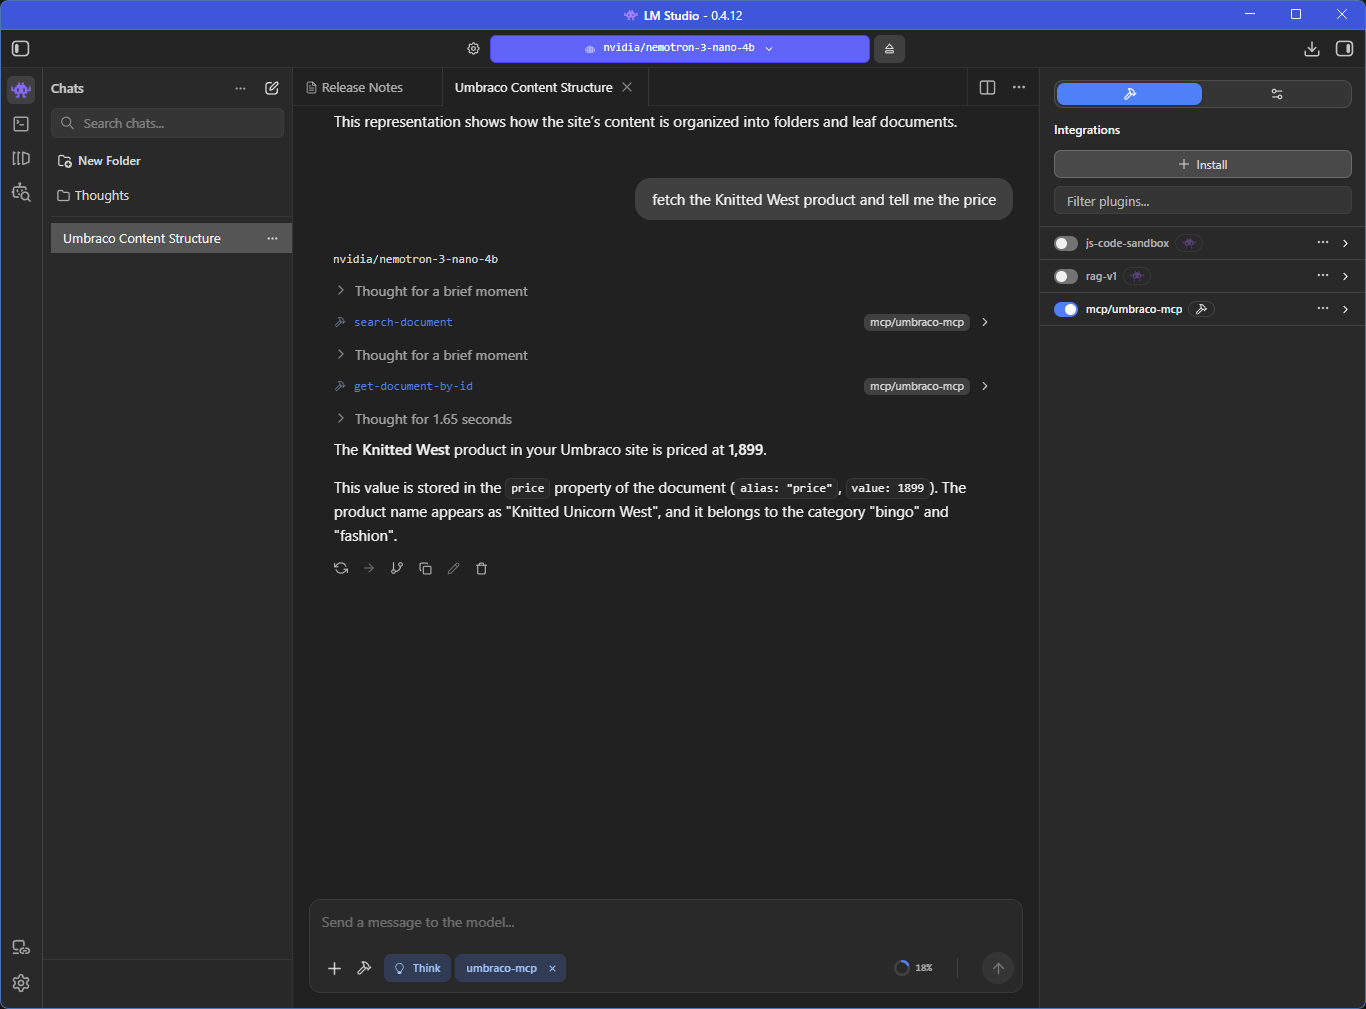
fetch the Knitted West product and tell me the price
You may get something like this.
At this point, if we wanted, we could update the mcp.json in LM Studio to permit write access, or expand the tools we wish to use.
Also note that Nemotron, while impressive, is fairly primitive, and can get easily confused with unspecific instructions. You will get better results if you give specific instructions, reference node ids, etc. Remember it is designed to be an agentic worker - it expects very clear instructions. You can also use smarter models, such as Gemma or Qwen. You are only limited by the models and your hardware. Happy MCPing!