
In the final part of my three-part series I will walk through the process of taking the artifact created in part two and get it onto the Azure Web App we setup in part one.
I won't be covering how to deploy the database. I will assume that the database has been deployed via Microsoft SQL Server Tools (SSMS). I recommend making a bacpac file from your local and importing this into the Azure SQL server we created in part one.
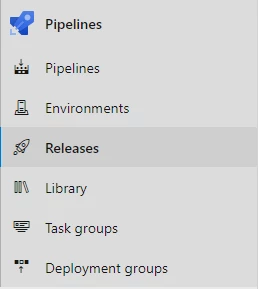
Creating the Release Pipeline
First browse to the Releases menu item under the Pipelines menu.
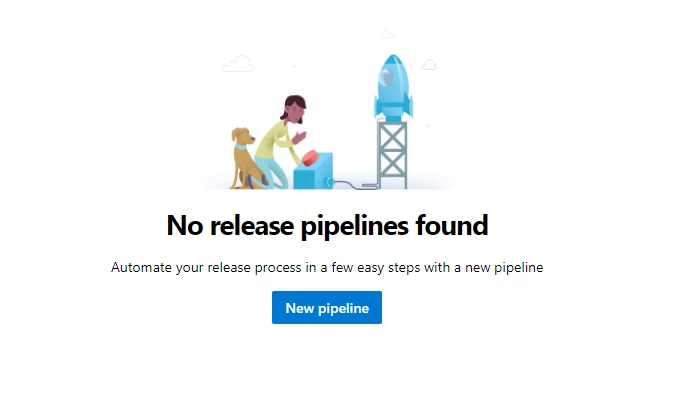
Once there you will be presented with a message saying No release pipelines found. Beneath that will be a button called New pipeline. Click this to begin the process.
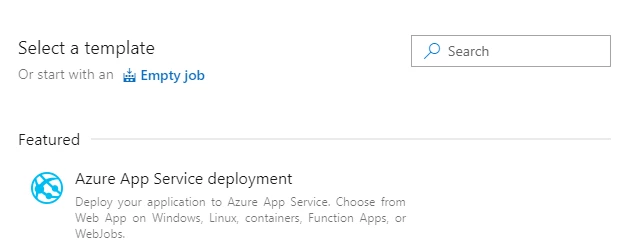
On the next screen select the option called Azure App Service deployment.
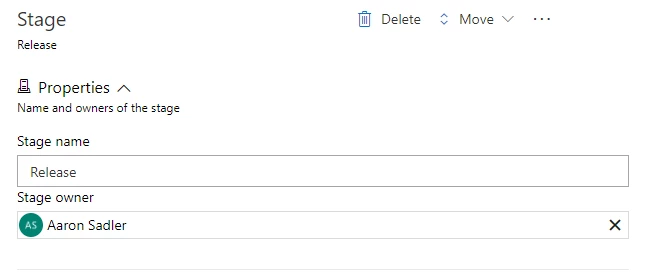
In the Stage name text box input your build environment type. This is directly linked to naming of your web.config transforms.
For example, a stage name of Release would mean that during the deployment process it would use the Web.Release.config transformation file.
For the purposes of this walkthrough I have entered Release.
Now press the X in the right to close this blade.
Link the artifact
Next the artifact needs linking to the pipeline. To do this click on the Add an artifact button, then on the blade which opens up, and then select the building pipeline from within the Source (build pipeline) dropdown.
Typically the default values in the rest of the fields should be fine.

Finally click the Add button to close the blade.
Configuring the task
The task now needs to be configured. First click on the 1 job, 1 task link within the Stages -> Release box.
On the next screen you will see some inputs highlighted in red. These are the required options to link everything together.
Connecting Azure
First you will need to link the task to your Azure subscription. There any many ways to link your subscription to Azure.
To do this, click the "Next" button to the right of the Azure Subscription field, leave it as Service principle (automatic), and then click Next.
On the window which pops up log into Azure. The window should then close when complete.
Back in the blade give your connection a name and then click Save to close the blade.
If the automatic method doesn't work, then use the Service principal (manual) option. This will require you to create the service principal manually in the Azure Active Directory.
You can find the instructions on how to create a service principal here.
In the blade which opens the fields get mapped to Azure as below:
Subscription Id = Azure Subscription Id
Subscription Name = Azure Subscription Name
These can be found within the Subscriptions blade in your Azure account.
The Service principal key is the client secret you created earlier with your service principal app.
The Tenant Id can be found on the Azure Active Directory homepage here.
Finally name your connection, then click Verify. You should get a green tick, at which point you then click Verify and save to close the blade.
Next you should find the Web App created in part one in the drop down under App service name.
Now you need to point the deployment agent to the artifact we created in part two. Press the 3 dots to open the browse blade and select the *.Web.zip file. Then press Ok to close the blade.
You should have something similar to this in the input:
$(System.DefaultWorkingDirectory)/_Skrift Part 2 Build Pipeline/Build-20201227.3/SkriftArticle.Web.zip
This needs modifying to work with each run. The folder name needs to be swapped out at release time by the agent. To do this change the build folder name to a predefined Azure DevOps variable $(Build.BuildNumber) so it looks similar to below:
$(System.DefaultWorkingDirectory)/_Skrift Part 2 Build Pipeline/$(Build.BuildNumber)/SkriftArticle.Web.zip
If you have any transforms which are required you can enable these by clicking on the File Transforms & Variable Substitution Options accordion title.
The XML transformation will enable the Web.ENVIRONMENT.config transformations.
The XML variable substitution will allow the appsettings or connection string to be swapped out with the variabled defined on the Variables tab.
Now you will want to name each release as something useful, this naming may differ depending on your company rules.
Click on the Options tab and then in the release name format box paste the following:
Rel-$(date:ddMMyyyy)$(rev:.r)
This will generate something similar to below:
Rel-21012021.1
Finally name your pipeline. In the top left find New release pipeline and change this to your pipeline name, then click Save in the top right.

Run the pipeline
So now all the configuration is done you will need to run the pipeline to push the files to the Web App. To do this click the Create Release button in the top right.

In the blade which opens use the default values then click Create at the bottom.
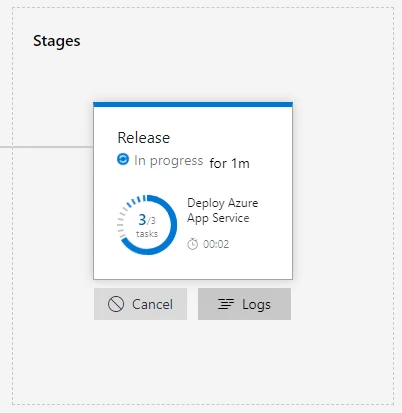
On the green bar that shows click the release name to open the information relating to the release.
If you hover over the Release block the Logs button appears. Here you can view the deployment as it happens.
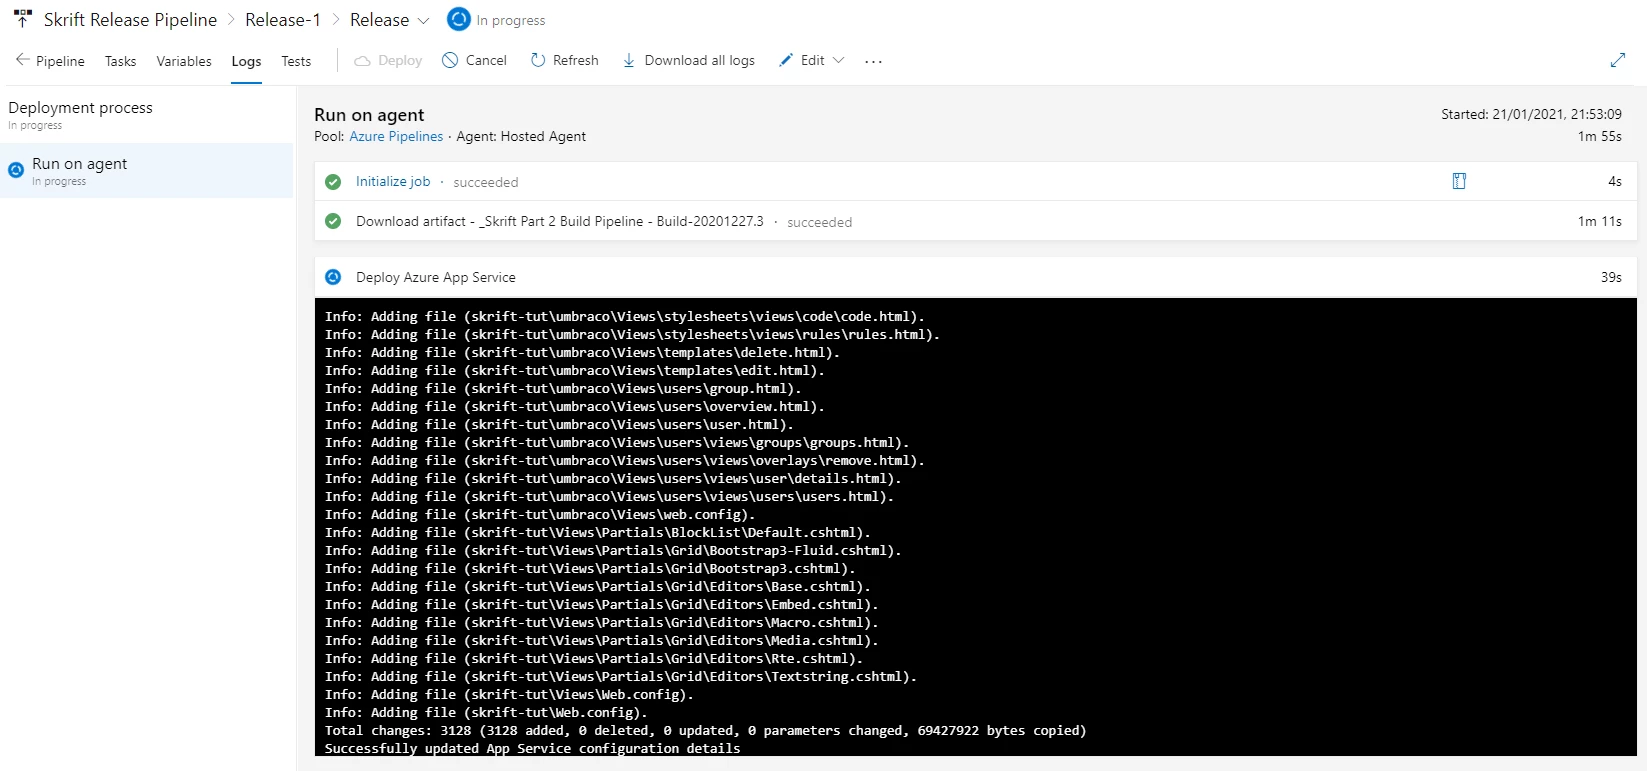
Once complete we are finished in Azure DevOps. Now we need to go back to the Azure Portal.
Deploying the Media folder
If you went with the Blob Storage option for your Media folder you will need to deploy this to your Blob account. You do this using a piece of software called Azure Storage Explorer.
You can find the Azure Storage Explorer download on the Microsoft website here.
You can then follow the instructions below to find your blob container:
and
Back in Azure
Go back to the Azure Portal and find the Web App created in part one.
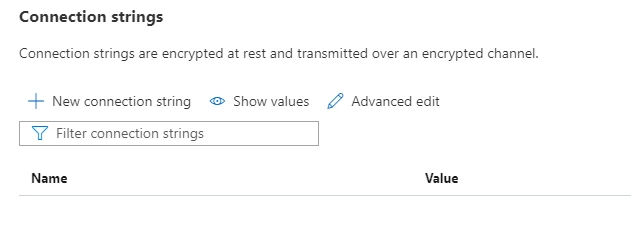
The final step which I typically do here is enter the live database connection string into the portal. This way it's kept away from source control or any pipelines.
To do this click on Configuration then click New connection string.
And then configure the blade as below, changing CONNECTION STRING to your actual connection string.
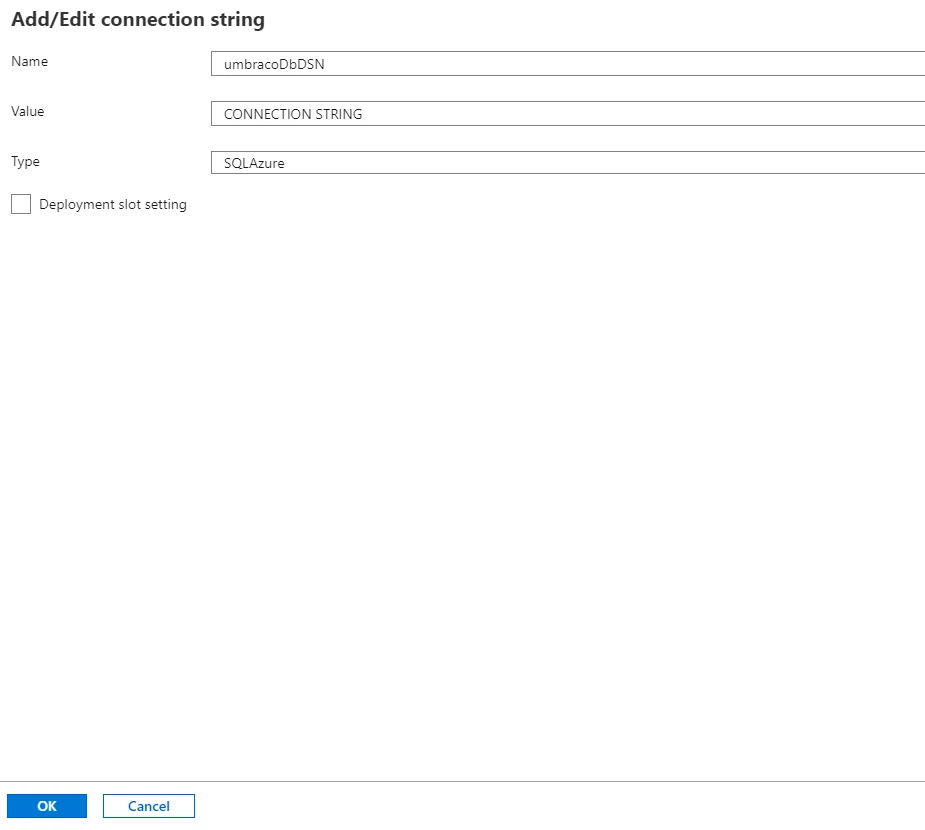
Click Ok and then Save.
Now you should be able to access your website. You will find the url on the Overview dashboard in the format of https://APP_NAME.azurewebsites.net
Some of the other settings worth configuring are found on the General settings tab under configuration. One is the FTP State. I typically disable this for security, as we are deploying using Azure Devops and the Media folder is on Blob storage, which is separate from the Web App. It's also worth changing the HTTP version to 2.0 rather than 1.1.
Once you are happy with your website, you can configure the web app to use your domain on the Custom domains dashboard.
It is also possible to configure your Web App to use Let's Encrypt SSL Certificates. Scott Hanselman has a great blog post on how to do this:
Wrap up
In my three-parts I have only touched on what these services can do.
It is possible to do so much more with them, the Microsoft documentation for these services are brilliant.
If you have enjoyed these please let me know, also if you would like me to go into more details on any particular part let me know on Twitter.
Also be sure to visit my blog for more posts about Umbraco, Tips, Infrastructure and other stuff I've found useful.